In the previous sections, we talked about the basic properties of light. In this post, we’ll discuss light modifiers – that is, devices that are used to shape and control light. Light modifiers are extremely useful, to the point of being nearly a necessity, particularly when shooting indoors but also even when shooting in sunlight. We’ll talk about some of the different types of modifiers and what they can be used for. In the next post, we’ll look at some practical ways that they can be used.
Softboxes
A softbox is a modifier that softens light. Specific details and construction vary, but all of them are basically designed the same way: they are enclosed containers with a white diffusive surface that comprises the front face. Light is focused forward through that front face, enlarging the light source and thus softening the light. There are two common configurations; with many smaller softboxes, the softbox is placed in front of the light, which fires forward through the diffusive surface, whereas with many larger softboxes, the light is placed inside the softbox, pointing to the rear, so that the light reflects back forward through the front surface.
There are a ton of softboxes available for purchase, and selecting the right one can be a confusing process. Fortunately, with anime figures, you don’t have to bother; you can build your own with materials that you probably already have. Indeed, being that there aren’t really any manufacturers that cater to the tabletop-shooting-with-desk-lamps market, building your own softbox to your own requirements may get you better results than anything you can buy.
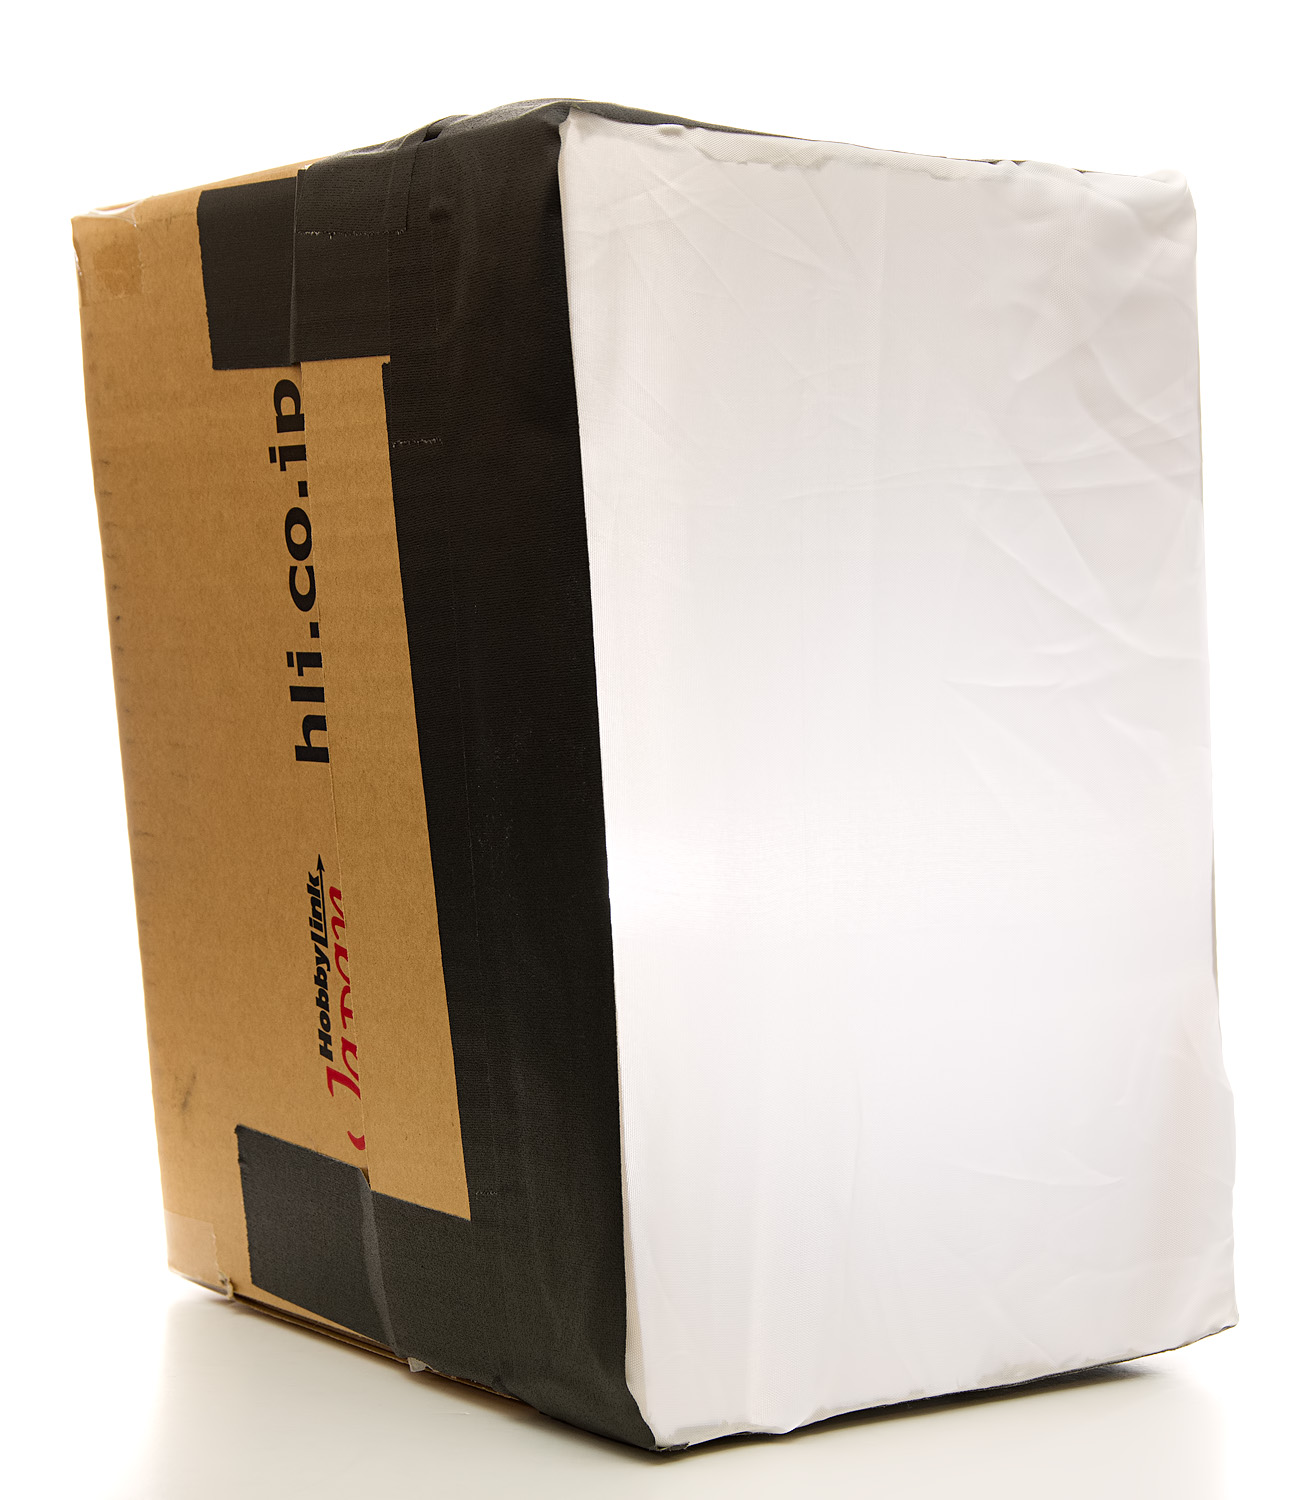
To construct your own softbox, you will, of course, need a box. That likely won’t be a problem, being that most anime figure collectors will have a ton of shipping boxes. You will also need some sort of diffusive material; the typical material is some kind of white fabric. The softbox pictured above uses white fabric cut out from a fabric shower curtain. I folded the flaps on the open end back into the box to give it some rigidity; otherwise, the box tends to collapse very easily. To use this softbox, you would simply put your light in the open end and shine it forward. Note that one thing I did not do was to glue or tape some white paper in the interior of the box; being that most boxes are brown, they will impart a very slight warm cast to the light. This isn’t necessarily a bad thing, since warm light is generally more pleasant to look at than bluish or greenish light, but it is something to be aware of. We’ll revisit this idea of color casts a couple more times.
The optimal size of your softbox will, of course, depend on what you’re photographing. For figures, I typically use a softbox that measures 8 inches by 9 inches (19 by 21 centimeters) and I find that it delivers very soft light on anything up to about 1/5 scale. I think that a box that is a few inches taller than what the largest figure you’d typically shoot would work okay, but you will of course need to take into account your own space requirements and desired photographic style.
I use flashguns for the most part now, but back when I used desk lamps, this is the softbox that I used:
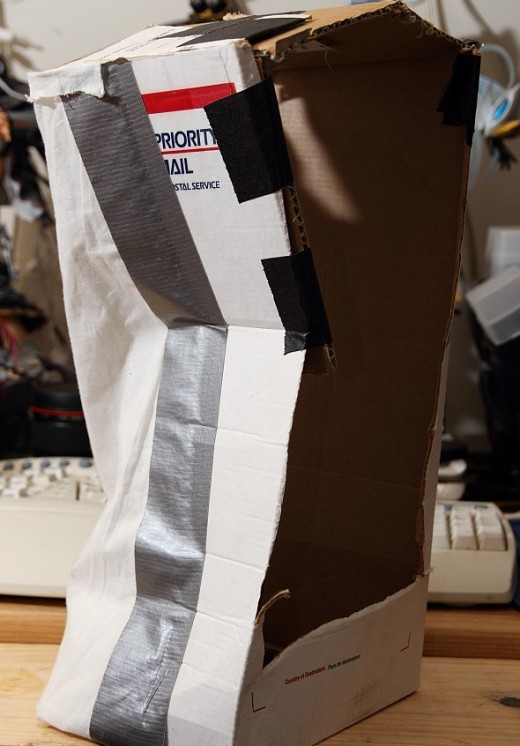
This sad-looking contraption comprised the key light for most of my photographs up to around February 2011 – over a hundred reviews. It worked well for me, and it was one of the most essential elements of my photographic toolkit. Hopefully the softbox you use will be a little more robust and cleanly constructed.
Scrims
A scrim is basically a softbox without the box; it’s just a diffusion surface, sometimes mounted to a frame. They are sometimes used when lighting large areas where it would be impossible to find an adequately-sized softbox; for example, when lighting a large group of people outdoors, or when lighting a large object such as an automobile. They are sometimes improvised; for example, it’s common for photographers to use a white curtain or bedsheet in a window to soften incoming sunlight.
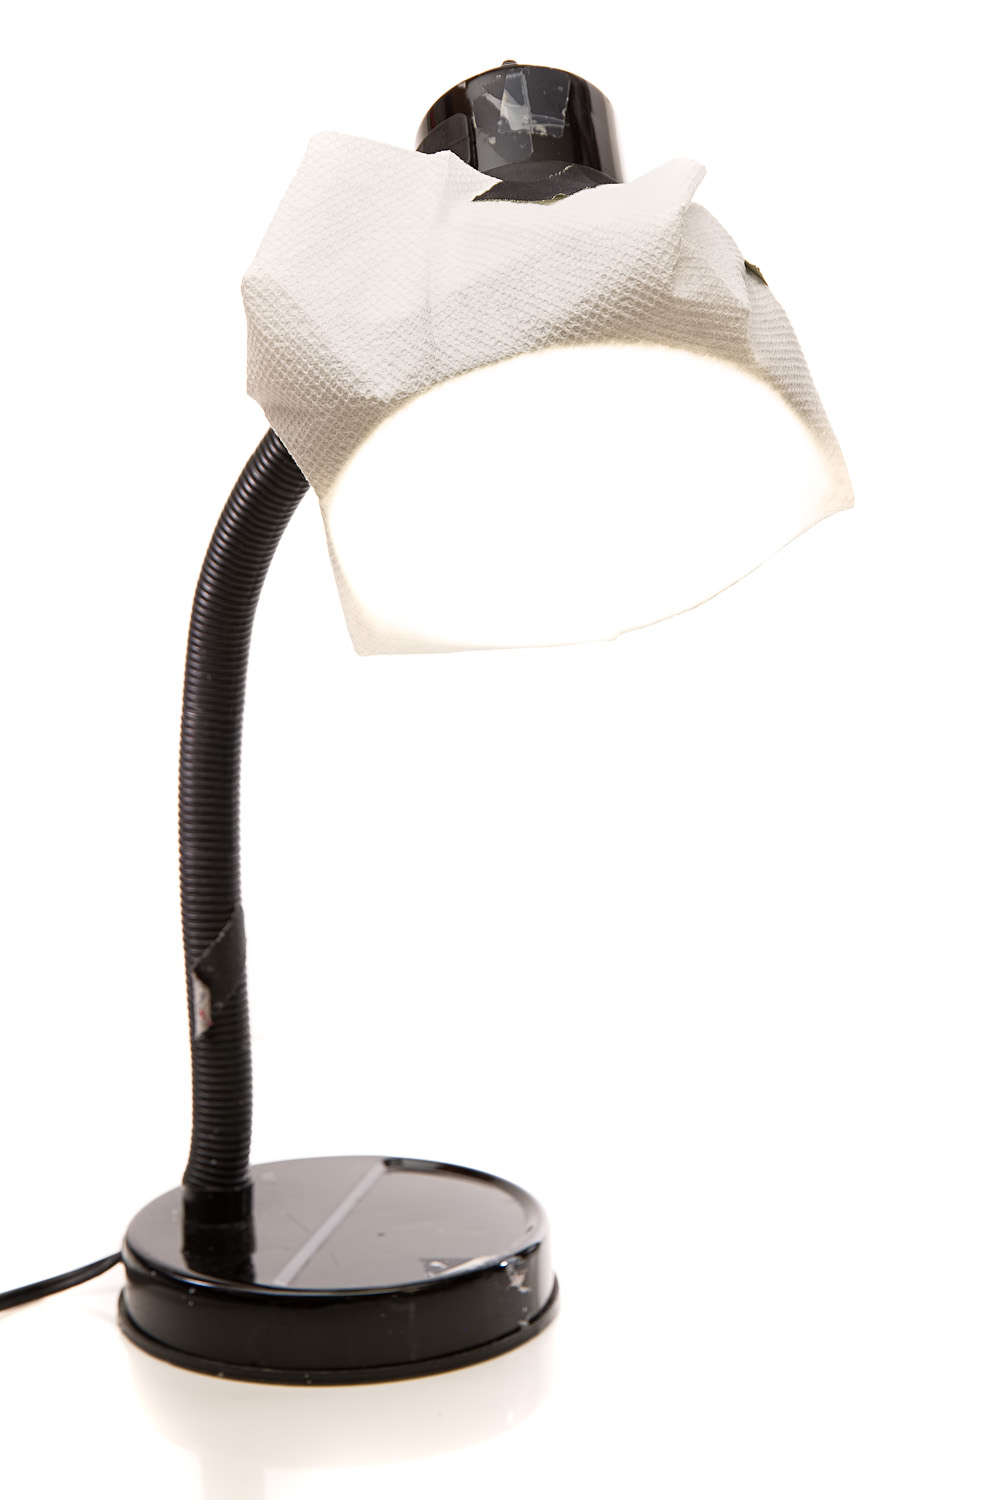
In anime figure photography, I often taped a white paper towel to my desk lamps, to soften the light a bit. It would spread out a bit, and then it would soften even more when used with a softbox. Do note that if you are double-diffusing your lamp in this manner, you need some space between the two diffusive surfaces; you can’t just stack them up one after another. All you’re doing when you do that is cutting down your light output.
Also note that apparently, the term “scrim” seems to mean something along the lines of a neutral density filter in theatre lighting. My advice is to not worry too much about the specificity of photographic terminology and instead think more about the context and meaning. In photography, it’s tempting to be pedantic but frankly, I don’t think it’s very helpful.
Other Light-Softening Devices
There are a whole host of other tools used to soften light: reflectors, umbrellas, beauty dishes, and so on. We’ve talked extensively about using reflectors as fill cards, so I won’t get into that here. I have no experience using umbrellas, but my experience suggests that for anime figures, they’re overkill. I do have some experience with beauty dishes; Adorama sells a very small beauty dish under their Flashpoint brand name, and I bought it to try it out. Unfortunately, I found that it didn’t work very well; it imparted a very warm color cast to the light, which made it useless to me.
Snoots
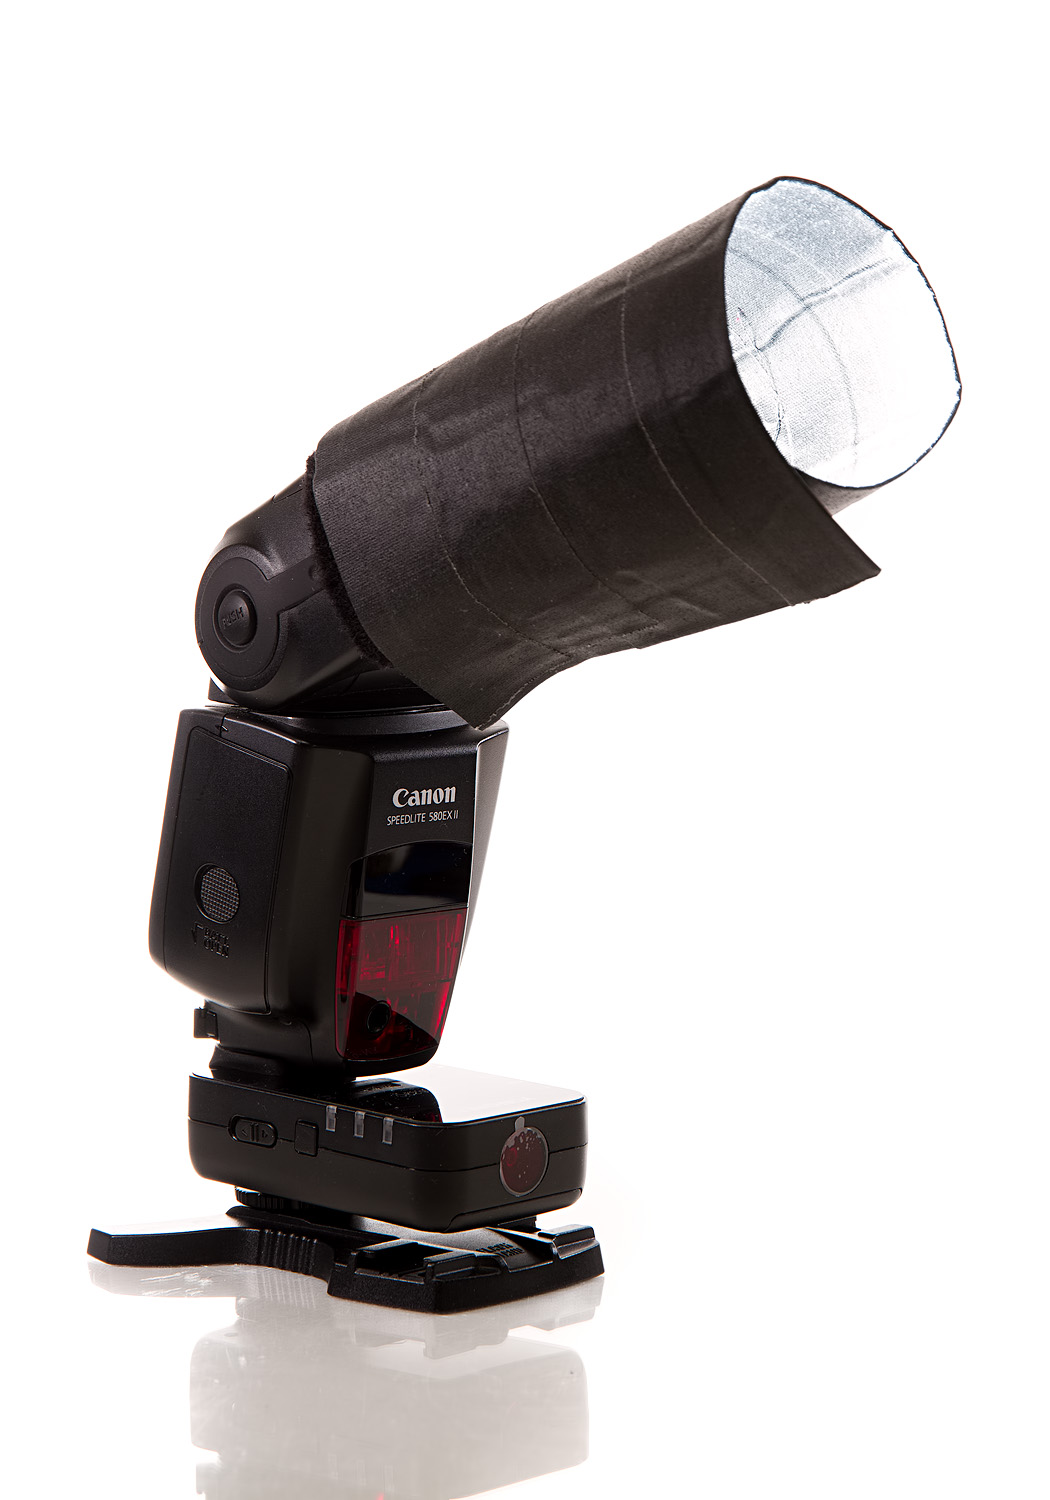
A snoot is a funny name for a simple concept; it’s basically a tube that wraps around your light to constrain its spread. A longer tube obviously results in a tighter beam of light.
There are some companies that sell professionally-made snoots, but it’s trivially easy to build your own. I recommend using black construction paper or posterboard; you really want to use a black material, since any colored material will impart a color cast to the light, which you don’t want (I used to use red construction paper for snoots and then I’d find little red highlights on my figure photos). If you want to make them more durable, you can wrap them up with black tape; the snoot depicted above is wrapped in black gaffer’s tape.
Snoots are tremendously useful for shaping light. What’s more, you can use them in conjunction with other modifiers, such as your softbox, which gives you a light that is a little softer and a little more directional. Remember that lighting is often very nuanced and subtle, and I highly recommend experimenting with different combinations of tools to see what different looks you can get.
Grids
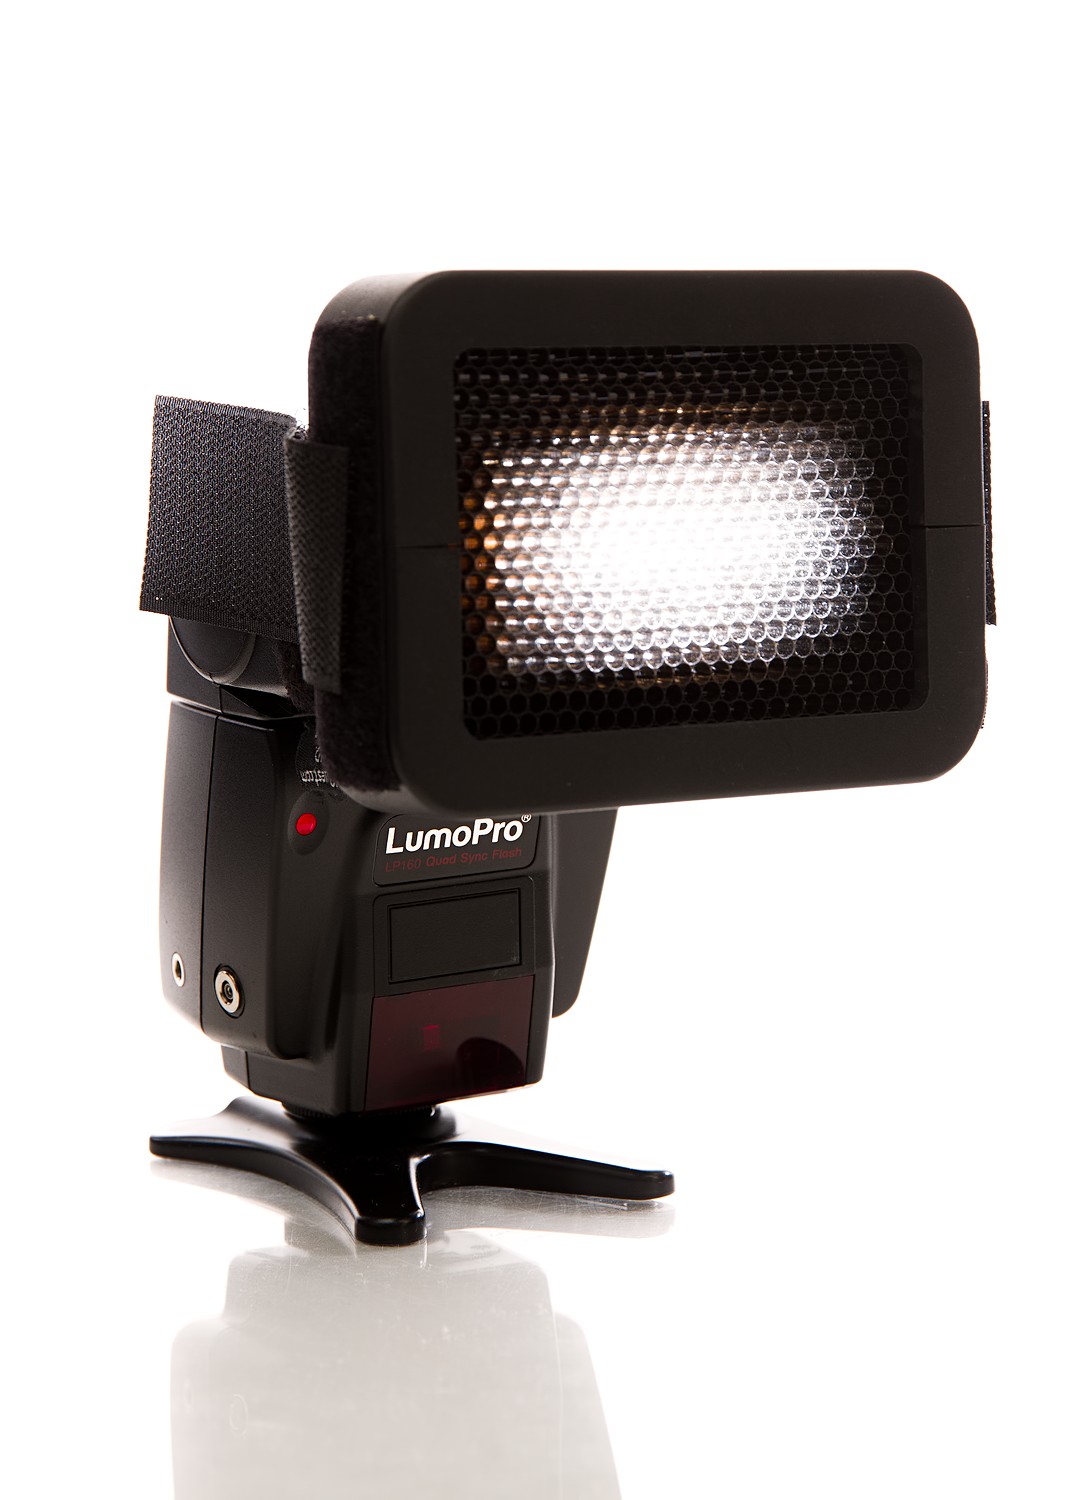
A grid, sometimes called a gridspot or (when used with a large softbox) egg crate grid, is also a device that constrains the spread of light. It has two advantages over a snoot; it is smaller and it is generally more effective at limiting the spread of light. They are also much more time-consuming and annoying to construct yourself (there are some DIY guides involving cutting up cardboard or drinking straws, but I’ve always found it to be a big hassle). Grids that mount to flashguns are not too expensive, but it’s harder to find grids that will mount to desk lamps (though there are companies that sell pre-cut sheets of honeycomb material, and I recall that Adorama sells a set of grids for that aforementioned beauty dish, and those might fit a standard desk lamp).
Flags
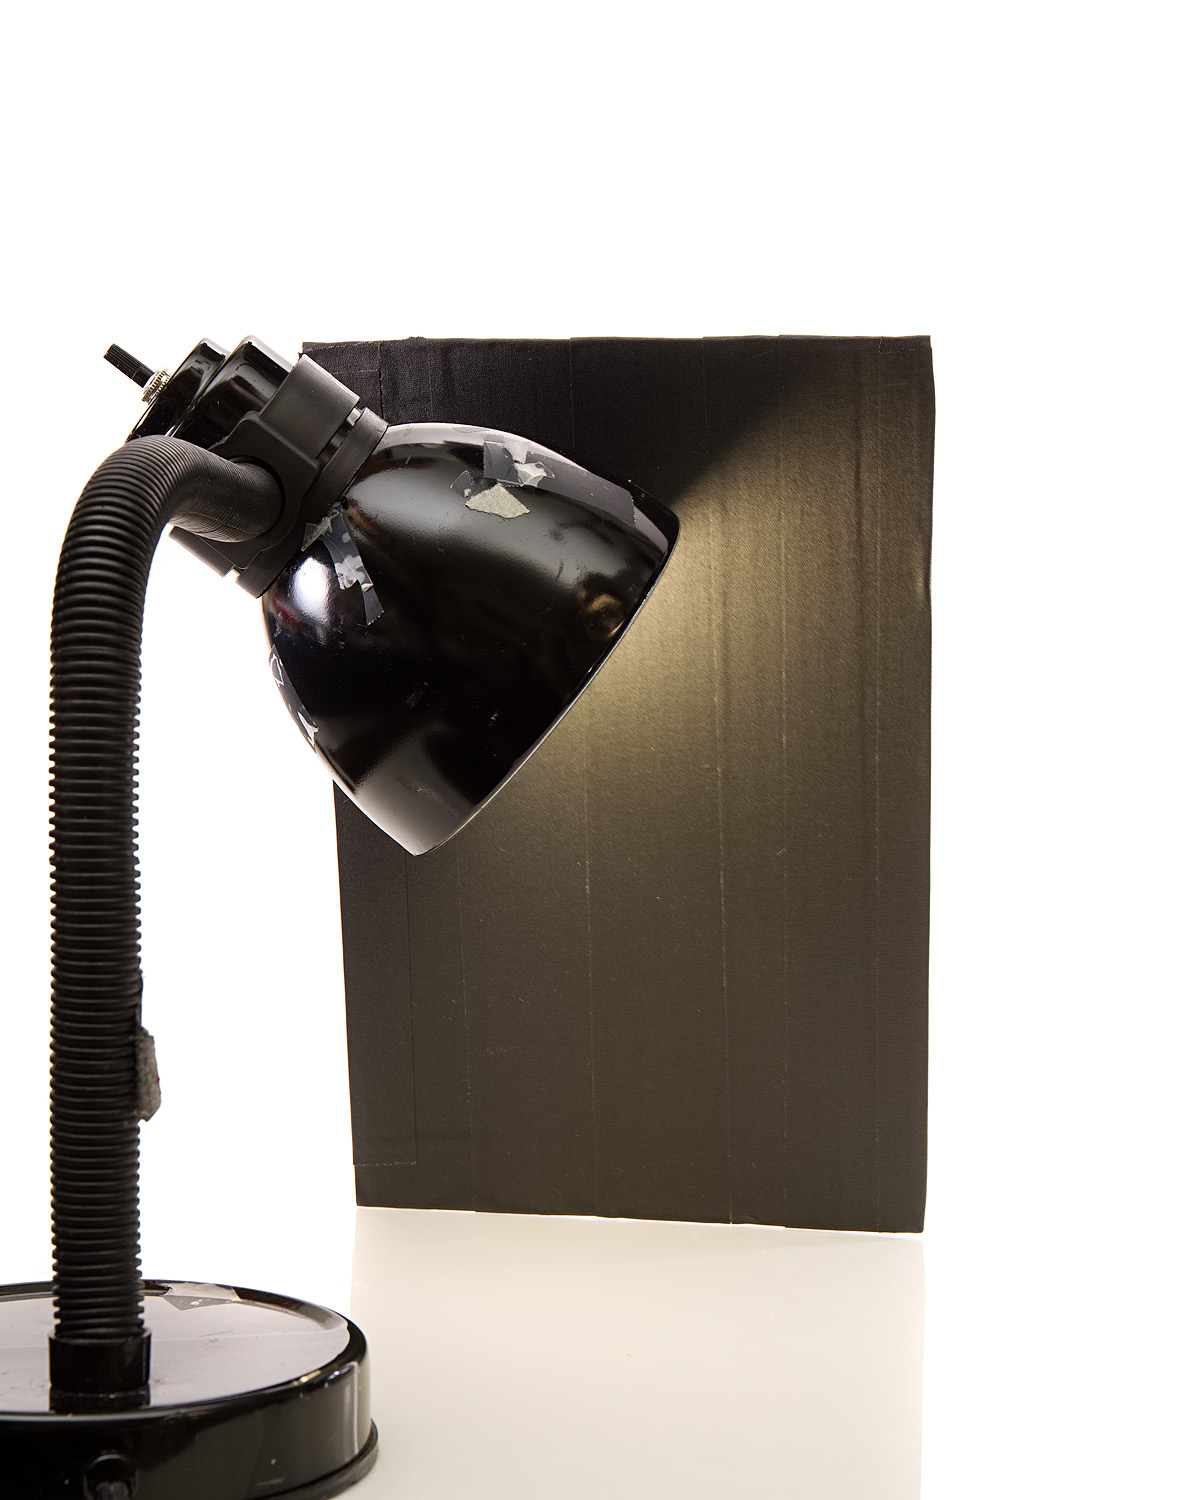
A flag – sometimes called a gobo, a cutter, or (when used in pairs) barn doors – is basically just some material placed next to a light that blocks its spread. A flag is typically rectangular in shape and is often used to block spill, particularly from the key light onto the background, or from a background light onto the subject. A flag can also be placed to prevent light from flaring into the lens; this is particularly useful with rim lights, especially if you aren’t using a lens hood.
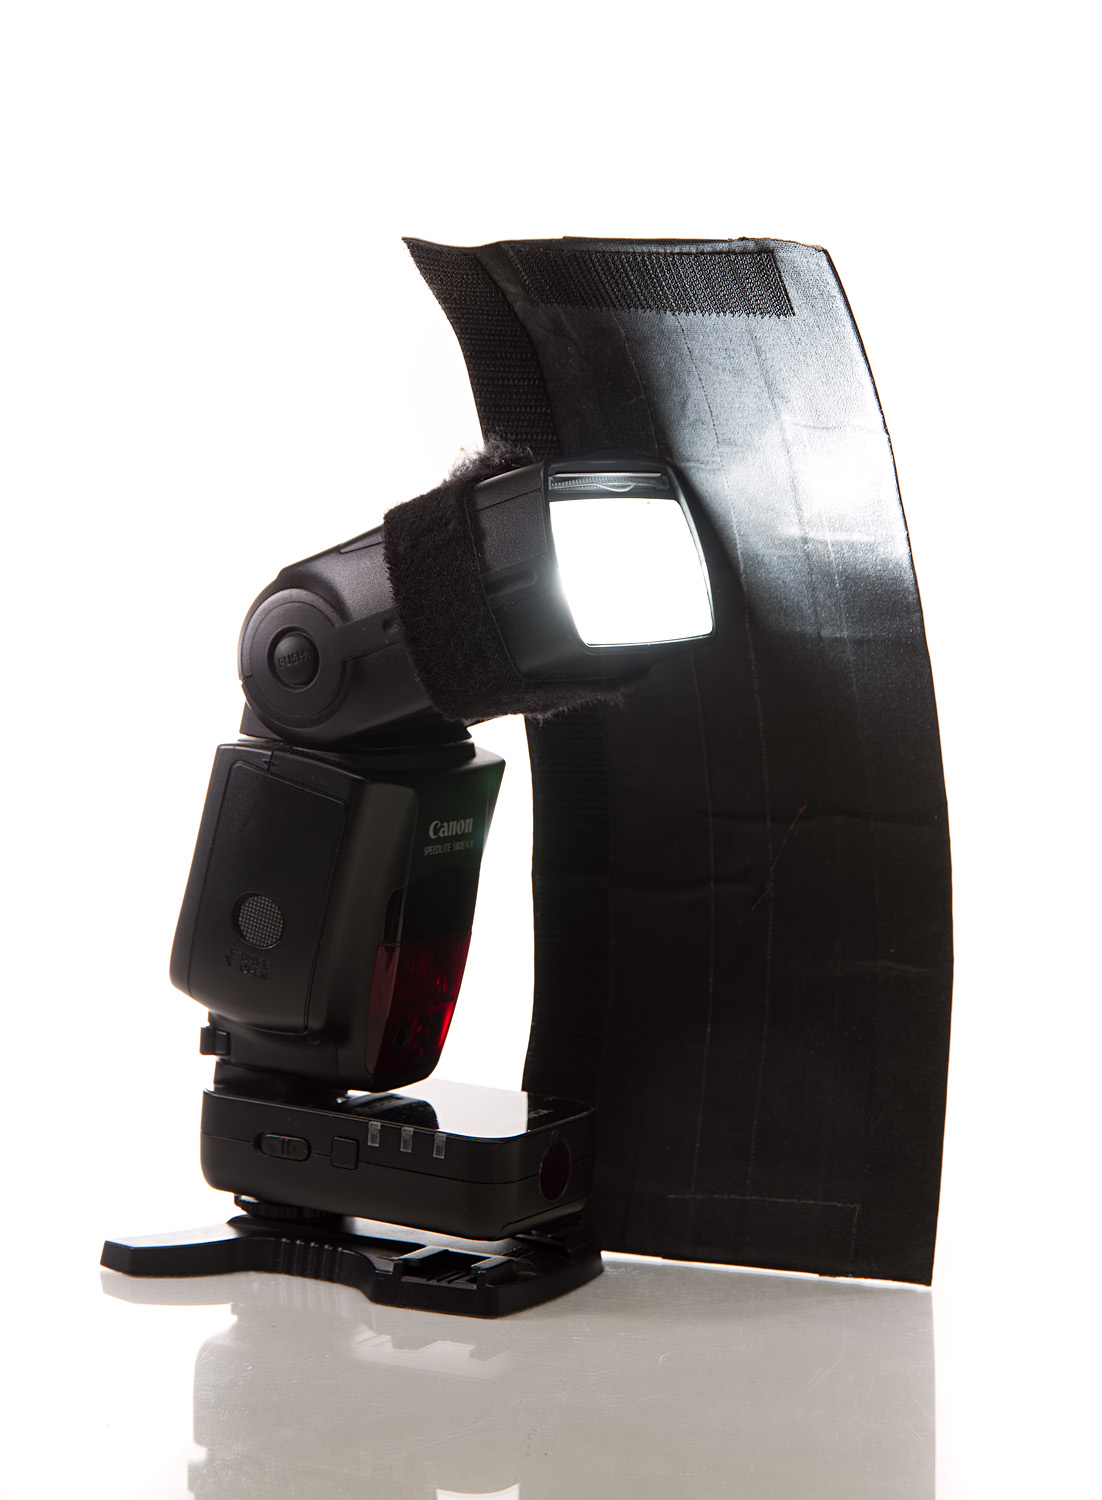
Flags are extremely useful, and I use them all the time. The picture above shows one of the flags I frequently use (it’s actually the snoot pictured above, unrolled and attached by velcro to the side of the flash head). I typically (but not always) like to light the background separately, and using a combination of a split light position with a flag blocks a lot of light from hitting the background.
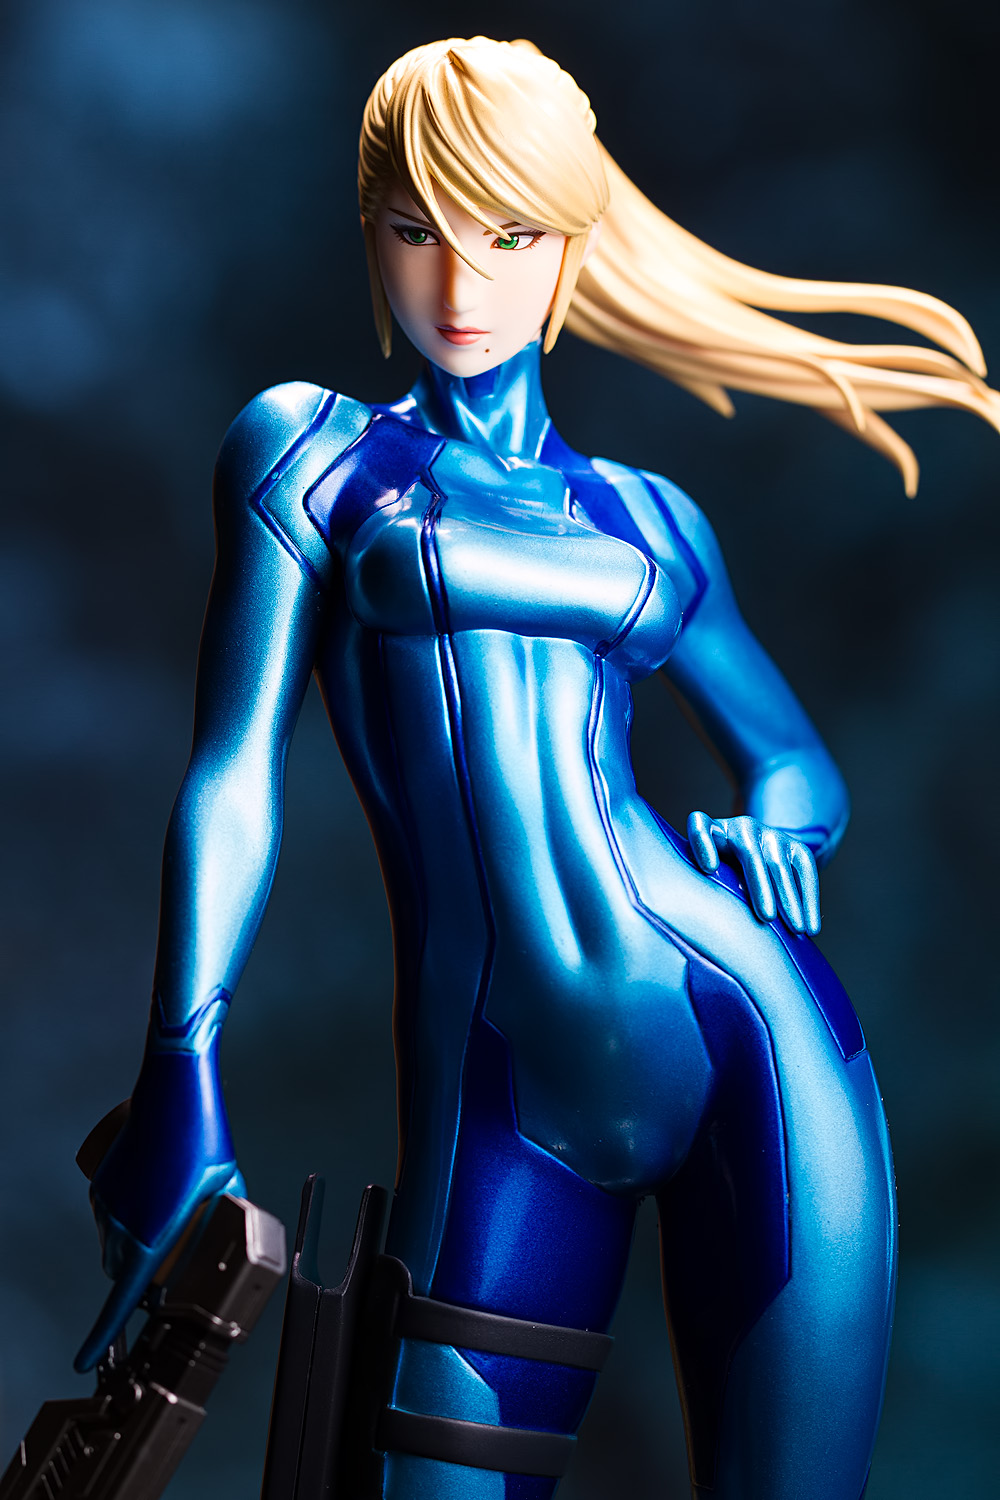
Flags obviously don’t have to be very fancy; the ones I use are made of regular printer paper, wrapped up in tape. I also frequently use pieces of cardboard. However, I really recommend wrapping your flags in black tape, or using black material. Stray light reflecting off your flag can cause warm color casts (even cardboard can reflect some light), and sometimes it can cause other complications. For example, here’s an image of Samus Aran; notice that brown outline running down her right side? What do you think that is? You can probably guess; it’s a reflection of the flag I used to block one of the background lights from lighting up the figure. I wanted to use that picture in Samus’s review, so I had to spend a lot of time getting rid of the problem in Photoshop; it would’ve been easier to have just used a black flag in the first place.
Cookies
A cookie – a shortened version of the term “cuculoris” – is an object placed in front of a light to cast a shadow or pattern on the scene. Obviously you need to use a fairly hard light; otherwise, the shadow’s edge will be diffuse and possibly unrecognizable (although it’s possible that might actually be what you want).
Perhaps the most famous cookie is the “Bat-signal” featured in the Batman series. Also, a gobo is sometimes used to describe this sort of device, particularly in stage lighting; again, I wouldn’t worry too much about specific terminology.
Neutral Density Gels (and Substitutes)
A neutral density gel is a fancy, high-tech term for a piece of transparent gray plastic. What this does is cut down light, typically by a pre-calculated amount. You can typically buy sheets of neutral density gel rated to drop light by one-half stops, full stops, or two stops.
These can be handy things to have when using improvised lights like desk lamps. Many professional photographic lights (like flashguns and dedicated LED lights) have adjustable power output but desk lamps typically do not, and sometimes – maybe often times – you will want one light to be brighter than another light. Neutral density gels give you the ability to control relative light brightness.
However, when I used desk lamps, I just used paper towels and toilet paper instead. I’d tape them over the lamp and if I needed to cut down the brightness even further, I’d just tape another one on. It worked well and I didn’t have to spend any extra money.
If you use desk lamps, it can also be handy to have light bulbs of different brightness. You can typically find compact fluorescent light bulbs in 60W and 100W equivalent sizes, so if you need one light to be brighter, you could use the brighter light bulb with that lamp.
A Note About Product Boxes
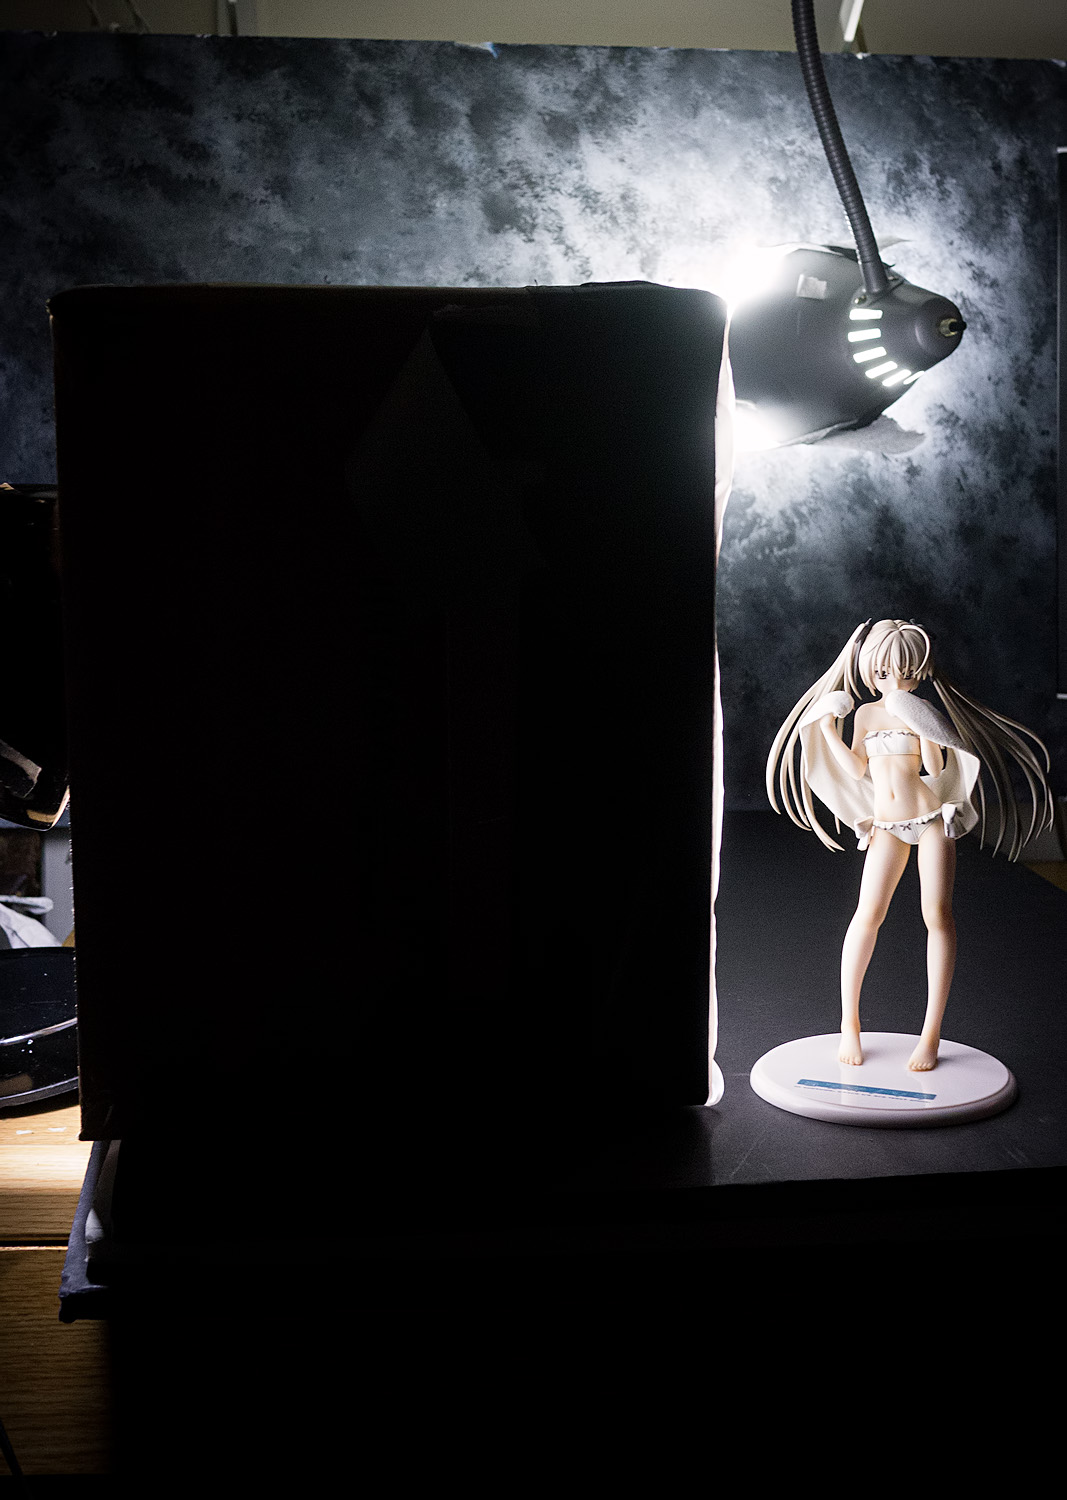
Sometimes you’ll see people shooting anime figures inside product boxes, also called product tents, light tents, or light boxes (not to be confused with the JavaScript image-viewing plugin or the backlit device used to view film slides). I tried using one myself, way back in the early days of this site (and my photographic explorations). The basic idea is that you take a box, cut out the sides and cover it with white fabric, and then shine a light on one side so that you get very soft light that bounces around and evenly illuminates your subject.
I really do not recommend using a product box for photographing anime figures. For one thing, they’re unnecessary; you can get very soft light without one. They’re very restrictive; you obviously can’t get low or high angle shots without getting the box in the picture, unless you’re using an absolutely gigantic box. They also limit your creativity; for example, you obviously can’t use hard light or a custom-made background unless you disassemble part of it – and if you’re going to do that, why bother with it at all?
What product boxes are good for are for photographs where you need pictures to be very consistent – product shots, for example. If you’re photographing bottles of shampoo for your local supermarket’s weekly sales flyer, then a product box makes a lot of sense. However, I don’t think product boxes make sense for anime figures.
The next post, which will wrap up this guide, will feature a few sample shoots, where we’ll take what we’ve learned and integrate it all together.


I had (well still have, packed away) a light tent/product box. I found it too restrictive, on the size front (40x40x40cm) and the cloth liners were huge static magnets for cathair.
Also, your grid reminded me of https://www.youtube.com/watch?v=tbEnUH1JS6Y — I actually made these when I was a kid. I adored this show as a child (it ran from 77 to 90, if only child edutainment were anything like it these days).
Anyway, I’ve tried snoots and flags. They do definitely help, though I need to make better/more durable ones, and maybe get some velcro tape to attach them to my lamps since masking or packing tape never seems to hold them. If I could readily get gaffertape I’d like to use it more, though. But it seems difficult to obtain these days which I find quite frustrting. Used to have an unlimited supply of it when I lived with my parents, since my father worked in the concert industry.
But, I digress. Another solid guide. I tip my hat to you, good sir!
Yeah, I didn’t enjoy using the light tent much. Aside from the small size, I also thought that it required a ton of light to make it worthwhile; I think I had lights shining on both sides and through the top. Otherwise, you could easily tell that the background was cheap, wrinkled fabric. Looking through the old archives to find that light tent post, I am really, really glad I don’t shoot like that any more.
Oh man, that is the exact same process I used to make a cardboard DIY grid. I used it with Gotou Matabei and it actually worked alright; it just took forever to build it. I didn’t mention it in the post, and maybe I should have, but it killed a lot of light output, which might make it difficult to use with something like a desk lamp. (I don’t think I’ve ever seen that particular science show; I remember that the science show I enjoyed watching as a kid was Mr. Wizard’s World. I also seem to remember liking a show called 3-2-1 Contact, which they occasionally screened in school.)
Yeah, I got tired of taping stuff onto my lamps all the time (you can still see all the old tape all encrusted on the lamp). Velcro tape is great; I keep a big supply of both the regular kind and the adhesive-backed type. It makes it much less of a hassle to get things rigged up, and I find that I enjoy photography a lot more when the little hassles are minimized.
Ahh the power of reflectors and diffusers… Since I don’t have a real mini reflector I’ve used anything I could think of, name it from illustration boards, white cardboards, silver tray, even a white T-shirt wrapped on a lamp LOL so that’s why I can really relate on that lamp photo with a tissue. XD
It’s really helps to keep in mind the importance of proper lighting and exposure when it comes to figure photography. They say an underexposed image is easier to adjust than an overexposed image, coz the latter is already a bad photo already.
Thank you for sharing your tips on the proper lighting series, I learned well!
Indeed! I tend to use what I have laying around; for reflectors, I’ve used envelopes, boxes, comic book backing boards … it’s all good, as long as it’s white.
There is actually a school of though which advocates overexposing a picture to get the best detail. This technique is called exposing to the right, and the premise is that the image sensor records more detail in the highlight regions, so overexposing and then tweaking the exposure in editing software will theoretically provide the best quality image. Me, I chronically underexpose my photos, because I evaluate exposure by looking at the LCD, and my camera’s LCD seems to be too bright. I also tend to be a poor judge of when the highlights are blown, since I don’t use the blinkie indicators nearly enough.
I’m glad that this series has been useful XD
I find myself quasi-envious of the budding figure photographers out there fortunate enough to have exposure to such a wonderful wealth of information so early in their explorations. The parallels between what you’ve shared of your experiences/experiments/conclusions and mine are staggering at times although you’ve arguably adapted much faster than I.
When you refer to your early observations of foobarbaz.jp, your early work with continuous lighting (and subsequent flashes of insight after moving to strobes [yep..bad pun]) plus some of your ghetto-tastic homegrown solutions are often eerily familiar. (I’ll borrow the opportunity to toss in a suggestion for the continuous-lighting photographers to employ white plastic shopping bags as diffusers/softeners. They’re essentially free, light falloff is fairly modest and the diffusion is extraordinarily shapeable by contouring the bag into any one of infinite profiles.) To see it all categorically laid out as you’ve presented it in these guides stirs up all sorts of forgotten creative ideas and/or exposes of creative ruts.
Anyway, the site in general is fantastic and I’m likewise impressed by the quality of feedback your articles muster. I don’t typically read blogs, much less their comment sections, whereas both rare exceptions lie here. I’ve lurked for a shameful number of years but this series of guides, which I think is poised to unleash a new generation of really impressive figure photography, has roused me from my apathetic slumber; this effort simply couldn’t go unthanked. (And, really, what’s not to like about someone who favors the metric system and calls out the overuse of Dutch angles. ;D)
So, cheers and thank you! Stay awesome.
I hope these posts are helpful to people who are just getting started; I remember for much of the first year that I started photography, I felt like I was not improving and that I had no idea what I was doing wrong. I hope that these posts can help people get past that clueless beginner stage since I know very well how frustrating it can be to feel like you’re stuck there.
Going through this site’s archives is kind of a trip – and, to be honest, really makes me cringe. On one hand, I’m really proud of the level of improvement that is visible. On the other hand … man, my early photos are pretty awful. And I can look at a lot of my photos and see flaws that I didn’t even comprehend when I shot them. There have been more than a few occasions where I shot a set of photos and thought that it was the best work I’d yet done; and then not long after, I’d look back at the photos and wonder why I ever liked them, because now I see all the problems and mistakes I made.
I’ve been very grateful for all the comments I receive here. The odd thing is that I sometimes go to other websites and many of the responses featured there are fairly short, sometimes so short that one wonders if the commenter actually read the post. I’m very glad that many of the comments here are more conversational; well, maybe not entirely glad, since I have to admit that it can take me quite a long time to respond to comments, but it is always worth the time.
Haha, I have to admit, I’m actually a typical American and I use American units (or imperial units, but they might as well be called American units these days), but I know the rest of the world uses metric and I used metric in school, so I figure I ought to use metric here. Following on some of my ideas for photographic posts, I also have had an idea for a post featuring what not to do … Dutch angles will be on there, and selective coloring will absolutely, positively be on there.
Haha, I eagerly anticipate your “what not to do” post particularly in the hope that, among the “selective coloring” critiques or otherwise, lie a few well-deserved dings regarding Instragram “effects” and their ilk. Gads, the more I think about it the more ideas come to mind.
If you’re at all open to requests (and by all means wait until you’re motivated to do so whatever the case), I’d be extremely grateful for any elaboration you’d be good enough to share detailing your approach to making backgrounds and/or dioramas for your shoots. You often touch upon them in your photoshoot articles, which is great, but I’d love to hear about all of the gritty details.
Early on I fear that I set myself back a bit because I decided that any real or perceived artistic vision I might have should be overridden first and foremost by the fact that I was making photos of someone else’s art on behalf of fellow figure collectors. My flawed belief was that figure fans would want photos that accurately represented the figure they were potentially in the market for so any distracting artistic flourishes like colored lighting, heavy contrast, patterned backgrounds, dioramas, etc. that I might desire were necessary sacrifices.
I did learn a lot about dialing in neutral color balance and finessing lighting control to achieve a nice 3D “pop” via subtle contrast manipulation (via many of the same methods you’ve detailed in this series) but, if I’m honest with myself, the end results often orbited too close to their product photo brethren. Usually much nicer than everyday product photos but very homogenous and “samey” (single-color microfiber backdrop, soft lighting, etc.)
My preference towards accurate depictions of figures remains (as I still retain a respectful reverence for the original sculptors’ works) but I’ve drastically relaxed my notions about what qualifies as a tasteful artistic interjection on my part…so much so that I’m now keenly aware of my underdeveloped creative facets, backgrounds being key among them. Or more shortly put, I’ve discovered that a “fun” shoot for me is often conveyed to the viewer so it’s not always a selfish prospect to simply cut loose and play a little.
Having seen some of your lower-key backgrounds, I watched a couple of videos for making mottled canvas backgrounds using acrylic paints which may be useful. I’ve even gotten a couple of decent-sized canvases to start off with. I’ll pick up the requisite brushes and paints the next time I catch them on sale but I must admit that working in an analog medium is well out of my realm of expertise so this could all end in fire and brimstone.
Still, I think it’ll be fun.
Haha, yeah, the whole cross-processed/Lomo thing seems kinda played out, too – though I have to admit that I was kinda interested in it for a little while, and while I don’t really dig those particular looks, that kind of lo-fi aesthetic does have a certain appeal to me. Still, I remember reading somewhere – I think on Laurence Kim’s blog – that those sorts of fads come and go, but a clean and natural look always stays in style.
I’ve long planned to write more about backgrounds, and I do hope to do so. I think one reason I don’t talk too much about them is that I’m not that confident in my ability to construct dioramas and sets; I’m not all that skilled at it compared to a lot of the work I’ve seen online (particularly by people who do tabletop wargaming or construct historical recreations). However, it’s a topic that interests a lot of people so I’ll try to write more about it.
Yeah, I went through that same exact thought process when I first started this website; I figured that since I was “reviewing” figures, I was obligated to provide as objective and complete an overview as possible, with little allowance made for any kind of artistic or personal touches. Now that you mention that, I’m not really sure why I ditched that philosophy; it may have just been a natural outcome of me discovering that I liked a high-contrast, deeply-shadowed look with crazy rim lights, which is not something you see too often in many figure reviews or product photos (though I noticed that Kotobukiya recently put up for preorder a figure of that one Bakemonogatari girl where they went nuts with the nuclear rim lights, and I was vastly amused to see that). At some point, I think I determined that every figure has a ton of promo photos, and foo-bar-baz did the soft, evenly-lit style better than everyone else, so I might as well do my own thing.
A weird juxtaposition: the other day I was reading the Wikipedia article on Lent (I’m not religious and thus I do not know what Lent is) and found that it was a traditional time of fasting, but an observer noted that humans love setting rules on themselves … and then they love finding loopholes to escape those very same self-imposed restrictions. It has been interesting for me to see what sort of bounds, artistic or ethical (almost always ethical) people will put on themselves in photography; the most common one I’ve seen is that many people refuse to post-process their shots. I think that’s a silly attitude for a number of reasons. For my own part, I do not like pasting figures on different backgrounds, particularly if I didn’t photograph the background myself. I have to admit that I have a certain disdain for pictures where a figure has been photoshopped onto a stock background; it’s not really fair, and my opinion isn’t really relevant, but I can’t help feeling negatively towards that practice. I think I have a similar desire to provide an accurate representation of the figure as you do; I’ve on occasion gone with different white balance settings to provide different color light, but I usually try to provide at least a few photographs (typically the full-body, 360-degree view shots) where the figure can be viewed in regular light.
Ah, yes; I’ve only been using these two mottled backgrounds (a gray one and a red one) relatively recently but I’ve found that I liked them a lot. They’re really easy to make, too; the gray one is painted on thick foamboard and the red one is painted on a small wood panel. I’m probably going to re-do both using a sheet of particle board, since the red one is a little too small and the gray one has curled up. Basically you need a broad chip brush (it’s going to get beat up so an old one is fine), black and white hobby paint (the cheap acrylic bottles you can get from a crafts store work great) and any color paint of your choice; I’d recommend a color with a wide range of tones (like blue or red; not so much yellow). Mix some white paint with your colored paint and paint it over the surface and let it dry for 15 or 30 minutes. Then mix the same tone of paint except make it a little darker (use a little less white or put a little drop of black in it); jab the paint brush into it to load the tips of the bristles and then just stab it into the surface in a random pattern. You want to jab it rather than painting in strokes; keep adding more paint with varying amounts of white or black to change up the tones. You can let it dry in between if you want a starker variation in tones or you can keep painting while the paint is still wet; this makes it easier to blend tones together.
I use a product box for almost all my figure photos but then consistency is exactly what i’m looking for when it comes to photographing my GK. Having said that, I do use multiple light sources so I can play around with things at times.
I never bothered with making a diy softbox, I just bought a complete one in 60×40. Even after I started to use flashes, It still is my favorite main lightsource, the soft light is really nice and it’s easy to work with.
I tested a variety of flash diffusors, most of these folded softbox like things are cheap crap, but sometimes the cheap products also are good, nevertheless I ended up with lumiquest things ^^
The LumiQuest stuff is fantastic, I use their stuff all the time. I did spend a lot of time early on with a lot of homebuilt stuff, including a couple of softboxes, but I found that it was generally more trouble than it was worth. Moreover, they usually took a lot of time to build, and when I looked at it from a time and money perspective, I think it was less expensive to just buy the professionally-made modifiers instead.