
The anime figure hobby has come a long way since I started my collection. The number of manufacturers has greatly increased, the quality of the products has been improved dramatically, and the variety of characters to pick from is now very impressive. However, the most remarkable aspect of the hobby has been the growth of the collecting community. All across the internet, throughout the entire world, there are discussion boards where members can converse with one another, news sites where fans can get glimpses of upcoming releases, review sites where prospective buyers can visit to judge whether a certain figure is worth the cost, and image sharing sites where collectors can make their photos available for viewing.
Photos indeed; the popularity of photography has exploded with the advancement of digital imaging technology. Almost every contemporary phone has a camera built in. Professional-grade DSLR cameras are nearly ubiquitous. It may be that photography is now the most widely-practiced creative activity in the world.
Figures are, of course, designed primarily for visual appeal and thus it readily follows that they make for good photographic subjects. However, despite the increase in the number of collectors interested in photographing their collection, there is remarkably little guidance on the internet on this subject. On the surface, it might seem that getting a good picture should be easy; after all, one need only to press a button. However, as anyone who has seriously attempted to pursue an interest in photography, getting a good picture can seem positively arcane.
In reality, it’s not actually that hard, and this post is the first in a series that I hope will help figure collectors learn more about photography and make better pictures of their favorite figures. This particular set of posts will focus on creative lighting – which sort of lights to use, positioning lights, and altering light quality for tone and impact. We’ll look at each of these aspects in detail, in turn.
Expressing Mood with Light
The first goal of photographic lighting is sufficiently illuminating your subject, at least to the degree that you desire, and I will assume that anyone reading this already knows how to properly expose their photographs (if anybody wants a complete beginner’s guide to getting started in photography, feel free to leave a note in the comments). Instead, what we will talk about are the creative, evocative things that you can do with light. To illustrate this idea, I’ve used Buddy, one of my favorite figures, for the following examples.
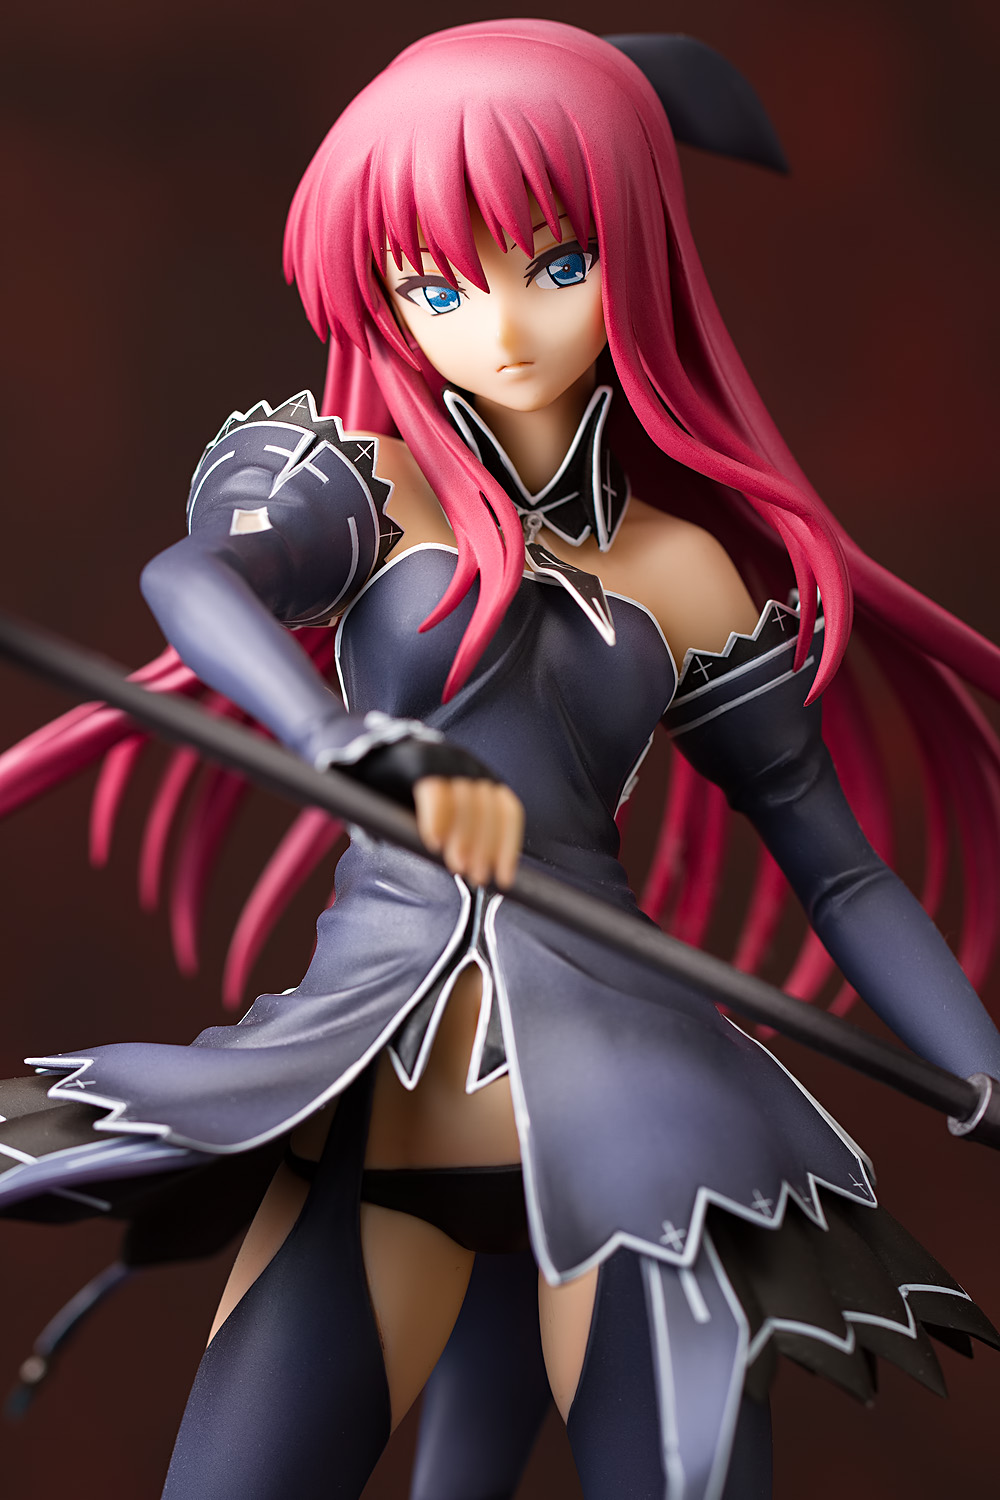
Soft, even light and an unobstrusive background focuses attention on the figure itself. This sort of clean lighting configuration is typically used for product shots and by review websites like foo-bar-baz, who often shot in this style and did it better than most.
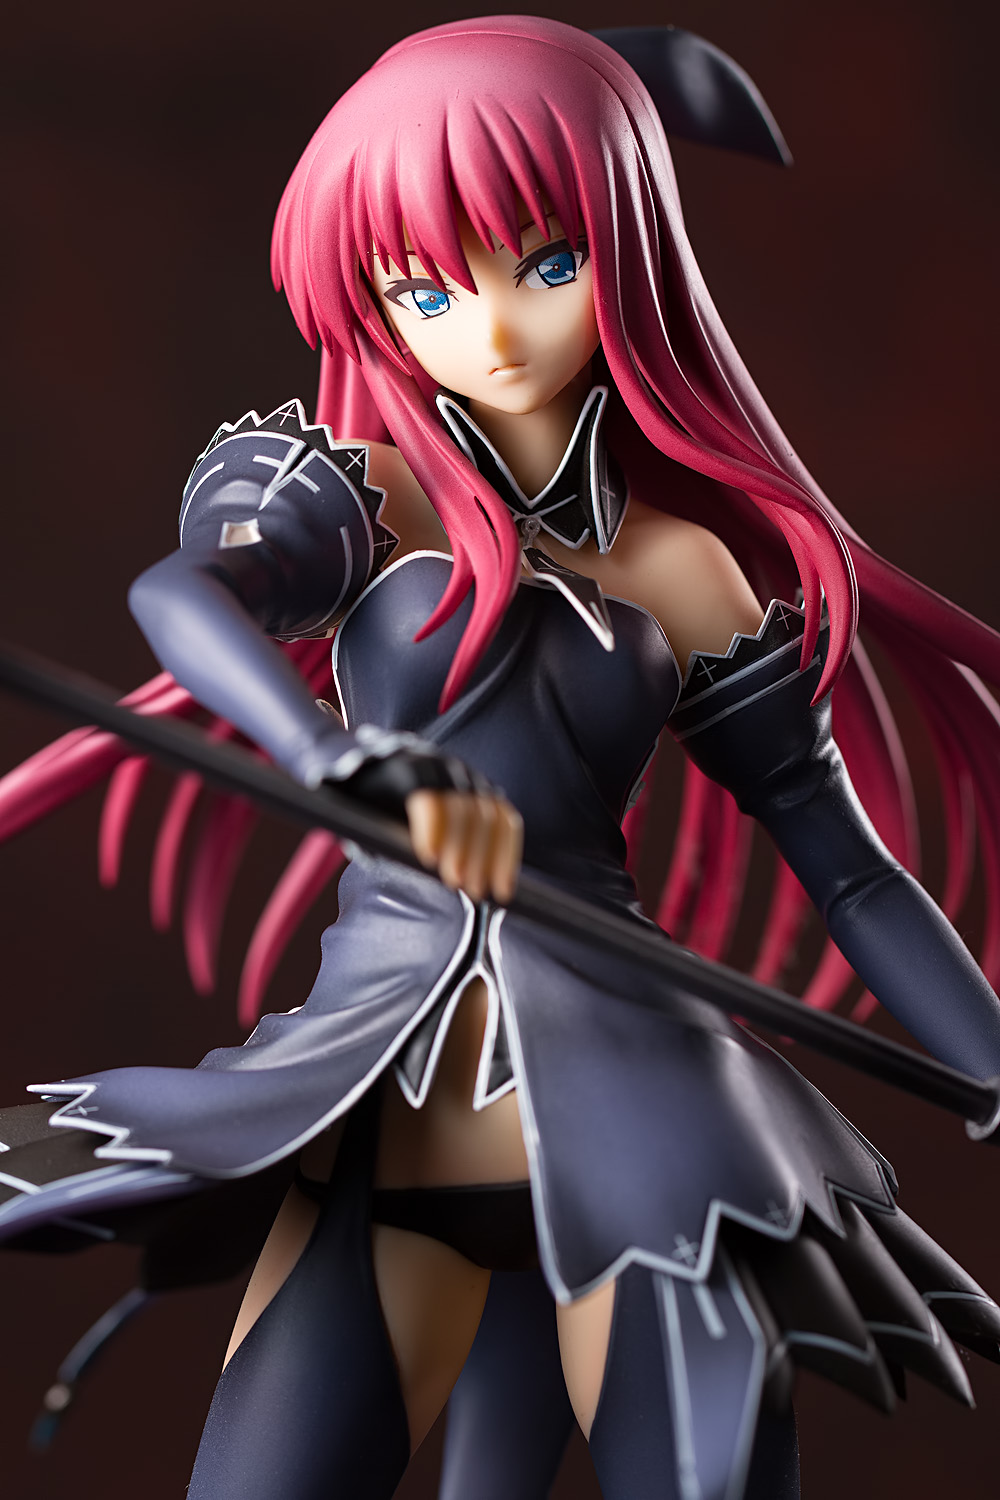
This is a similar arrangement, except that the fill source has been removed, darkening the left side of Buddy’s body and emphasizing the direction of the main light. A rim light placed to camera right (that is, to the left side of the figure) and behind the subject gives the image a little more drama, but not so much that it becomes a prominent element of the picture.

Using a smaller key light placed closer to the subject still generates soft light, but with far quicker falloff and reduced light coverage, leaving much of the figure darkened in shadow. This creates a much more mysterious feeling than in the above two pictures; the mood is heavier, and the deep shadows focus more attention on the figure’s single lit eye, thus amplifying the intensity of her expression (which, in this case, is fairly placid, admittedly).
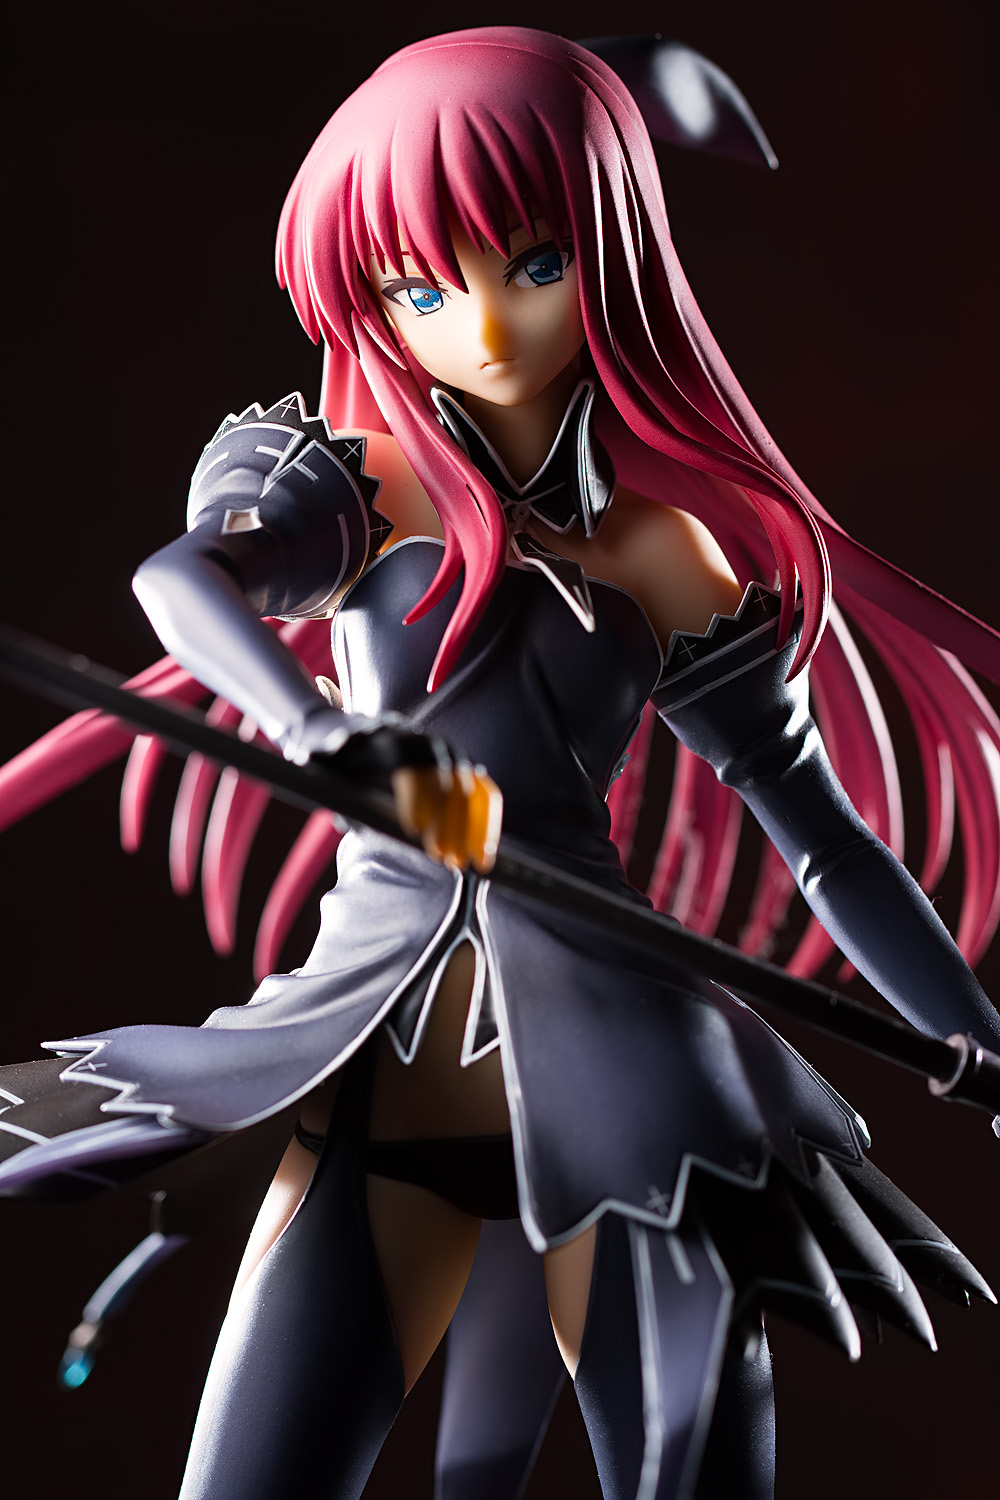
Moving the key light to the side and employing two hard rim lights generates a sense of boldness and drama. The directionality of the light is strongly felt. This type of aggressive, high-contrast lighting arrangement often works very well for an action-oriented figure in a kung-fu pose, and sometimes looks odd when used on friendly doe-eyed schoolgirls gazing lovingly at you. That is not to say that it couldn’t work, however; if that’s the sort of look you want, you should experiment with it to see if you can make it happen.
These are just a few examples, and we’ll look at putting together these sorts of pictures later on. One thing I would stress, if you are a beginner, is to not worry too much about establishing a style. Anyone who has followed this website for a while might guess that I am a big fan of the lighting style shown in the fourth picture, whereas I don’t use the first lighting style all that often. However, I never consciously thought that I wanted to pursue that kind of high-drama look; it came naturally to me over the course of years. Style is, intrinsically, the way that you like to shoot, and you will not know the way that you like to shoot until you have attained a degree of experience. Don’t worry too much about picking a style; your style will find you.
Getting Started
To start, you will, of course, need a figure and a camera. If you are just getting started, the type of camera you use doesn’t really matter; don’t think that just because you don’t have a DSLR that you can’t get good pictures (conversely, don’t think that using a DSLR will do anything by itself to improve your pictures; the internet is full of proof that demonstrates otherwise). If all you’ve got is a little cheap point-and-shoot camera, go ahead and use that. Here’s the thing: if you’re a beginner, that automatically implies that you don’t have much experience or knowledge, and that means you’re going to make a ton of crappy pictures at the start. If you’re a beginner with an expensive DSLR, that means you will make high-resolution, low-noise, optically-sharp pictures that are nonetheless just as crappy as the ones you would have made with a cheaper camera.
That said, a DSLR is still a very useful tool, and if you want one, I would encourage you to get one. In my case, I started photography with an inexpensive DSLR, and purchasing it got me committed to pursuing this hobby in a way my old point-and-shoot camera could not. (Most of the pictures that I took with my first DSLR camera still sucked, though, and not because it was an inexpensive camera with a kit lens.)
You will obviously also need a light source. Light sources are often classified in two ways: continuous or flash. Continuous lights remain lit throughout at least part of the exposure, and they are usually lit for the entire duration of the shot. Sunlight and light bulbs fall into this classification. Flashes emit very brief (typically less than 1/1000 of a second) light pulses; studio strobes and hotshoe flashes are grouped in this category. These light sources generally require different procedures to use, but in the end, they all basically do the same thing. Light is light, and you should feel free to use whichever type of light source you feel most comfortable with. This tutorial will assume you will be working indoors with electrically-powered lights, but the guidelines presented here will still be applicable to natural light.
Speaking of which, I sometimes see people assert that sunlight makes for the best light. This is not correct, and saying so typically reveals a level of romanticism and inexperience on the part of the speaker. Through much of the day, raw sunlight is actually one of the worst light sources you could ever use. Further, there is no such thing as a universally “best” sort of light. If you’re a night owl, sunlight will obviously be of no help. If you’re a landscape photographer shooting a mountain range, there is not a flashgun big enough to help you out, short of a nuclear bomb. The circumstances that you shoot in and your level of comfort in shaping and controlling (or, in the case of sunlight, dealing with) that light will dictate which is the ideal light source for you.
How Many Lights?
I’ve posted some of the setups I’ve used to make pictures, and one sort of comment I consistently get is, “Wow, you use a ton of lights!” I have to admit that this is really not the sort of comment I’m looking for, particularly because it logically leads to the idea that the more lights you use, the better your picture will be, or that the more lights you have, the more skilled or sophisticated a photographer you are. Neither of these things is true and I really do not wish to abet this line of thought. Therefore, if you are just getting started, I really recommend that you use just two light sources: one desk lamp (or the sun) and a fill card (as you learn more about photography, you will find that there are many fancy names for fairly simple concepts. A fill card is just a white surface used to reflect light. Like many people, I get a lot of junk mail, so I often use envelopes as fill cards. I’ve also used comic book backing boards. Printer paper also works well.). The reason for starting with only one light is that it’s much easier to see what the light is doing, and it’s much harder to screw it up. With multiple light sources, you can often get shadows and highlights in places where you don’t want them, and it can be maddening to track them down, if you even notice them while shooting.
Also, I really don’t recommend starting out with flashguns. Flashes provide some capabilities that light bulbs do not, but they also come with the huge drawback of not being able to see what you will get until you take the picture. Now, this is less of a problem with figures, being that figures aren’t going to move while you’re shooting and thus you can shoot and adjust until you achieve what you want, but it can be enormous frustrating to get to that point, and frustration is not what you need when you are just beginning. I use flashes, but we’re not going to talk about much that is flash-specific.
Eventually – or perhaps very quickly – you will feel limited by using one light and will want to explore the creative possibilities afforded by a more complex setup. When you get to this point, you should absolutely feel free to add more lights. But if you’re just beginning to shoot seriously, I’d start with just one light, at least until you feel comfortable with some of the concepts we’ll be talking about here.
That wraps up this intro post; in the next post, we’ll look at some of the basic components of a lighting setup and how they integrate together.


Yay, finally. How many years have we been waiting for this. 😀 Though it is the very beginning and not hugely useful to me, it’s still well written and goes over the basics well enough. Could maybe have used a few example shots of what a single lamp and fill card is capable of, though.
I have three main lamps, a few smaller ones and a “lightbox” (for negative/slide viewing, makes a good stand for uplighting) but I haven’t actually used any of them for months. I packed them all up to take to a shoot with some others that never happened. Haven’t unpacked them since. ;.; I probably should.
Also, for fill cards, I have some polystyrene sheets and also an actual mirror. Though the mirror has its own issues (maybe something you could go in to with reflecting the colours too fully and such) it is useful for some stuff. I really need to practice more with it. Maybe I should go back to simply working with one lamp to see if I can get any decent shots.
Hoorays! Yeah, this is really more of a philosophical post; I had planned to include some practical bits but I thought that that section would be too long, so it’s going to get its own post, which might actually get posted in a few hours, if I don’t fall asleep first.
You should! Hands-on experience is the best teacher. Well, that and some books, I guess; much of what I plan to write has been distilled from stuff that I’ve read.
I think there’s something to be said about putting limitations on your own work. I find it liberating at times, since it frees you from a lot of the ancillary crap that you might otherwise worry about. For example, I’ve written before about my fondness for the Nanowrimo competition, where aspiring writers try to write a 50,000-word novel in 30 days; with that kind of deadline, there’s no time to think about plotting or coherence or thinking about anything; there is only enough time to work. (I’ve yet to make a satisfactory entry into this competition myself, unfortunately; I intended to do so back in 2009, but then I started this website, and I found that I didn’t have enough time.)
Now that I’ve mostly cleaned up my shooting space, I really have no excuse not to. Maybe I’ll get to it over the next few days.
I did Nanowrimo a few years ago (07 maybe, I forget) and quite easily surpassed the 50k word quota, though the story was since destroyed re-reading over it and editing to oblivion. Still, it was a good writing exercise. Main thing was to storyboard a plot and key events first. Which I spent a few weeks doing in October, so when November came I just rolled it out. Plotted ten chapters, aiming for ~5000 words each, and hit 67k words. Though as I said, going over it later ended up obliterating it, as such hurried writing is no good. Or wasn’t in my case, anyway.
Still. I should clean up my shooting space fully (having removed most of the clutter is nearly there…) — I haven’t done any real shooting for ages, sorta just “blah” about cameras and figures both. Perhaps a bit of burnout from too much too quickly. Or I’m just lazy.
I really miss creative writing; I remember when my dad bought a PC, WordPerfect was one of my favorite programs. I stopped writing when I hit my teenage years, though … and I stopped drawing, and I gave up any interest I had in learning how to play a musical instrument. That’s pretty sad to reflect upon, since those are all things I really wish I could do now. (Though to be frank, the Nanowrimo story I have in mind is basically one big porno story. My lifelong ambition is to create the best tentacle eroge that the world has ever seen, and I’m viewing this as one step towards realizing that goal.)
The one thing I’d really like to have is a flash with like a dedicated LED modeling light. My flashes do have a modeling light function, but the implementation makes it useless.
Anyway, I’m glad you decided to start writing these guides. One thing I’ve always struggled with is rim lights, so it’ll be nice to learn from the master of rim lighting. I tend to go for the look in the 1st Buddy photo as a default, but I also really like the intimate 1-light look if the figure’s showing a lot of skin 😀
Your comments about sunlight got me thinking. From my experiences shooting outdoors, I’ve found that the harsh midday light is actually not bad for photographing smaller figures (like figmas and Nendoroids). The hard shadows will look softer due to the small relative size of the figure, and you can white balance your camera to produce very warm, golden hour-looking tones. I’d say 1/6 is the largest scale I’d go before the hard light becomes too much of a disadvantage. So basically, useless for those 1/4 scale figures you’re so fond of haha
That would be pretty handy. I recall that Canon made some odd-looking flash that had a video light built into it, but I’m guessing it can’t function as a modeling light, which would seem a bit silly since it ought to have that functionality. Personally, if I wanted a modeling light, I’d just get a little LED flashlight and velcro or tape it to the flash head.
I think I actually use look #2 the most, which is a simple key light/rim light combo with no fill. I’m trying to experiment a little more with fill lighting, since looking back at my old photos, I don’t always dig the split-light style I often use (nor do I dig the really hot highlights, but that’s more of a postprocessing problem than a lighting problem).
I’m not sure if the small size of the figure causes the light to get any softer; the sun is really, really frippin’ big, so the relative softness of sunlight is going to be the same whether you’re shooting a nendoroid or a skyscraper. I would guess that small subjects like nendoroids just have flatter faces and fewer protrusions than many scale-size figures, so that they simply cast fewer shadows (particularly on the face, where they would be most noticeable). Not that I know anything about photographing nendoroids; I try to avoid even looking at them, most of the time. I’ll be honest, if I were a landscape or cityscape photographer, I would absolutely shoot during sunrises and sunsets as much as I could, but I do not own many figures that would benefit from shooting during those times. Thinking about some recent figures I’ve photographed, Cryska Barchenowa, for example, would look completely wrong if photographed at sunset. Mai Shiranui would work; Nymph would probably work but less well (I think that her blue and white colors – the colors of the sky – are important, and washing them out in golden tones would be a mistake, in my view). Tomo could work but a golden light would not be my first choice for her. And so on.
Regarding the shadows for figures in sunlight, you can think of it in terms of the working distance. With small figures you move up a lot closer to get the proper framing, so the shadows appear softer because you’re close enough to see the falloff as a gradient. The details would also be proportionately smaller so the lighting can appear to be more nuanced. If you’re photographing a person standing 6-8 ft away, the shadows will appear sharper because the edge gradient (penumbra) will be small relative to the size of the subject.
You can also think of it this way: the apparent size of the sun in the sky is actually not that large. It’s only about 30-ish minutes of arc when seen from the ground, so you can treat it as a small but extremely bright light at a fixed distance. All the same considerations concerning the relative sizes of subject vs light still apply.
Ah, I think I see what you’re talking about. We can indeed test this sort of thing. Here’s a picture of a tangerine and my trusty rocket blower, lit by a fairly soft light source:
I’m standing a few feet from the subject. Here’s a picture with everything the same, except I moved back to a range of about 25 to 30 feet:
Does the light appear any harder? I would not say that it does, even though the rocket is barely over 80 pixels high and the tangerine is barely 25 pixels square in the thumbnail. Let’s look at a crop of the image:
I think the lighting quality looks basically the same as in the first image.
I think I get what you’re saying, though; you’re talking about a loss of detail and subject resolution due to being too far from the figure. That doesn’t affect the softness or hardness of light; the only factor that affects quality of light is the relative size of the light source (the distance from subject to camera does not factor into quality of light). Frankly, if someone were so far from the subject that the shadow areas were smearing and affecting a viewer’s perception of the softness of the light, I’d say that the figure isn’t actually their subject, their choice of equipment is wholly inadequate for what they’re shooting, or they are a horrible photographer.
Yeah you’re right. Maybe it just has to do with the size of the object? Or maybe I’m just off my rockers.
Yeah, quality of light is dependent on the size of the subject, though I think with sunlight, the sun is so far away that it might not make too big a difference (unless you were shooting something the size of an insect larva, I guess).
It’s all about how parallel the light rays are, which is something I should have recalled. So yeah I’m just off my rockers.
Finally! Yes! Thank you very much!
I am one of those beginners you mentioned. I figure I only need one or two books to understand the basics (like all that F- nonsense ^_^ and exposure times), and would like to hear in your opinion where to start.
Oh and what camera do you use?? J/K ^_^ I know you hate that one.
Seriously, what basic features and controls are needed to go from beginner to intermediate skill level with one camera. I think the one I have (SX-1) is more than sufficient, but I would like to make sure.
I bought Joe McNally’s “Life Guide to Digital Photography”; I think it provides a really good introduction to beginning concepts, such as exposure (like the F-stop stuff and shutter speeds, which took me about a year to figure out on my own). Unfortunately for me, I bought the book after I already understood a lot of the basics, but I still enjoyed reading it because I have great respect for the photographer. His other books (“The Moment it Clicks,” “The Hot Shoe Diaries,” and “Sketching Light”) are all a huge source of inspiration for me; the first two might have had the most impact on my own way of shooting (perhaps aside from the HappySoda website).
There is also a neat Flash thingy at Stanford University that visually explains exposure very well. You can play with the sliders and very easily see how changing values will affect the picture.
I’ve also been thinking of writing a “Complete Noob’s Guide to Getting Started With Figure Photography” (I’ve even picked out the title) that would talk about that sort ot stuff, approaching the topic from a very low-budget point of view.
I’ve never heard that question before! I use a Fuji Instax 210. (I seriously do own one and have taken a number of figure photographs with it. Unfortunately, most of them are framed very badly, since the viewfinder is not set up very well for close-up photography …)
I think an SX-1 should be fine; here’s a picture I took with a Canon SX120, which is a fairly low-end pocket superzoom point-and-shoot camera (I bought it for around $70, I think, since at the time, I did not have a cell phone with a camera and I wanted a camera that I could throw in my backpack and not worry if it got lost, stolen, or broken):
It’s not a fantastic picture, but I do not know if anyone would be able to tell that I shot it with a very cheap camera (apart from cheating and examining the EXIF data).
As far as camera features that are useful for figure shooting, the number one thing I’d pick is probably minimum focus distance; since figures are very small subjects, it is very useful to be able to focus closely. Fortunately, most point-and-shoot cameras have this capability, and since the SX-1 is a superzoom camera, you can get close-up shots by just zooming in further. I’d also say that focus accuracy is very important; with my previous camera, I never really trusted its autofocus system and thus I always focused manually. I don’t know if compact cameras have good autofocus systems – I’d be surprised if they do, honestly – but they also have deeper depth of field which makes pinpoint focus a little less important. And then I’d say that manual metering modes are useful, and the SX-1 does indeed have this.
If I were starting out all over again, I think this is what I’d do:
1. Get a tripod. You really, really need a tripod, unless you’re shooting with flash or in daytime sunlight all the time (and if you’re shooting with flash, you are no beginner). If you’re shooting indoors, a really cheap tripod is fine; I used a really crappy Best Buy tripod for well over a year, and I sometimes still do, because it’s a lot lighter and easier to set up than the far more expensive semi-pro tripod I bought later on. (If you can, get a tripod with a ballhead; they make it much, much easier and less frustrating to set up your framing.)
2. Get a desk lamp with a cool-running bulb, like a fluorescent bulb (you absolutely don’t want to use a hot-running light, like an incandascent or halogen bulb; the risk of starting a fire with such a bulb is very high, I think).
3. Construct a simple softbox. Just open up a cardboard box – if you collect figures, you probably have lots of shipping boxes – and tape/glue/attach some sort of diffusion material to one end. This diffusion material can be anything that is white: paper towels, the soft tissue-paper that Hobby Search wraps figure boxes in, or white fabric (fromt a fabric store, or from such as a bedsheet, a shower curtain, or a hacked-up t-shirt).
4. Set up a shooting location and place your figure. Put your softbox off to the side so that it faces the side of your figure’s head. Put your light in the other end.
5. Put your camera on your tripod and try to move as far back from your figure as you can (at least a few feet).
6. Zoom in and try to fill up the frame with your figure. Adjust your light if necessary; try to get it as close to your figure as you can without it actually intruding into the frame.
7. Set your camera on manual mode if it has it (I think most of Canon’s superzoom cameras offer the PASM modes – or in their parlance, the P, Av, Tv, and M modes). Set the image quality to its best setting (typically called “Superfine” or something like that). Set your ISO value to 100, or whatever its base ISO setting is (it’s probably something like 60, 80, or 100). Pick an aperture setting that you like; to start, you can go with the lowest F-number that you can get. Then set the shutter speed until the meter readout points toward the middle. (Alternatively, set the camera in aperture priority – Av – mode and the camera will do this for you.)
8. Take a picture and look at it on the LCD. If it seems too dark, set a slower shutter speed and if it seems too bright, set a faster shutter speed (if you’re in aperture priority mode, adjust the exposure compensation; if it’s too bright, lower the exposure compensation to some negative value and if it’s too dark, increase the exposure compensation to some positive value.)
9. Experiment with different looks, different light positions, adding in fill, adding in more lights. And have fun!
Oh cool, that could definitely help
I have no intention to explain such things, because I have not enough confidence in my techniques to show them as a positive example. When you would see how I’m using my flashes, I guess you would facepalm all day XD But oh well I’m blessed with coincidencial success and so I’m having fun. I guess starting with static light is best (and cheaper) for beginners.
raw sunlight is really the worst lightsource, you better use the early light or the one in the evening, or a cloudy day.
On occasion I hear people say that sunlight makes for the best light, and then I look at their pictures and they’ve got these nasty bright spots all over their figure. Sometimes I wonder if people even look at their pictures before making such poorly-informed declarations.
This guide will be very great for those who wanted to venture on figure photography. Gonna have to read this with interest, not to mention it’s pretty easy to read and not too intimidating like some medical books, ouch
I hope that it is helpful. Haha, yeah, I tried to write this to be accessible; considering how easy it is to take a picture, it can sometimes be quite difficult to understand the most basic concepts. I’m certainly still learning them myself.
Hey! Old post sorry i know but I have been meaning to ask and try find out ; v ;
Do you know where people get backdrops for photos?
Like you know the ones on official release pictures, the ones that have nice textures and stuff?
Do people buy these or get them printed? I cant find ones like that on the net, so I would think you would have an idea or recommendation!
I do not know where figure makers get their backdrops specifically, but it’s pretty easy to find or print backdrops. They’re usually mind of vinyl, canvas, muslin, or some other sturdy fabric. B&H Photo sells a whole bunch (mostly sized for human subjects), and unsurprisingly, there are a ton of options available on eBay (mostly from Chinese sellers, who are always very enterprising in these sorts of niches). Just search for “photo backdrop” and some keywords, like color or fabric choice. Alternatively, you can print your own if you can print large enough; you can just search Google Images for some examples.
I did get your e-mail; comments from new commenters have to be approved before they show up here, since I get about a thousand spam comments per month. But once you’ve had a comment approved any subsequent comments should show up instantly (unless they contain a bunch of hyperlinks, which my spam filter sometimes flags as possible spam).
Ahhh thank you for the answer, I found some from a card from a supplier just now with the pattern i was looking for!
Thanks for the clarification, ill keep that in mind next time ^^
Also whats your opinion on using reflectors for light, would you say there are better alternatives?
You’re welcome! I guess I don’t have a specific opinion on reflectors; I think they’re a good choice and I use them a lot, though my primary light is usually a flash fired through a small-ish softbox. I’m usually more concerned with what I can do with the light rather than where it’s coming from; a lot of times, I just use whatever is easiest to work with. For example, if I want to add some fill light from below the figure, I’ll almost always use a sheet of paper as a reflector, since I usually can’t fit a flash there without it photobombing the picture.
Hello. Thank you very much for this great lightning guide. I was just getting started in toy photography one year ago and bought myself a softbox that I think is to big. The light is illuminating almost the whole room. So i guess i need to look out for something smaller. In some of your pictures I think I found what I am looking for. So in one of the comments above you posted a picture of a rocket blower and a tangerine. In the second picture there is a softbox. I was wondering what kind of softbox this is. Is it a Lumiquest? So i was wondering if I am able to use a different light with this instead of just putting it on the flash of a camera. And what could that be? Simply a bulb or like you mentioned a flash? Can you help me? Thank you in advance.
Thanks for the kind words. Man, scrolling up through the comments is like taking a step way back in time, but I guess it was only five years ago. Yeah, it’s a Lumiquest Softbox III. I still use it all of the time. You can probably use it on any other sort of light but you’d have to improvise some way to attach it; it’s really meant to be used with a light with a rectangular face. Personally, with camera flashes being so cheap these days (Amazon sells an AmazonBasics flashgun for under $30 US), I would just use a flash. (Admittedly the cost of triggers and rechargeable batteries brings the price up a little higher.) If I were using a desk lamp – and I haven’t used one in nearly a decade – I’d probably use a small cardboard box with a sheet of white cloth (or paper towels, which is what I think I used to use) on one side to diffuse the light.
Well thank you very much for your answer. I already built a softbox by myself like you described in your guide. I used what we call „white bread paper“ in german to diffuse the light. I think it worked pretty well. But looking at the photos i had another issue. Maybe you have an idea what to do!? like you said i placed the light right next to the figure. I am using Hot Toys figures most oft the time so there i have this catchlight-effect in the eyes. I know many people are looking forward producing this effect but im am not. So the problem is not that there are reflections in the eyes of the softbox or comic boards i use. the problem is that the reflections are huge. It almost looks like eye disease. I dont know if you know what i mean but the eyes look pretty „milky“. I changed positions of the figure, the light and even used a smaller softbox or changed the position of the comic boards reflecting the light. But the effect is still there. I ordered a polarizing filter but i dont know if that helps out. Do you have an idea what could help?
Are you talking about glare in the eye caused by your lights? Yeah, that’s pretty annoying to deal with, if that’s what you’re talking about. There’s a couple of ways to deal with it; you can move the light or you can edit it out in post-processing. I’m lazy so I just Photoshop it out. You can look at some tutorials on Youtube for avoiding glare from people wearing eyeglasses; it’s the same principle.
Hey! Thanks for the awesome lighting guides you have made, that have been really helpful for me. Are there any plans of making an updated guide on equipment you are currently using? I’m quite puzzled for things to get now days with figure photography. Thank you <3