Photography can be a funny thing. You sometimes hear people – and camera companies – minimize the difficulty of photography. After all, all you do is press a button and bam, you’ve got the shot. Much easier than, say, drawing or painting, right?
Well, no, or at least, the case is not as clear cut as it may appear. The illustrator starts with a blank sheet of paper and has full control over what goes on it. The photographer, in contrast, has much less control. When you put a camera to your eye to make a picture, you’ve got dozens of decisions to make. How should you arrange the elements of the picture? Where do you focus? What goes into the frame? What gets left out of the frame? Then there’s lighting. Color. Perspective. And then there are the technical factors: what shutter speed? What aperture? And if things are moving, you’ve got to worry about shooting at the right fraction of a second. With all the factors that go into a good photo, it’s a wonder that we aren’t paralyzed before snapping a shot.
A skilled illustrator can usually draw a picture pretty close to what she originally envisioned, and if whim and imagination carry her vision someplace else during the process, she can account for that. However, even a world-class photographer will encounter difficulty capturing her initial vision in a RAW file. Sometimes things just don’t work out and you have no clue why. It happened to me just last evening. Last night, I shot off a couple dozen test shots, tweaked exposure, shifted angles, moved my lights around. I switched from a wide angle to a telephoto to a zoom lens racked to somewhere in between the two primes. It wasn’t working. I powered lights on and off, went from a big softbox to a small one to no softbox, put CTO gels on, took them off, and finally, sat down, a quizzical expression on my face, studying the image playback on the camera’s LCD, while all this time Lacia scowled back at me as if to say, “Bitch, you ain’t taking my picture.” It happens. There’s a lot that goes into a photograph.
Sometimes, though, things work out pretty well. Maybe not exactly as you had first planned, but that’s the thing about photography. When things don’t work, you’ve got to be able to reverse course and come up with another idea, sometimes in an instant. But when things do go well, you think, “Man, this is pretty cool stuff.”
The Idea
I’ve used water splashes in a few pictures, but I’ve never really been completely satisfied with them. Maybe my favorite shot in that category was the first picture in my Kurisu Makise post, but it’s always bothered me how it’s not a very sharp picture. Not that sharpness is a requirement for a quality picture, of course, but for this sort of close-up shot, I think a sharply-rendered water drop would have significantly enhanced the effect of the image. But I didn’t have enough depth of field to get both Kurisu’s face and the drop in focus, and I was seeing noticeable diffraction effects at f/22, so f/16 was as narrow an aperture setting as I wanted to use. I didn’t really like the Haruka shot since it looks like a solid pillar of ice growing out of her back. And I’m not too pleased with the Kureha picture either because the water looks like it’s being ejected out of her backside. I wonder if people were too polite to point that out.
A few years ago, I came across this video by Seattle photographer Chase Jarvis and a special effects studio in which they made a picture of a martial artist throwing a punch into a giant splash of water. It was one of the most awesome pictures I’d seen and as I learned more about photography, I thought maybe I could do something a little like that, with my figure interacting with the water in a way that looks cooler and less artificially cheesy than the giant ice spike jutting out of Haruka’s butt.
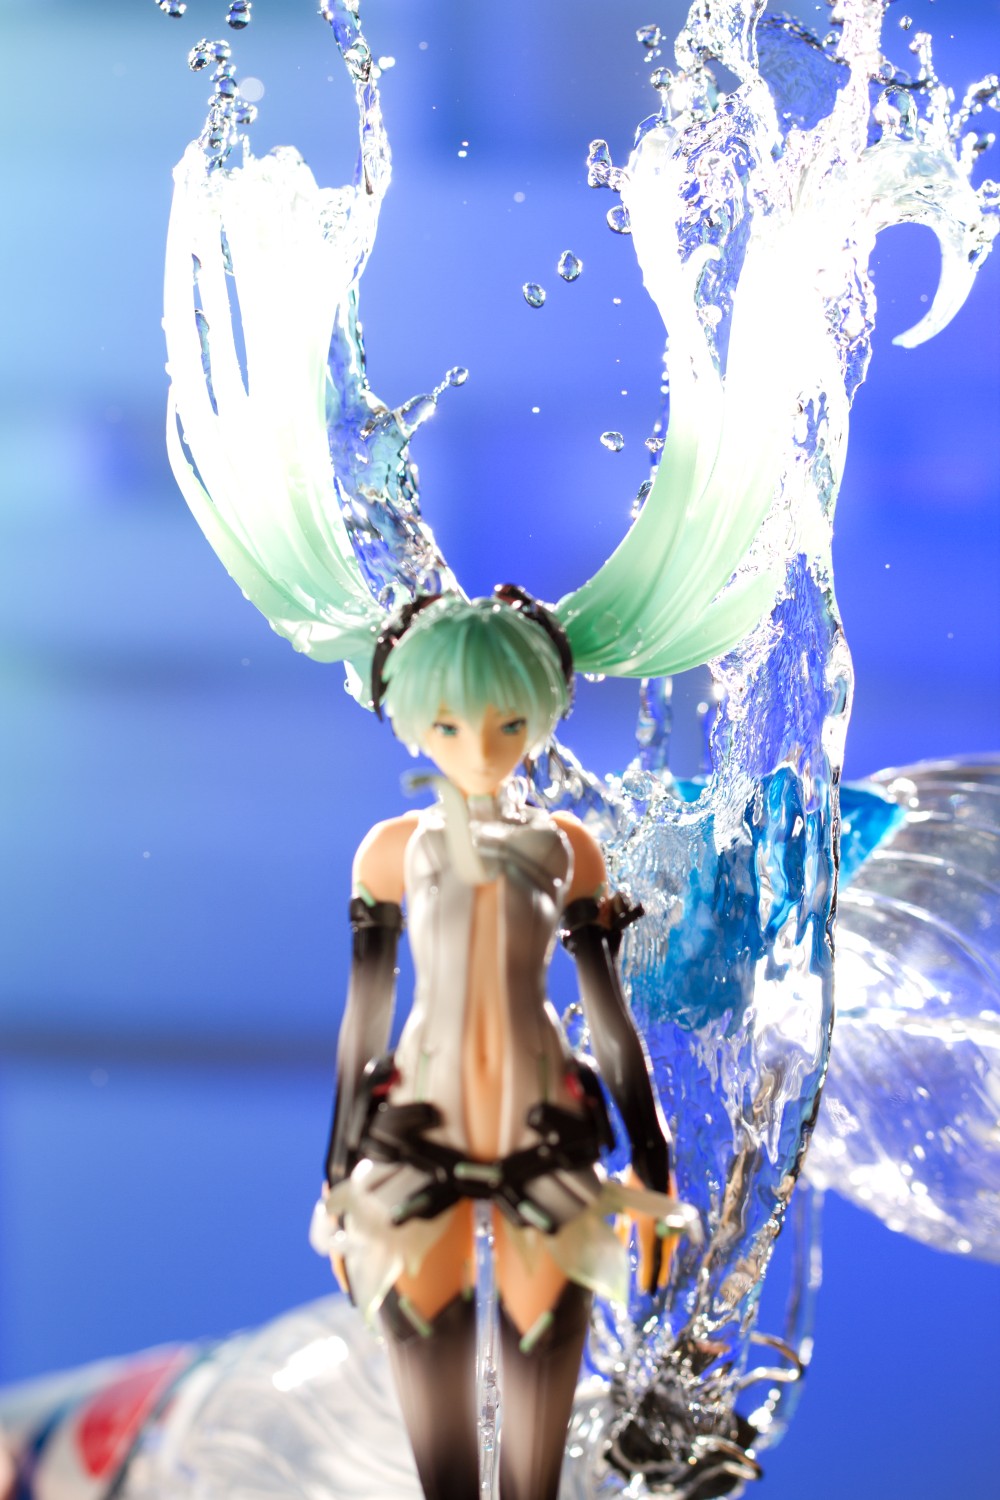
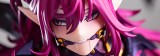
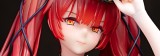
I needed a suitable figure for this shot and the first two candidates were Good Smile Company’s old dark elf and Alter’s Sen Tokugawa. The idea would be I’d photograph a splash of water and then composite over their outstretched hand, giving their gesture an added element of appeal. I’d already written posts for both of those, however, and as time passed I lost interest in the idea. Then last summer, as I was debating whether to order Miku Append, the idea came back to mind. The upward rise of her hair is visually striking, and I wondered how it would look if I set up a shot where it looked like her hair was exploding into water. The idea sparked my enthusiasm and I decided to order the figure.
I’m not a very artistic person. I studied engineering in school and I work as a computer programmer at my day job. I’m much more comfortable with checklists, flowcharts, and plans of action than questions of philosophy and beauty. I’m a lot better at handling problems that have solutions than pondering things that have no answer – things like photo composition, for instance. Fortunately for me, the challenges presented by photographing water drops are in large part technical and I’d already thought of potential solutions to most of them. Unfortunately for me, the unanswerable questions – like composition – don’t go away no matter how technical a photo setup gets.
The Setup and Necessary Equipment
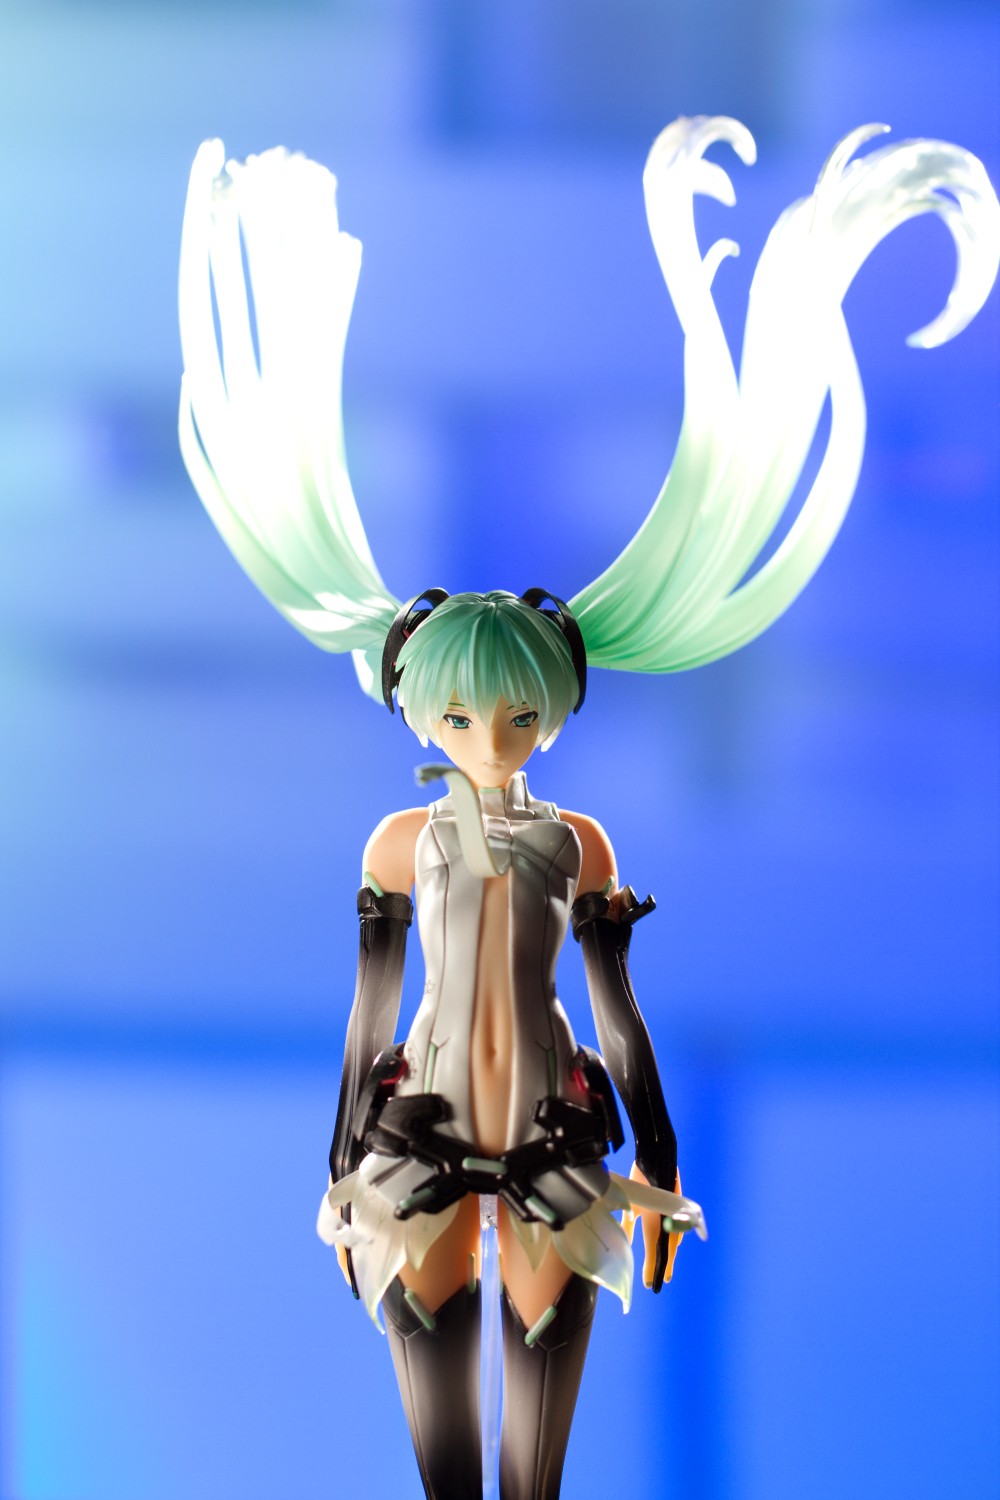
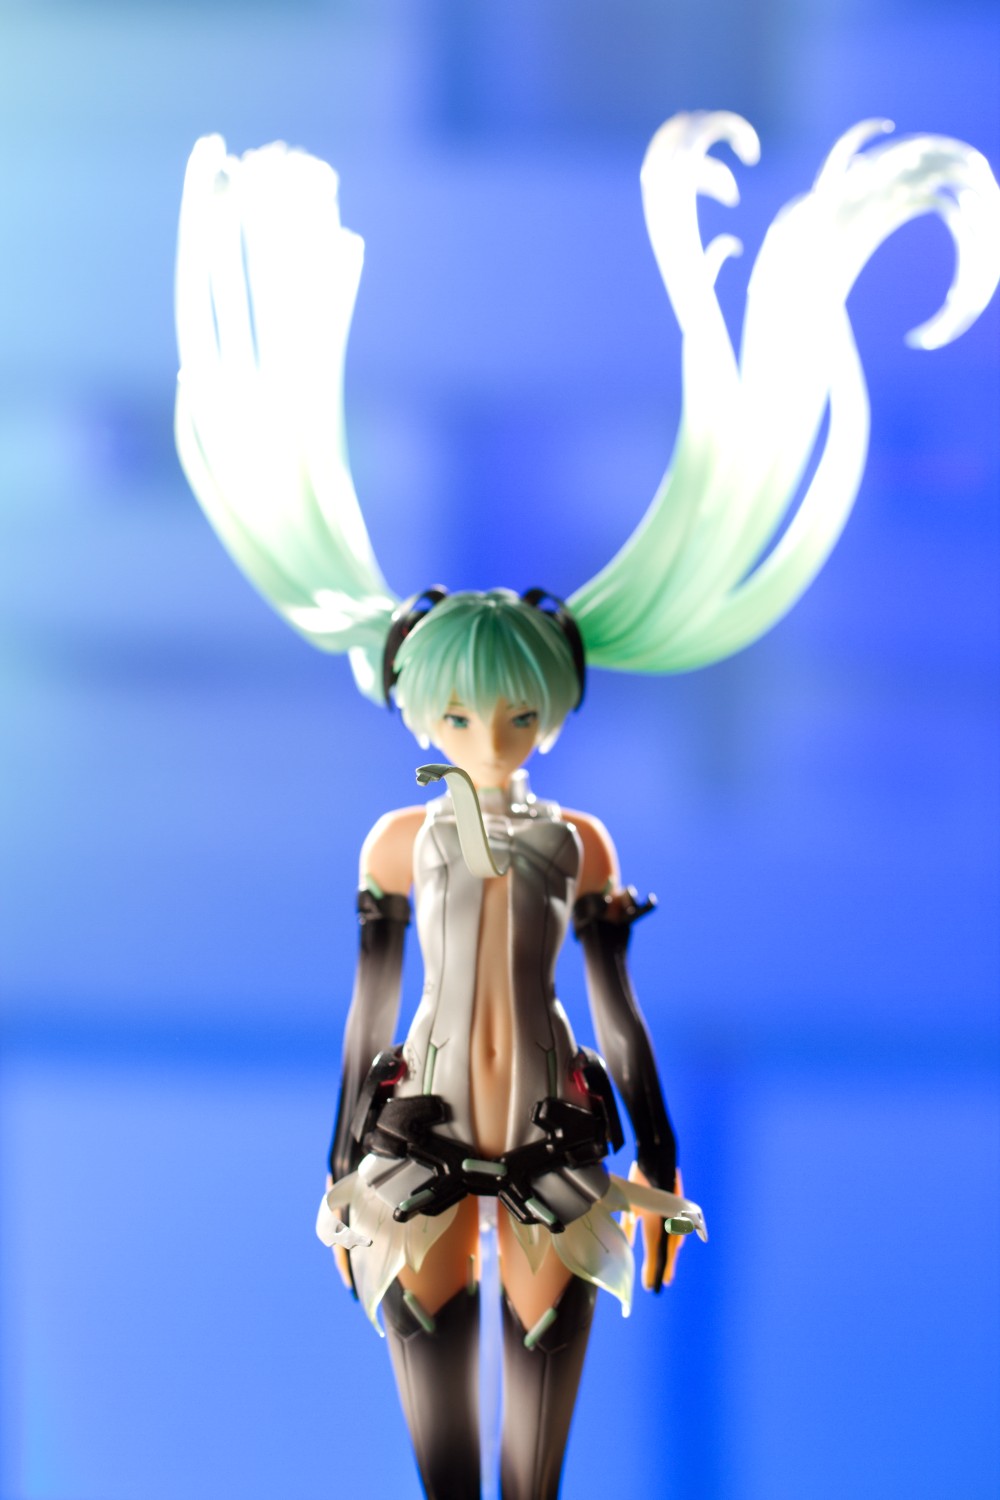
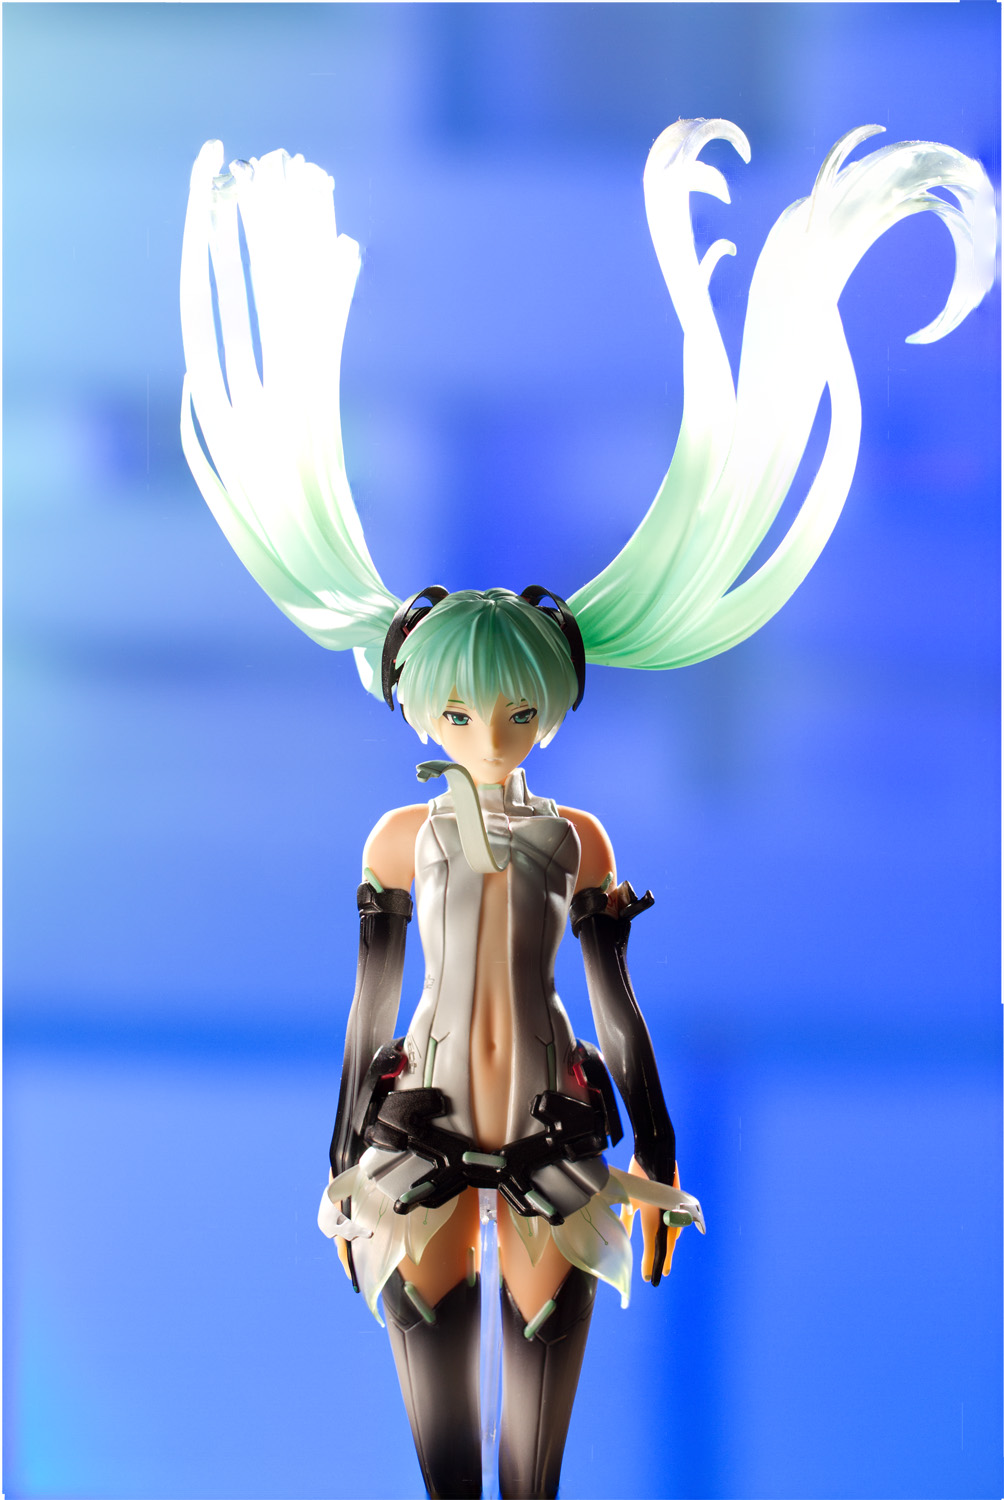
The setup for this shot was a lot less complex than for something like Sasara’s review. At first, I decided I’d go with abstract geometric shapes in the background, and I went with a blue color, thinking that it would provide an attractive complement to Miku’s black, white, and green color scheme. Later I went with a black backdrop.
Since I wanted the water to fly upwards, the figure had to be hung upside down. I built a platform from a wood plank and some threaded metal rod that I had laying around. It wasn’t particularly stable since I only gave it three legs, which had the potential to cause problems down the line, but I was too cheap to buy a fourth rod. The initial backdrop was made out of some white foam packing material.
For this sort of shot, you pretty much need to use photographic flashes. To freeze the motion of a large animal – like a dog running across a field, or a human being – you typically need a shutter speed of something like 1/500 or 1/1000 sec. However, when you’re shooting water drops, the frame is a lot smaller and you’re going to see motion blur at a shutter speed of 1/500 sec. You need a much faster shutter speed than that to freeze the movement of those drops.
Flashes can give you that faster shutter speed, though in an indirect way. Most DSLR cameras restrict shutter speeds to about 1/200 or 1/250 sec when you use a flash; this is because that’s as fast as the camera can sync the opening of its shutter to the flash pulse. If you’ve got a DSLR, you can test this yourself; turn it to manual mode, dial in a shutter speed of 1/1000 sec or so, deploy the popup flash, and press the shutter button down halfway. You’ll see the shutter speed reset to your camera’s sync speed. However, for freezing objects in motion, we can get around this limitation through a quirk in the way that flashguns operate. Many flashes have adjustable power settings, expressed as a fraction of maximum power. Flashguns actually modulate power by varying the duration of the flash pulse. Flashguns fire at the same initial brightness, regardless of the power setting, but at lower power, an electronic component (a thyristor or IGBT) in the flash cuts off power to the flash tube after a certain period of time. For example, at maximum power, a high-end flash like a Nikon SB-900 or Canon 580EX II fires a pulse that lasts about 1/800 sec. At 1/8 power, the pulse lasts about 1/5000 sec. At the minimum 1/128 power, the pulse lasts less than 1/30000 sec.
Take a picture of your desk at a shutter speed of 1/200 sec. It will almost certainly be completely black. When you use a flash at, say, 1/32 power, your camera sees 1/20000 sec of light followed by 99/20000 seconds of darkness, meaning that although your camera’s maximum sync speed may be 1/200 or 1/250 sec, your image has an effective shutter speed of 1/20000 sec – far faster than your camera’s fastest shutter speed setting and fast enough to freeze the movement of a single water drop with no motion blur at all.
That’s one technical problem accounted for – the easiest one, since I already have a bunch of flashguns and I’ve been using them for a while now. There’s still the issue with depth of field, but I had an idea to solve that as well. Adobe introduced a function called focus stacking in Photoshop CS3, where you take a series of photographs focused at different points and then merge them into a single image, giving you a deeper depth of field while not needing to shoot at a very narrow aperture. I also plan on generating the water splashes on her hair by stacking images and selectively masking them to ensure full water coverage of each twintail.
So besides flashguns, you need Photoshop for this image. A note about Photoshop: this image is by far the most photoshopping I’ve ever performed on a photo. Typically, I don’t do a lot of post-processing; my general scheme is to get exposure right in Lightroom, increase global color saturation a bit (usually +3 to +5 in Photoshop), increase red tones in highlights by +4, and sharpen. But I’m not opposed in the least to photoshopping. My belief is that a photographer’s main imperative is to make the image that is in your head and if photomanipulation is part of that process, then go for it. My only beef with photoshopping is when it is done badly; bad photoshoppery sticks out like a man wearing a kufi at a Klan rally.
So those are the technical issues involved in making this image. How did the actual picture-taking go?
Attempt #1 (850 images)
The image I envisioned was one looking at Miku straight-on. I not only wanted water to be flying above her head, I also wanted to have two drops of water colliding in front of her so that she would be looking right at the impact point. I figured that timing a collision like that would be nearly impossible, so I planned on photographing that effect on a black background and then merging it in front of her face in Photoshop later on.
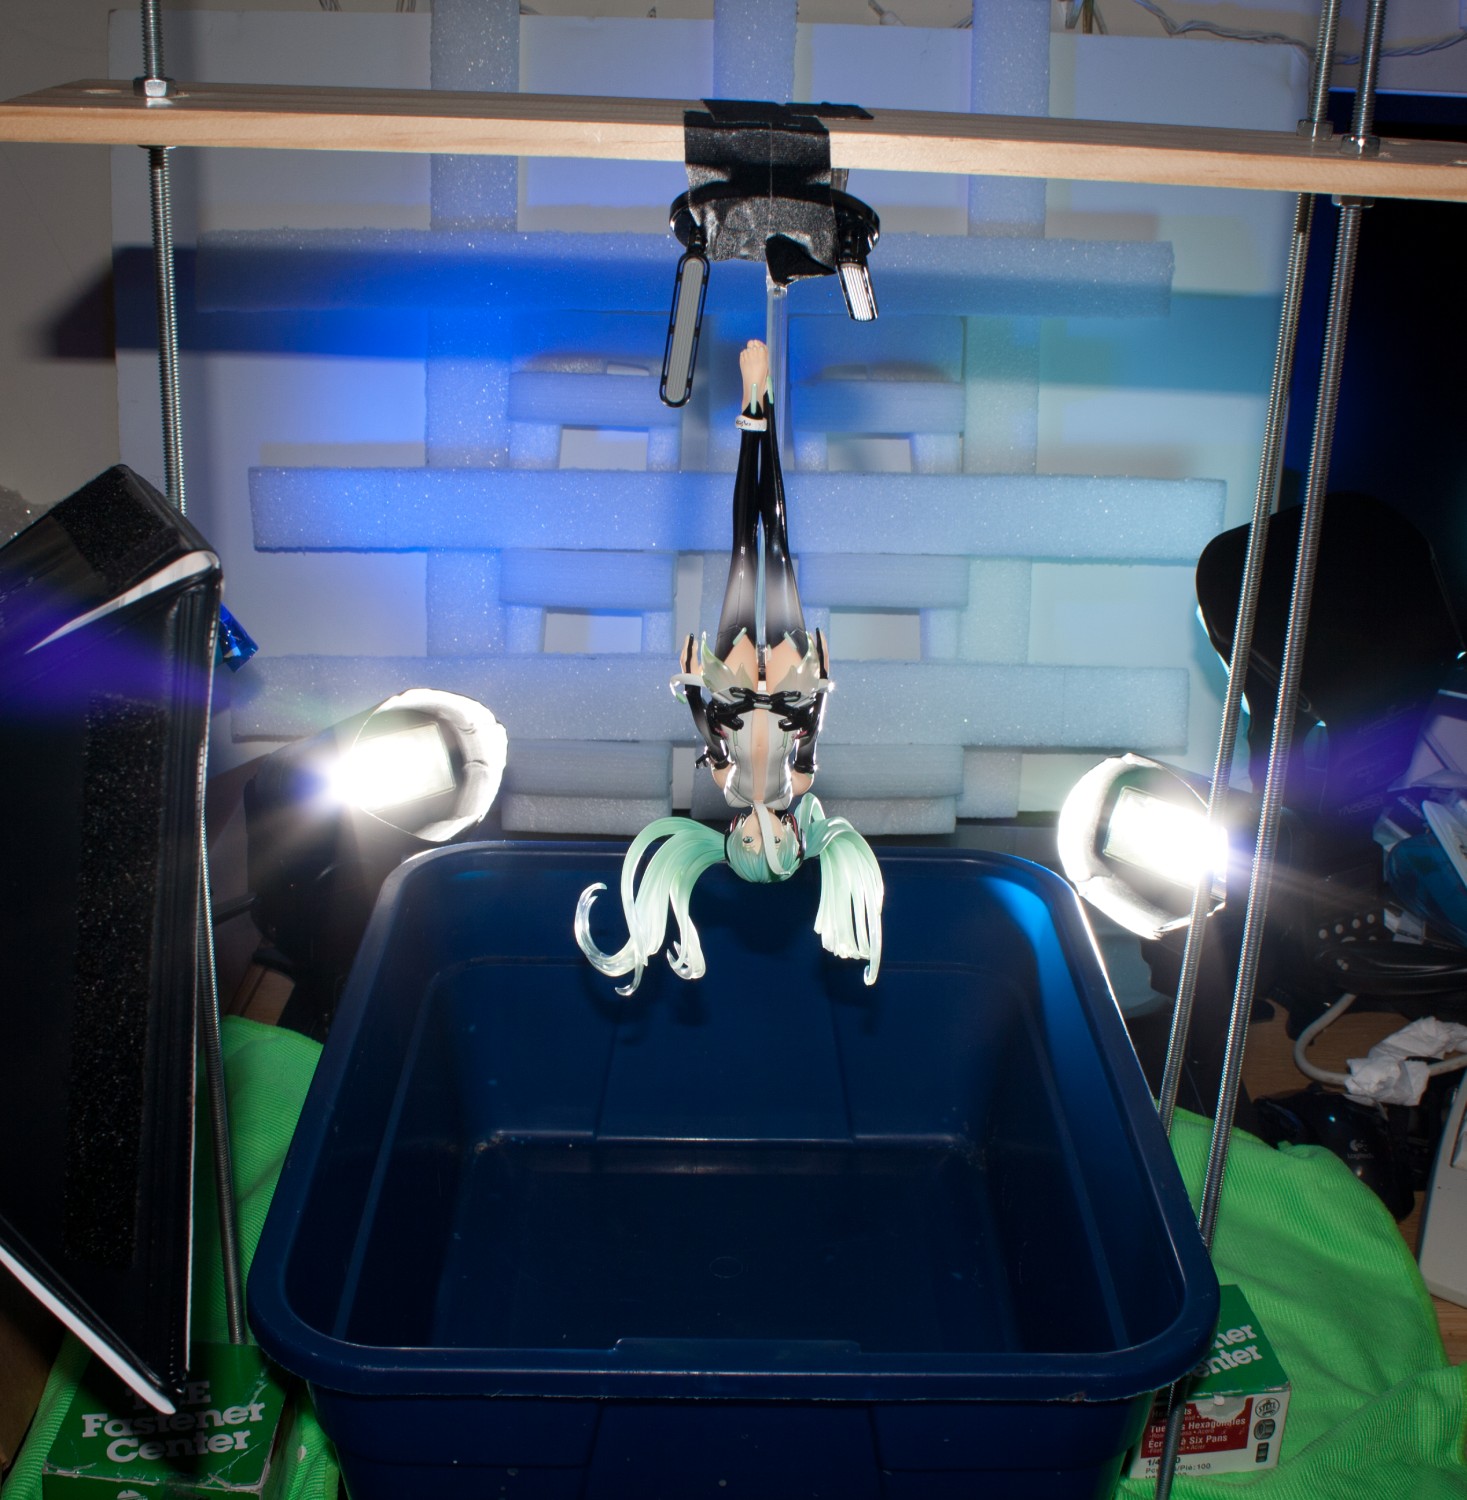
Here’s the platform Miku’s dangling off of. My idea was almost confounded by Max Factory’s unusually-shaped base. Presuming that Miku would come with the typical flat circular base that most figures get, I planned on securing her to the platform with a couple of A-clamps. When I unboxed the figure, I found she had this tiny base with an inclined surface and a couple of fragile-feeling struts underneath. I wound up using a couple feet of gaffer tape to stick Miku to the platform. Have I talked about how awesome gaffer tape is? It’s absolutely amazing. A bit expensive, but it’s way, way better than masking or duct tape.
O hai
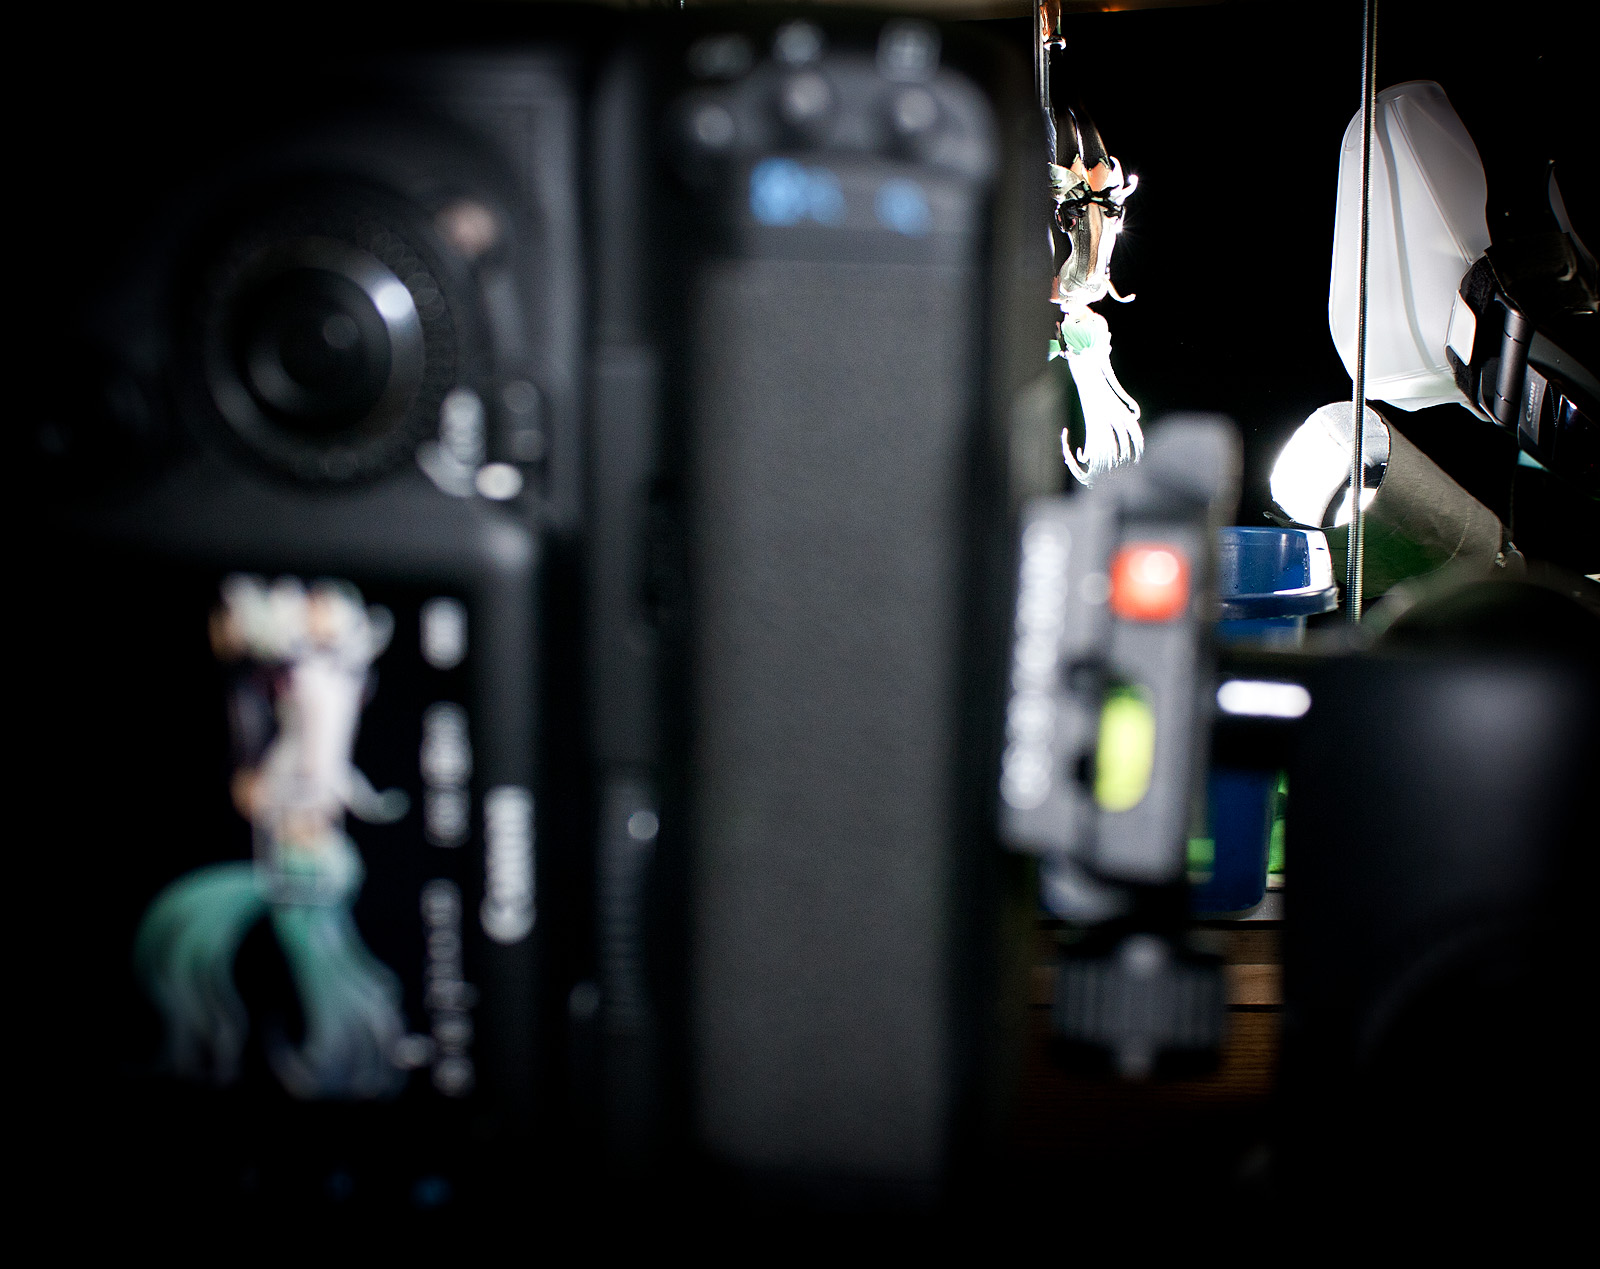
So here’s Miku hanging upside down while I work out exposure. As mentioned, flash power has to be kept fairly low to ensure that the light pulse is brief enough to get sharp water drops. My main flash unit – a 580EX II – is quite powerful for a hotshoe flash, so I’m not too worried about not having enough power, particularly because I’m shooting at a fairly wide aperture – f/3.5 – for a lot of these shots.
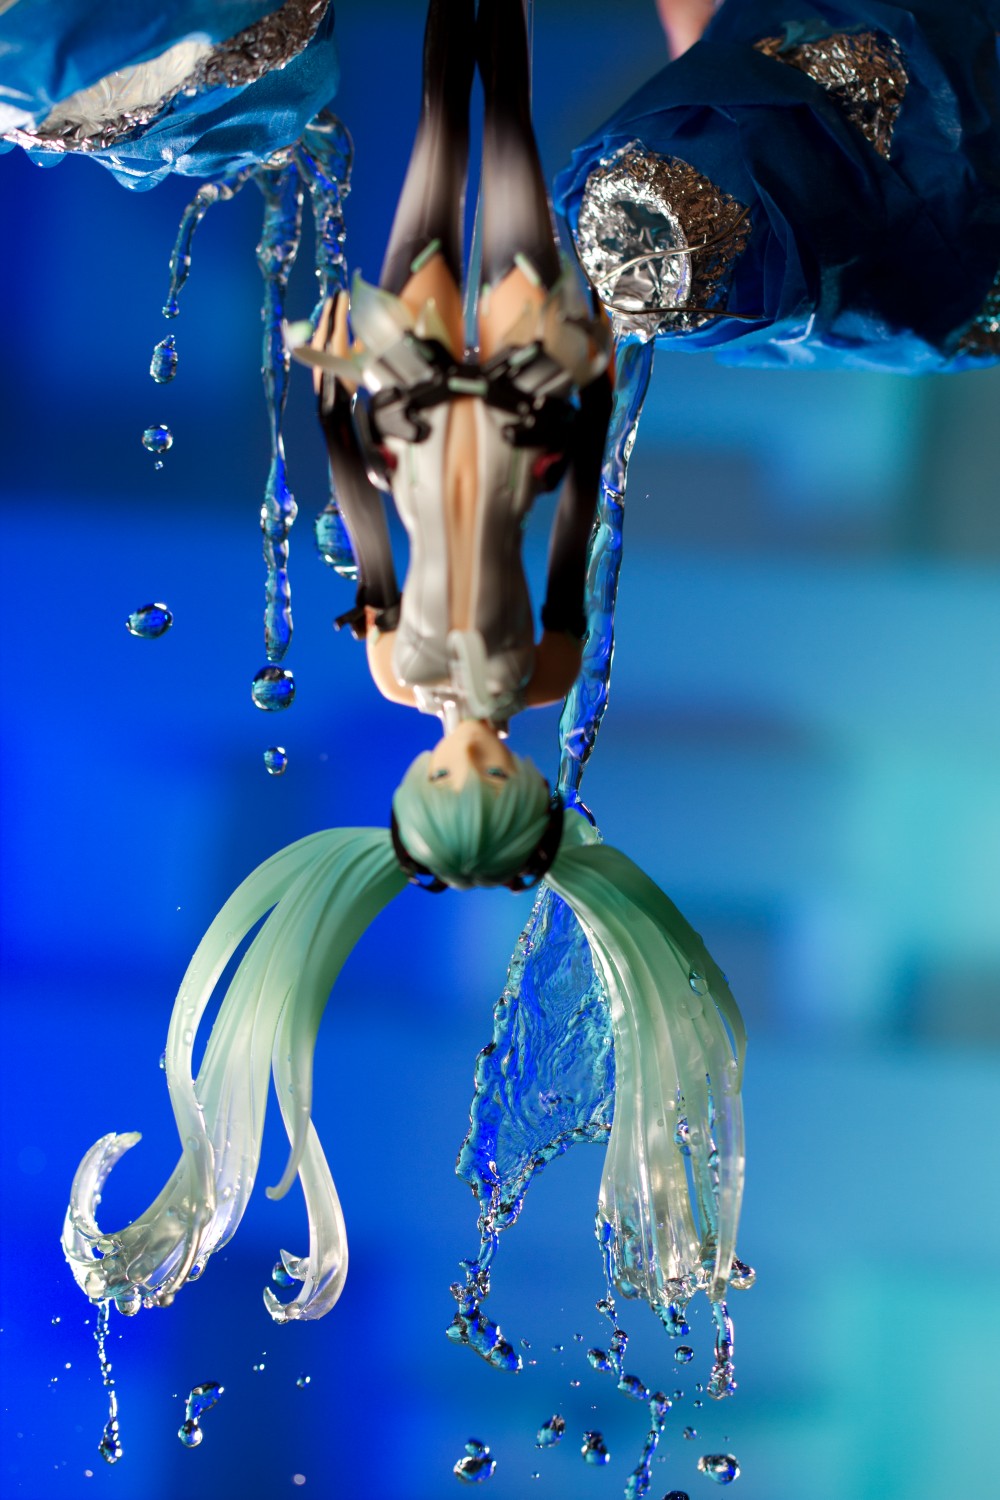
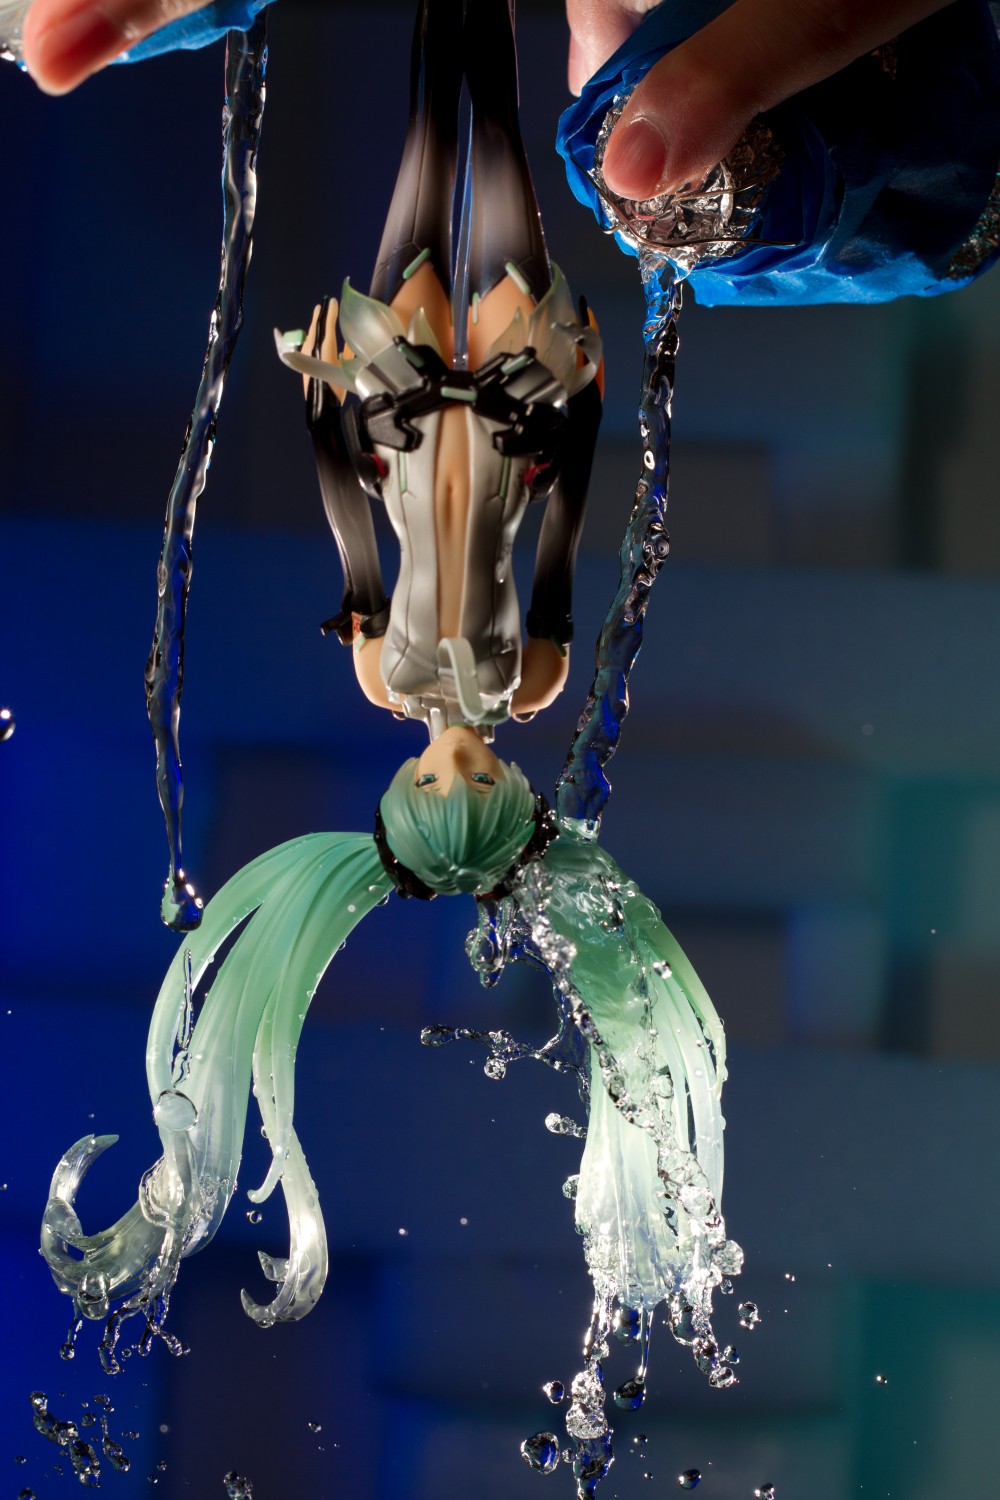
I’m pouring the water out of a couple of soda bottles. I tried to use some twisted-up aluminum foil to block part of the mouths of the bottles in an attempt to break up the water flow, since I didn’t want that ice pillar effect. It didn’t work too well, though; I probably would’ve been better off just covering up the mouth with my finger and agitating the bottle as I poured.
Note that for these images where I’m pouring water onto her hair, I’m only going to be using the parts of the image where the water is splashing onto her hair. The rest is going to be masked out so it’s not a big deal that part of the bottle is obscuring a portion of Miku’s body.
My camera was on a tripod, set to burst-shooting drive mode, manual focus, and I used a remote shutter release. It was quite a pain to trip the shutter, by the way; since I was holding a soda bottle in each hand and the cable release was on the floor, under my foot. When I poured the water, I used my big toe to press the shutter button. It wasn’t as easy as it sounds to coordinate all this, particularly since the cable release’s button sometimes got stuck. Canon’s Rebel cameras have a self timer-initiated burst shooting mode but their higher-end cameras do not, and I wish that those cameras did, since it would’ve come in really handy for this sort of shoot.
With water, basically getting the shot involves a tremendous amount of luck, and that means shooting a ton of pictures. Each trial involved pouring water onto Miku or squeezing the eyedroppers, shooting off three or four shots, cleaning water off of Miku, and refilling my water containers. Not particularly thrilling but at least I had the procedure more or less refined so that I didn’t have to think too much about it.
I focused on the center of Miku’s twintails and I noticed that the water splashing on the front and rear parts of her hair is out of focus. That’s no surprise – I’m shooting at f/3.5, after all. I’m too lazy to go back into Live View and refocus, so I just stop down to f/9.
Which, of course, causes the background to go dark. Oops. I figured I could just get around that in Photoshop. Hmm … no.
After finishing up the shoot, I load the images into Photoshop, auto-align and auto-stack the images to perform focus stacking, and load up one of the shots where water is flying off her hair. And then I realize that since the background is darker in that shot, it’s going to take forever to mask it out. And I realize that I’d have to do that for every shot all the way down each of her twintails. And I realize she’s not even looking at the camera. I also took some pictures of water splashing on a black background and after copying it in as a layer, I realized that I don’t have any idea how to blend it in. So … not much hope there. I decided I couldn’t salvage anything from this shoot and stopped working on the picture.
Attempt #2 (819 images)

Though my first attempt ended in complete failure, I didn’t think it was a waste of time. The most significant thing was that I felt that the idea was sound and that the solutions to the previously-mentioned technical problems were sound. I decided to give it another try.
The basic setup remained the same. I did move in a little closer to get a tighter framing and to reduce the depth of field since I planned on shooting at f/4.5 the whole time. I also ditched the idea of getting two water drops colliding in front of Miku; this time, I decided I’d photograph water squirting out of eyedroppers in front of Miku’s face and hope that something interesting would happen.
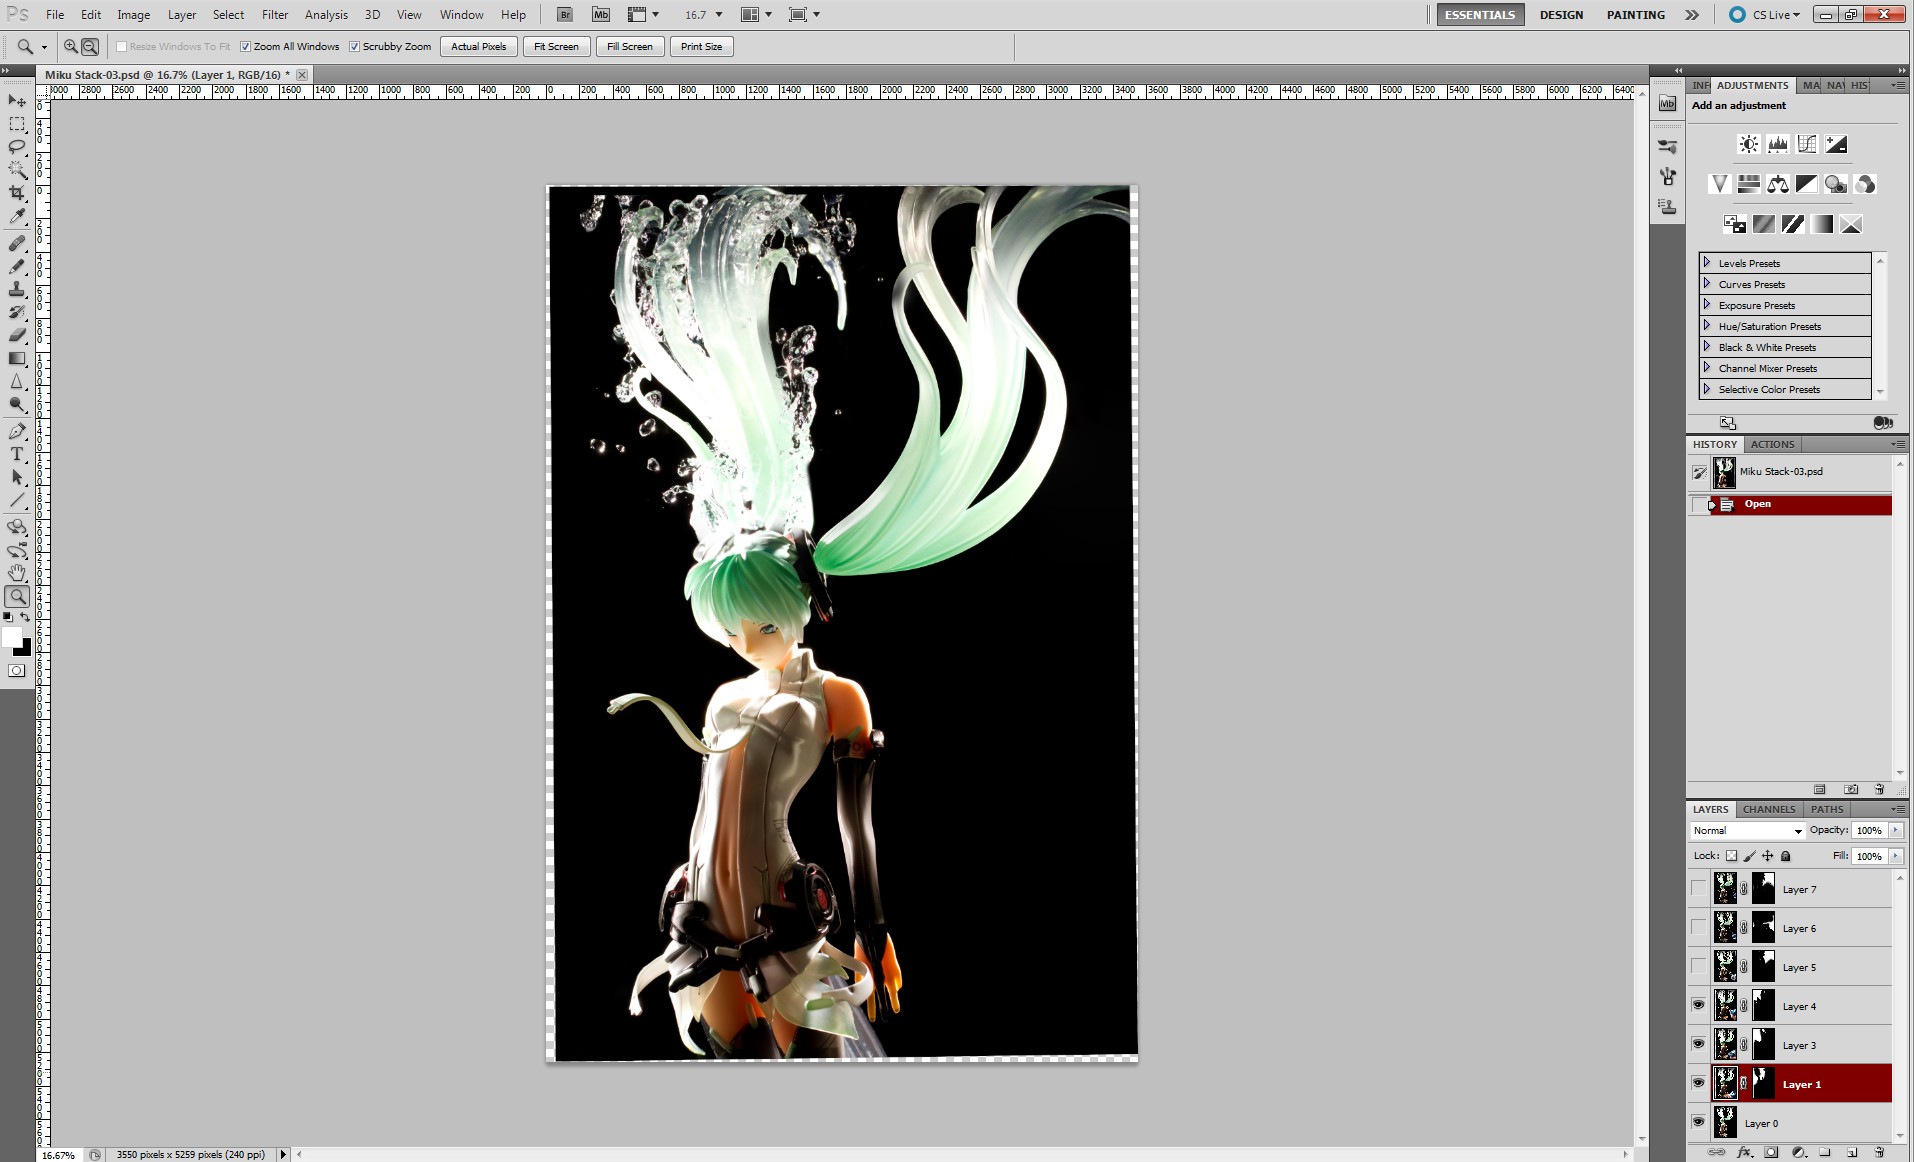
Here’s how focus stacking works. The left image is focused on the rearmost part of Miku’s hair, the second image is focused on the base of her twintails, the third image is focused on her face, and the fourth image is focused on the tip of the strip floating in front of her. Four more images were used to generate the composite; the more images you use, the more accurate the stacking process is. Run Auto-Align Layers and Auto-Blend Layers in Photoshop and you get an image that is sharp from necktie to hairtip:
The stacking operation is remarkably accurate. It adds a little space on the sides, which is easily cropped out. The next step is to get the water on her hair.
Here’s how I got the water effect. I picked out the images that had splash effects that I liked. The picture above is one of them.
I pasted the image on top of the focus-stacked image and masked out everything except for the part of the splash that I wanted to keep. I repeated this process for each image that had a splash I wished to use.
Here’s a splash on her other twintail. After I was done, I got an image that looked like this:
Now that the water effects on her hair are done, I perform basically the same operation to get some water flying around in front of her. The idea here is that I want something interesting to happen in front of her face. If I can get a couple of water drops to splash into each other in front of her, that’d be great, but I’m looking for something that is interesting in general. To do this, I point a couple of eyedroppers at each other and squeeze them.
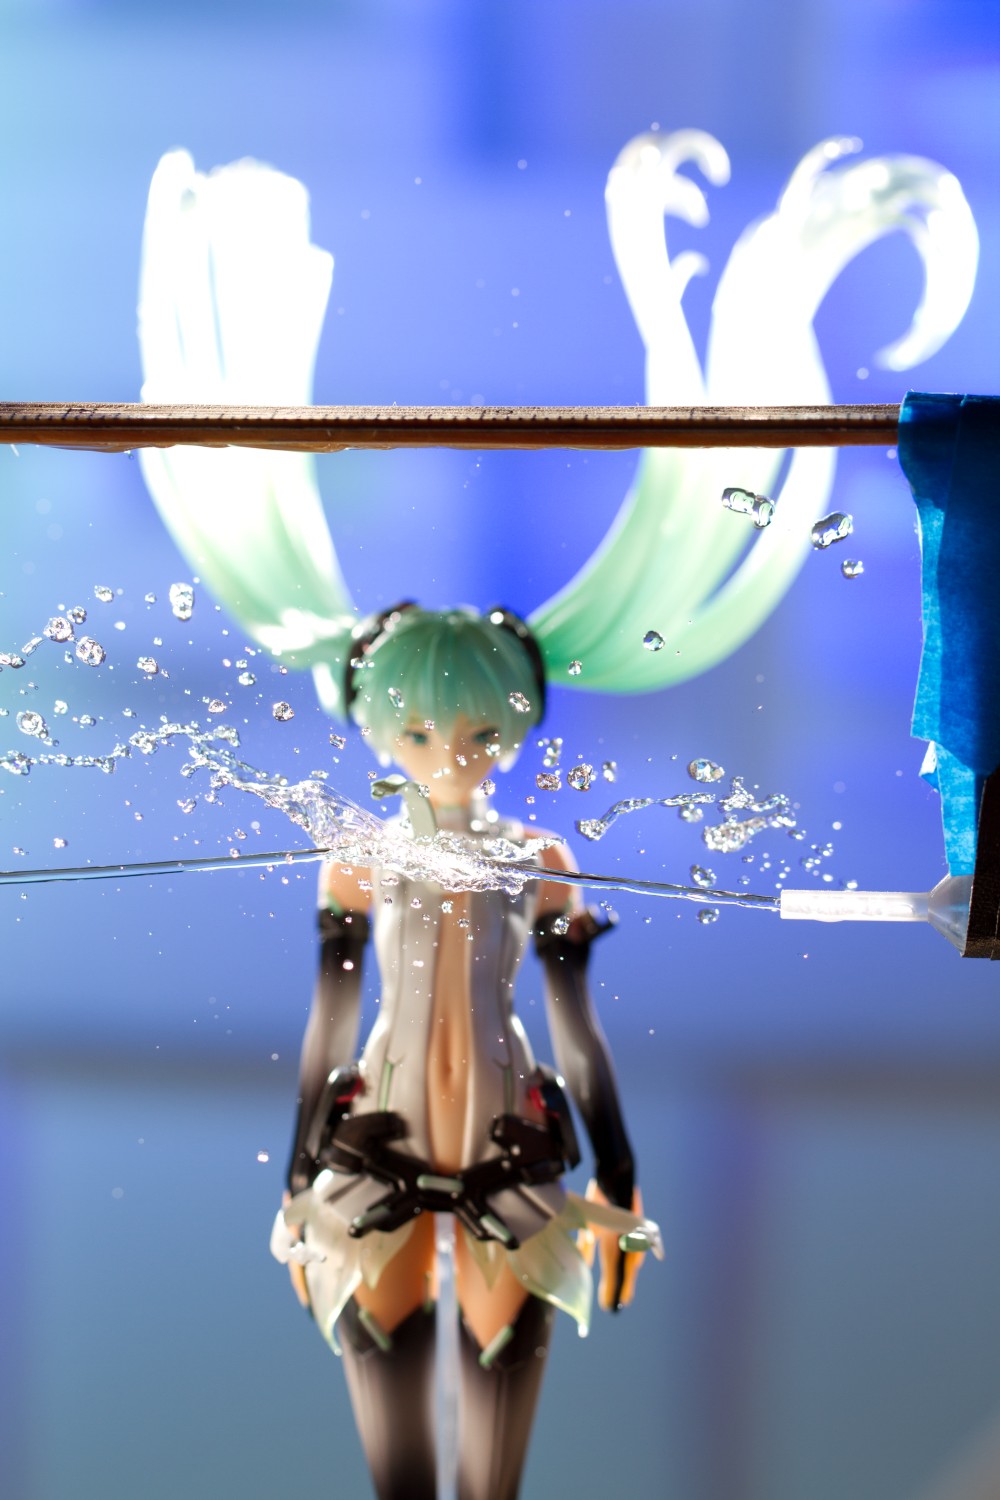
This is probably the best shot out of over 600 attempts. Getting two eyedroppers aimed at each other is way, way more difficult than I thought it would be, even though they’re only a few inches apart.
It’s no wonder I couldn’t get two drops to collide; the streams from each eyedropper are repelling each other! I’ve got no idea why this happens but I saw this sort of thing quite a bit.

After merging in a lot more images, masking, and performing my usual post-processing routine, I got this image, which was pretty close to what I had envisioned. And then … I decided I didn’t like it. I’d managed to solve the technical problems I had encountered but the artistic aspects of the picture bothered me. The composition is poor; Miku’s face is smack in the middle of the photo, which is a weird place for it. The way her legs are cut off at the knees is awkward. The thing I disliked the most is her stare, which is eye-level and simultaneously vacant and disconcertingly intense. I thought this was the image I wanted to make but in the end, it wasn’t what I wanted. Time to go back to the drawing board, this time with more thought spent on the image’s composition.
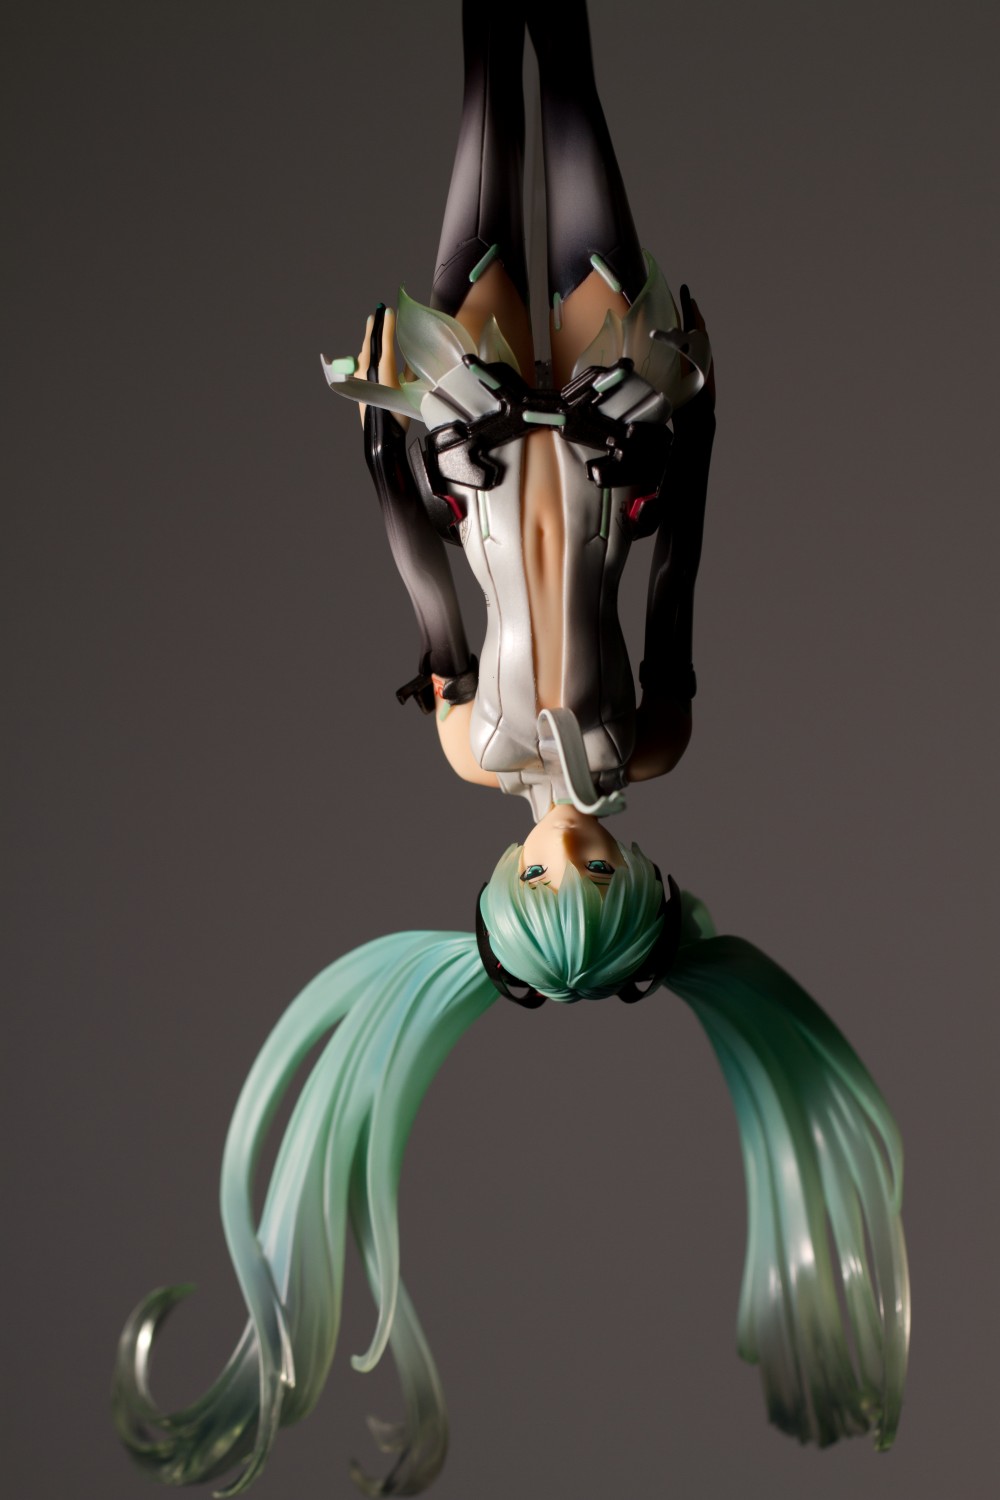
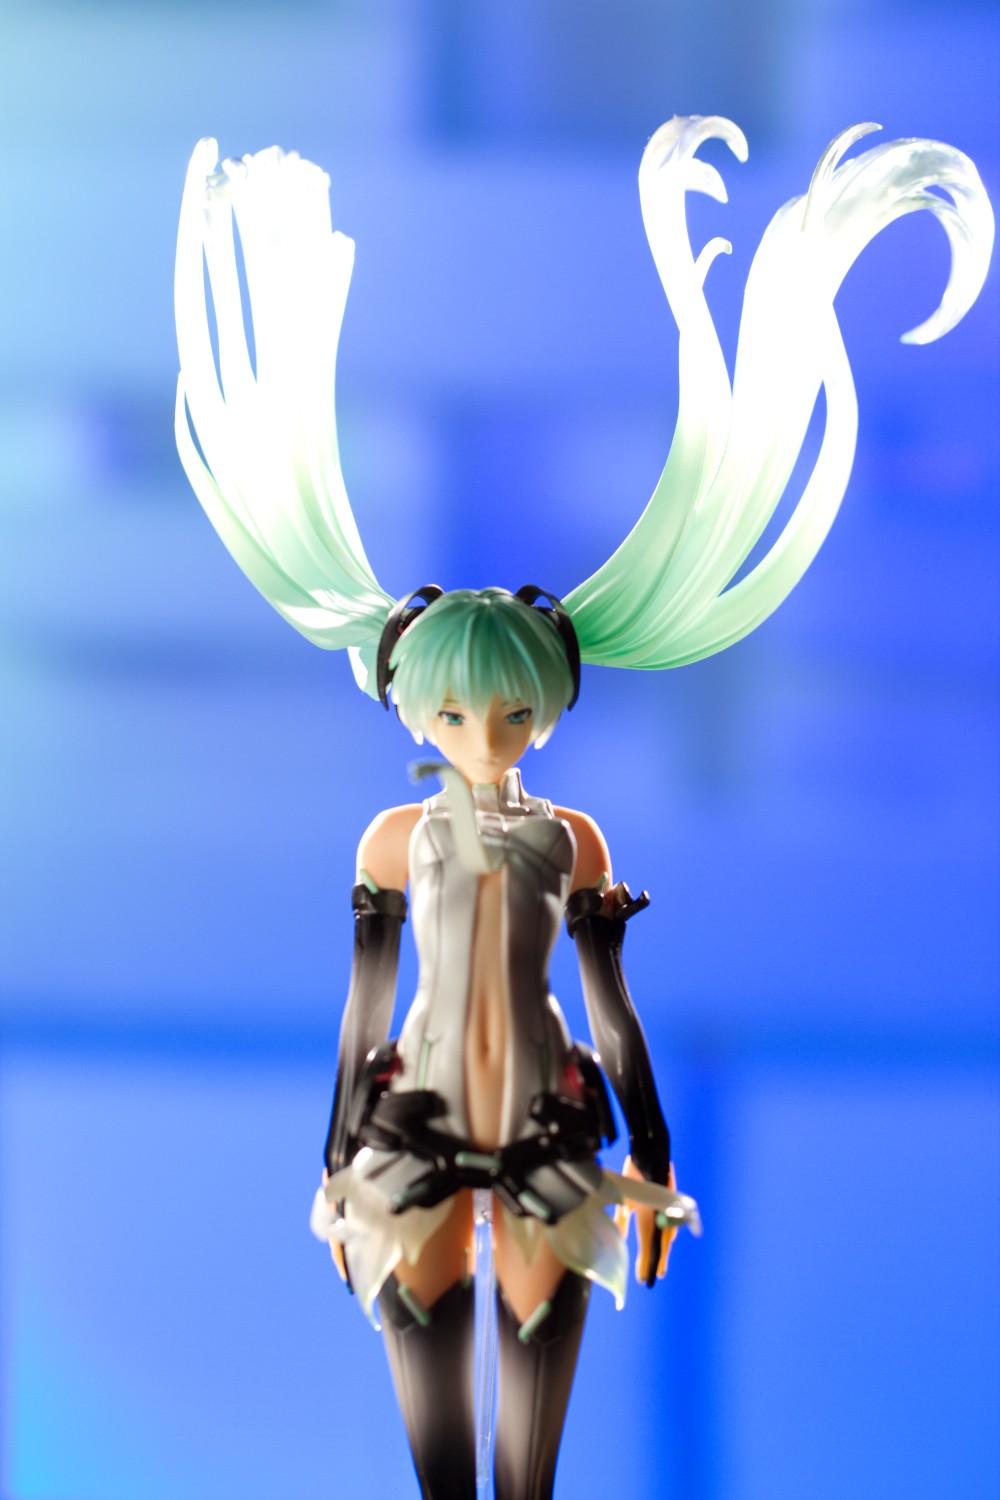
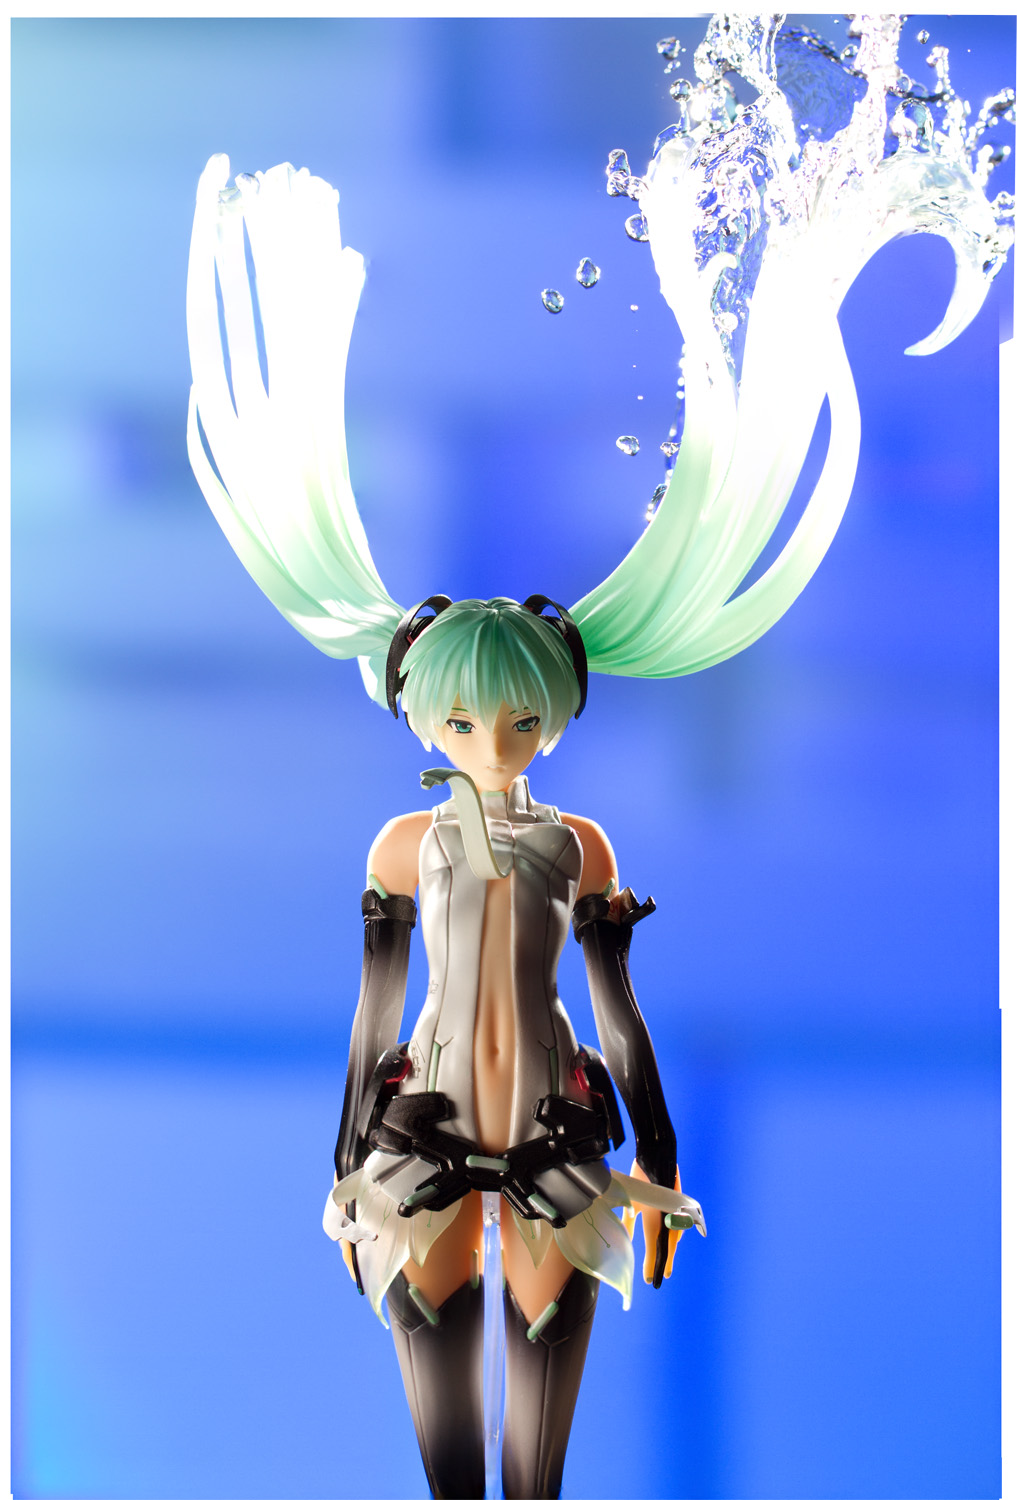
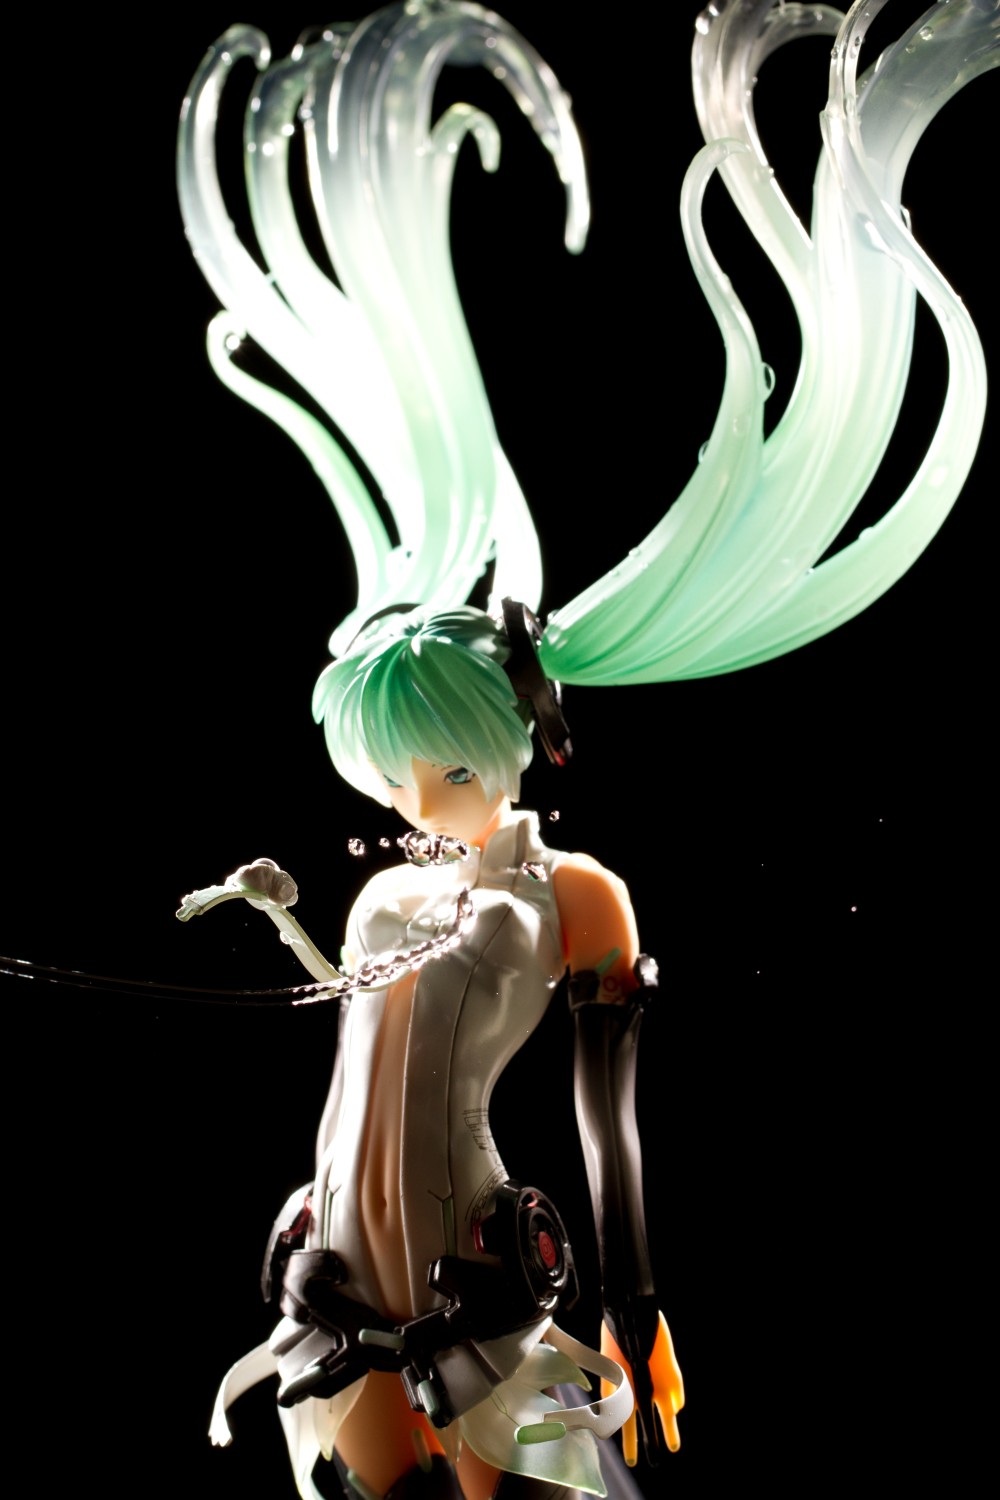
Later, I put Miku on my desk and took a few quick test shots to experiment with different angles. The image I liked the most was this one, where she’s angled away from the camera. After using bright blue backgrounds for the other two shoots, I really liked this darker background and thought that it provided a more appropriate mood for a figure like this. The one thing I didn’t like is the prominence of her chin; to minimize that I knew that I needed to shoot at a higher angle – or, as the figure was suspended upside down, a lower one.
Attempt #3 (734 images)
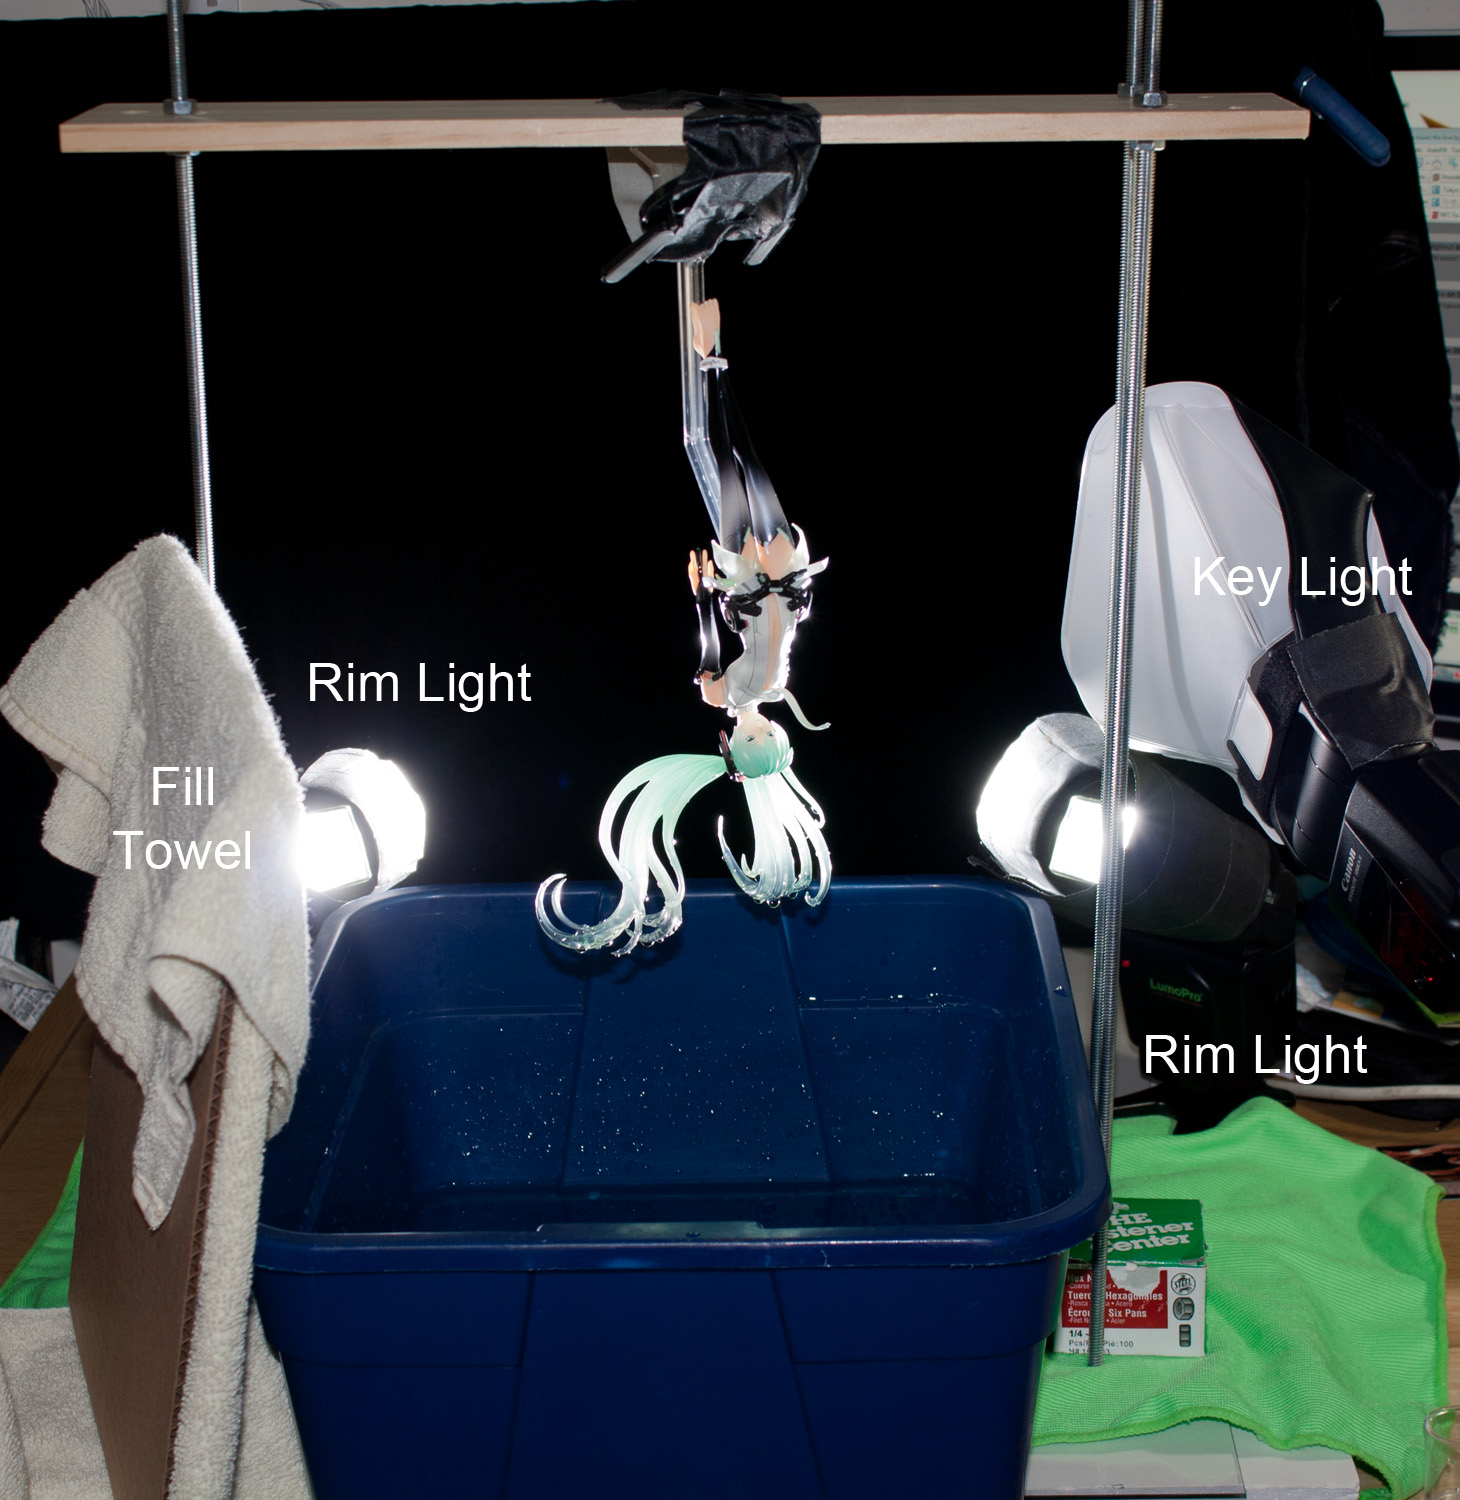
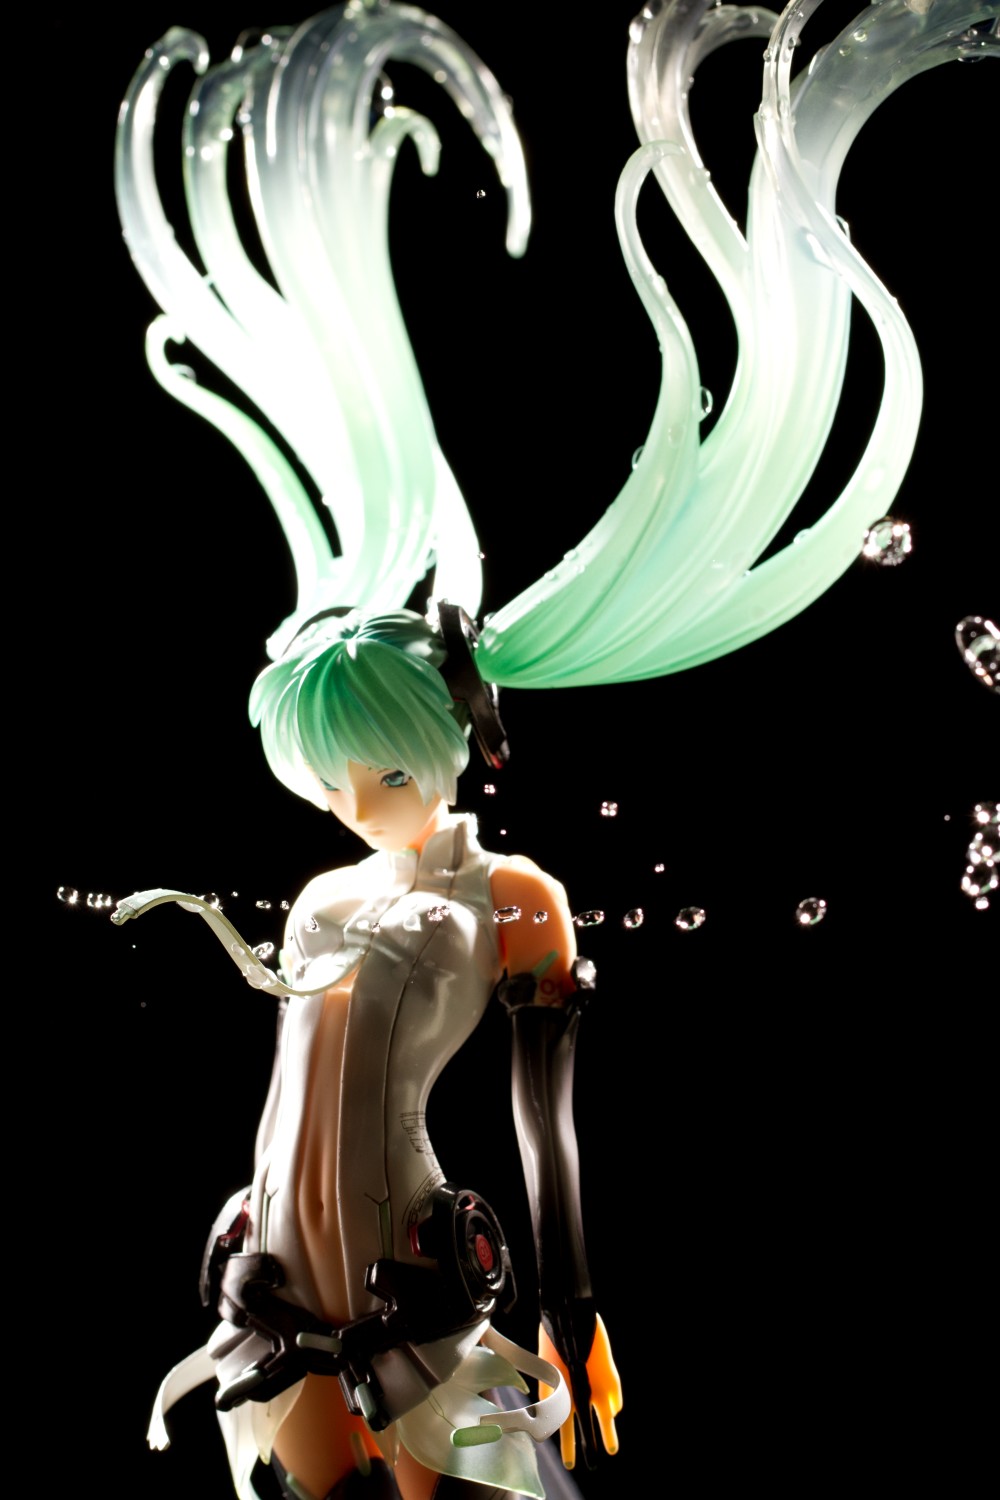
So with that in mind, I set up for another shoot. The lighting system is basically the same – a snooted rimlight on each side to give her body a hard-edged outline, and a key light short-lighting her face with a LumiQuest Ultrasoft modifier.
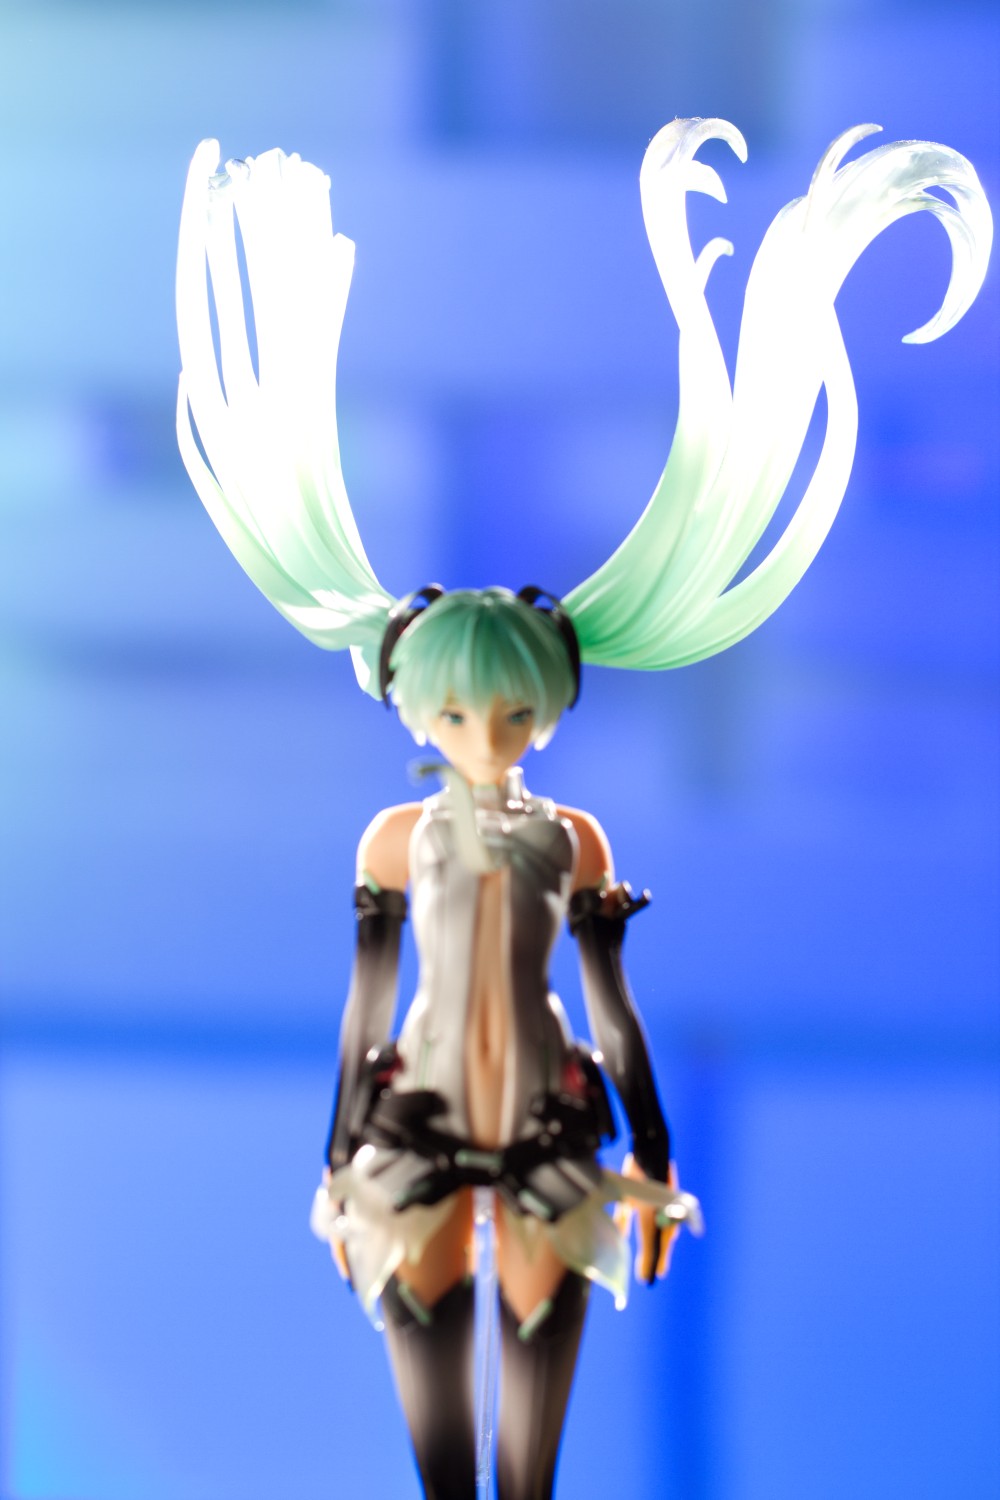
I shot off a bunch of images with focus adjusted in increments from rear to front and focus-stacked the images, as I did with the earlier shoot.
I like the composition of this image far more than the earlier photo. I put Miku a bit off-center since I felt that balanced her hair. She’s looking out of the frame; sometimes people say that subjects ought to be looking into the frame but the way she’s sculpted, I think this framing works better. Also, the bottom frame border set at mid-thigh and just below her fingertips is more natural than cutting her off at her knees.

Sometimes you run into unexpected surprises while shooting. After I had shot the images to perform focus-stacking, I placed a towel – visible in the setup shot – to catch water being ejected from the eyedropper. The towel reflected light coming from the flashguns and filled in the left side of her body with warm light. I hadn’t planned on that at all but I liked how it looked, so I incorporated it into the image. Also, light reflected off of her necktie and filled the lower part of her face with a soft glow, which was something that really pleased me, particularly because I didn’t anticipate it.
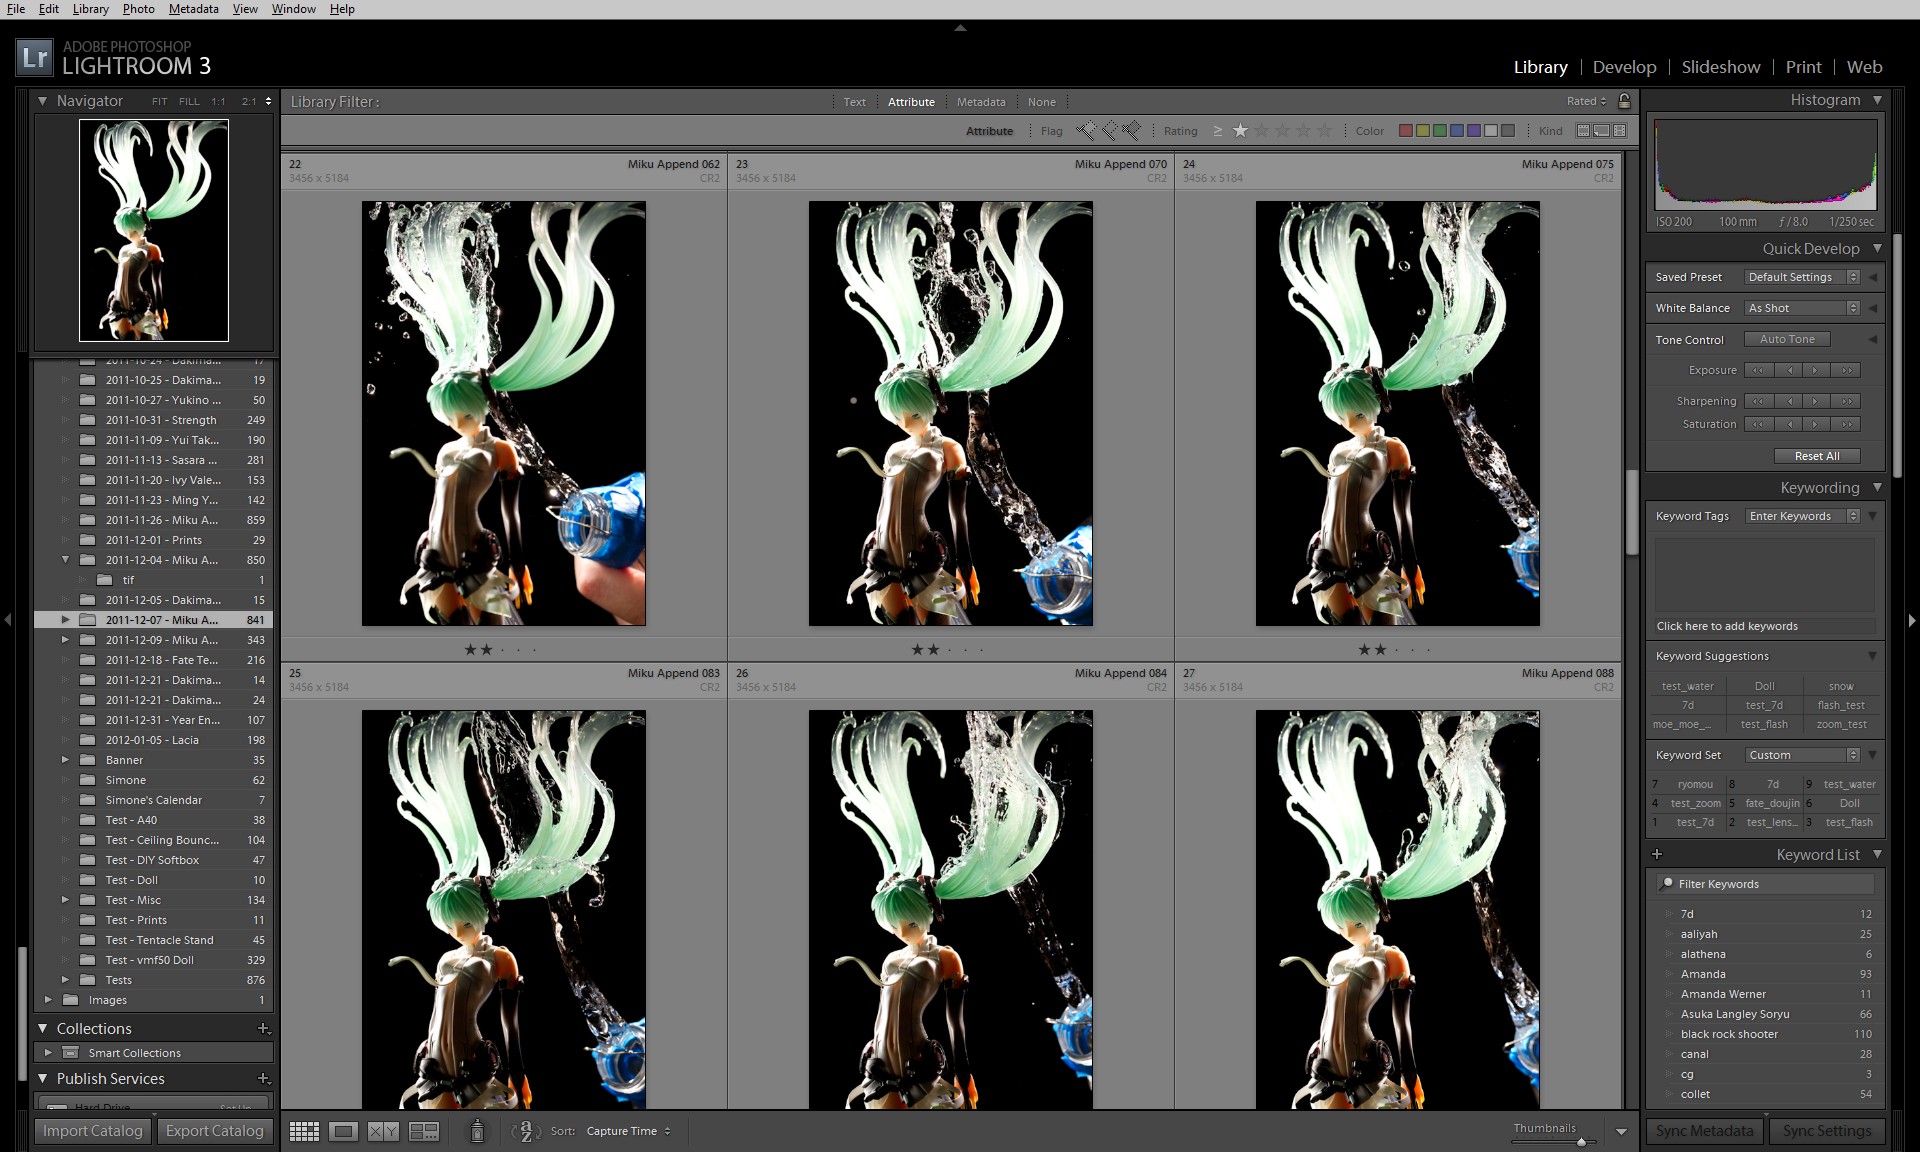
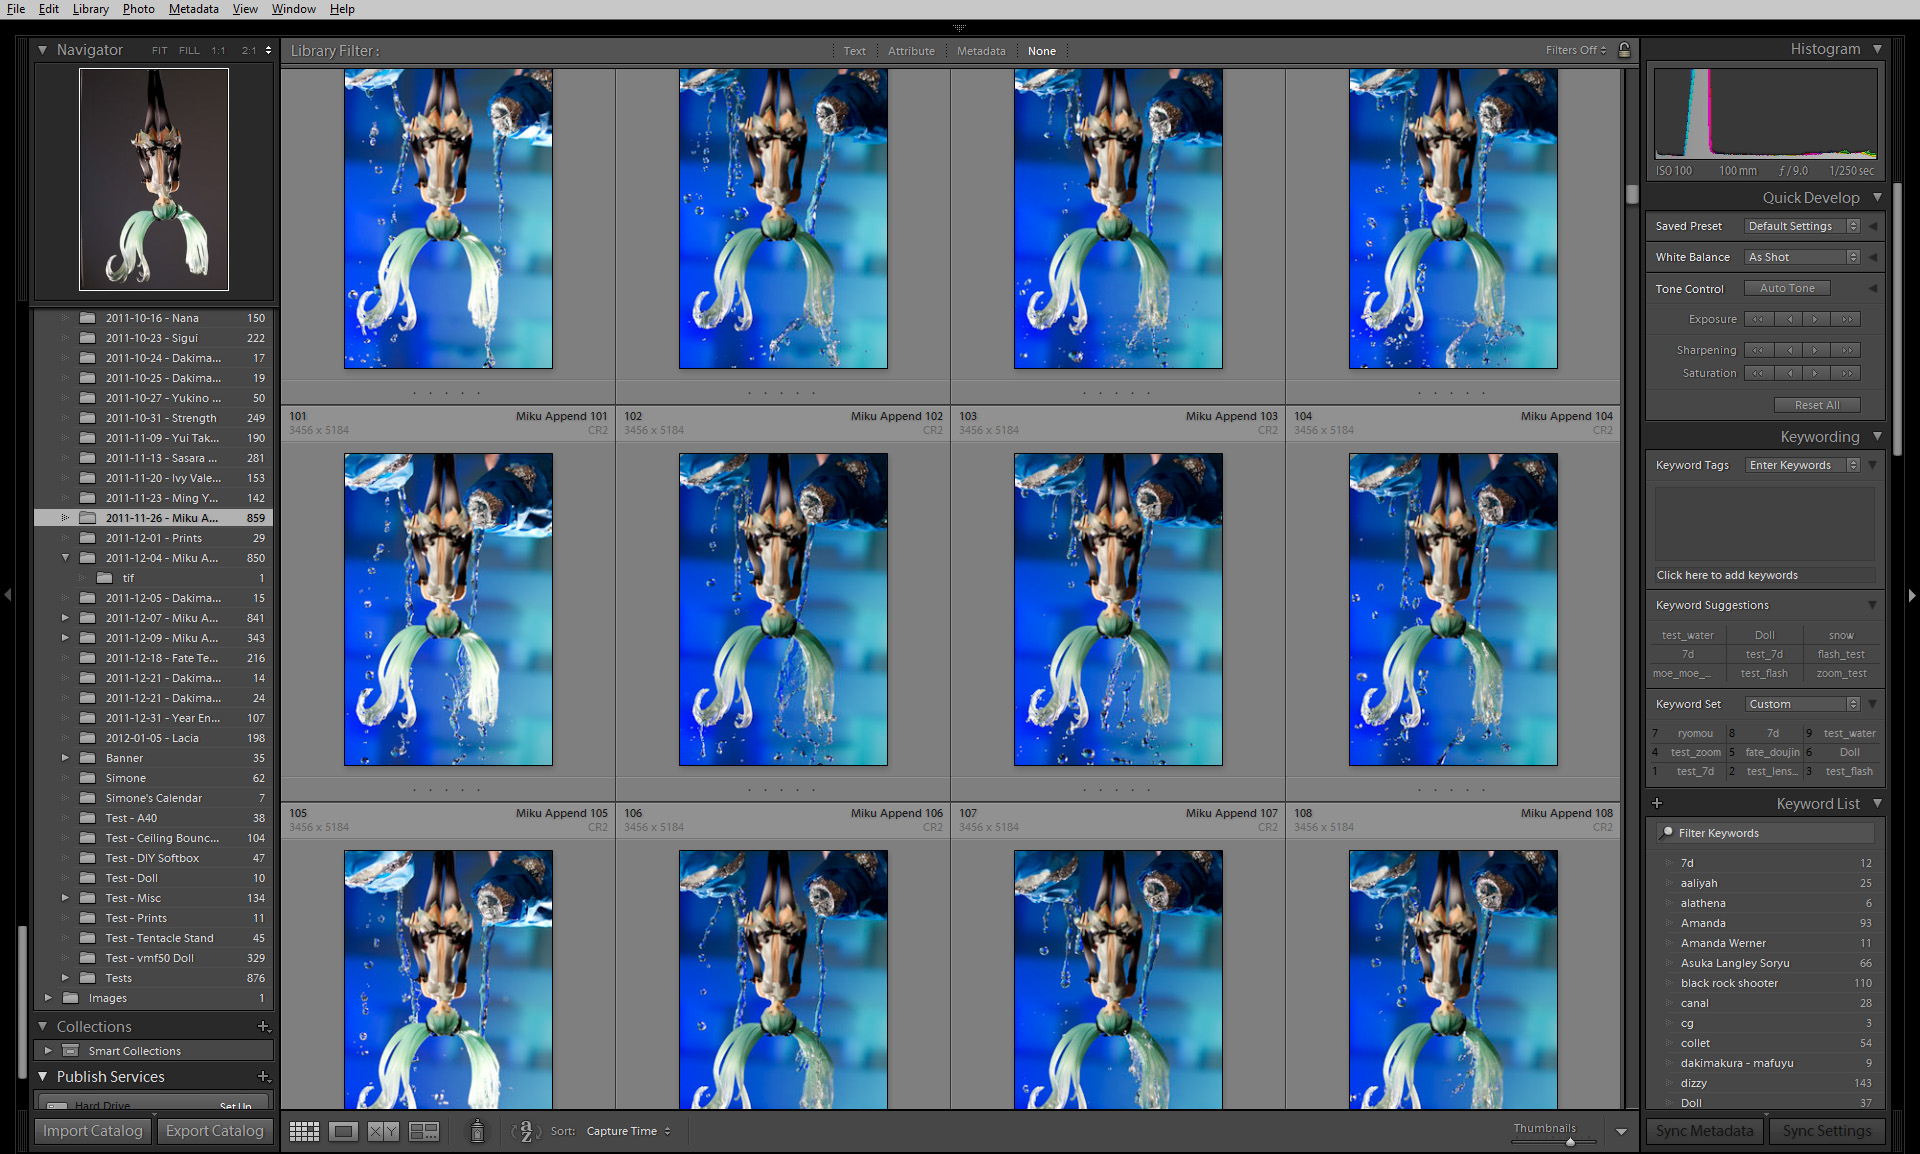
The procedure for getting the water splashes on her hair is exactly as it was before; here’s a look in Lightroom at some of the images I selected for masking.
And here’s how her right hair tail looks after compositing and masking images.
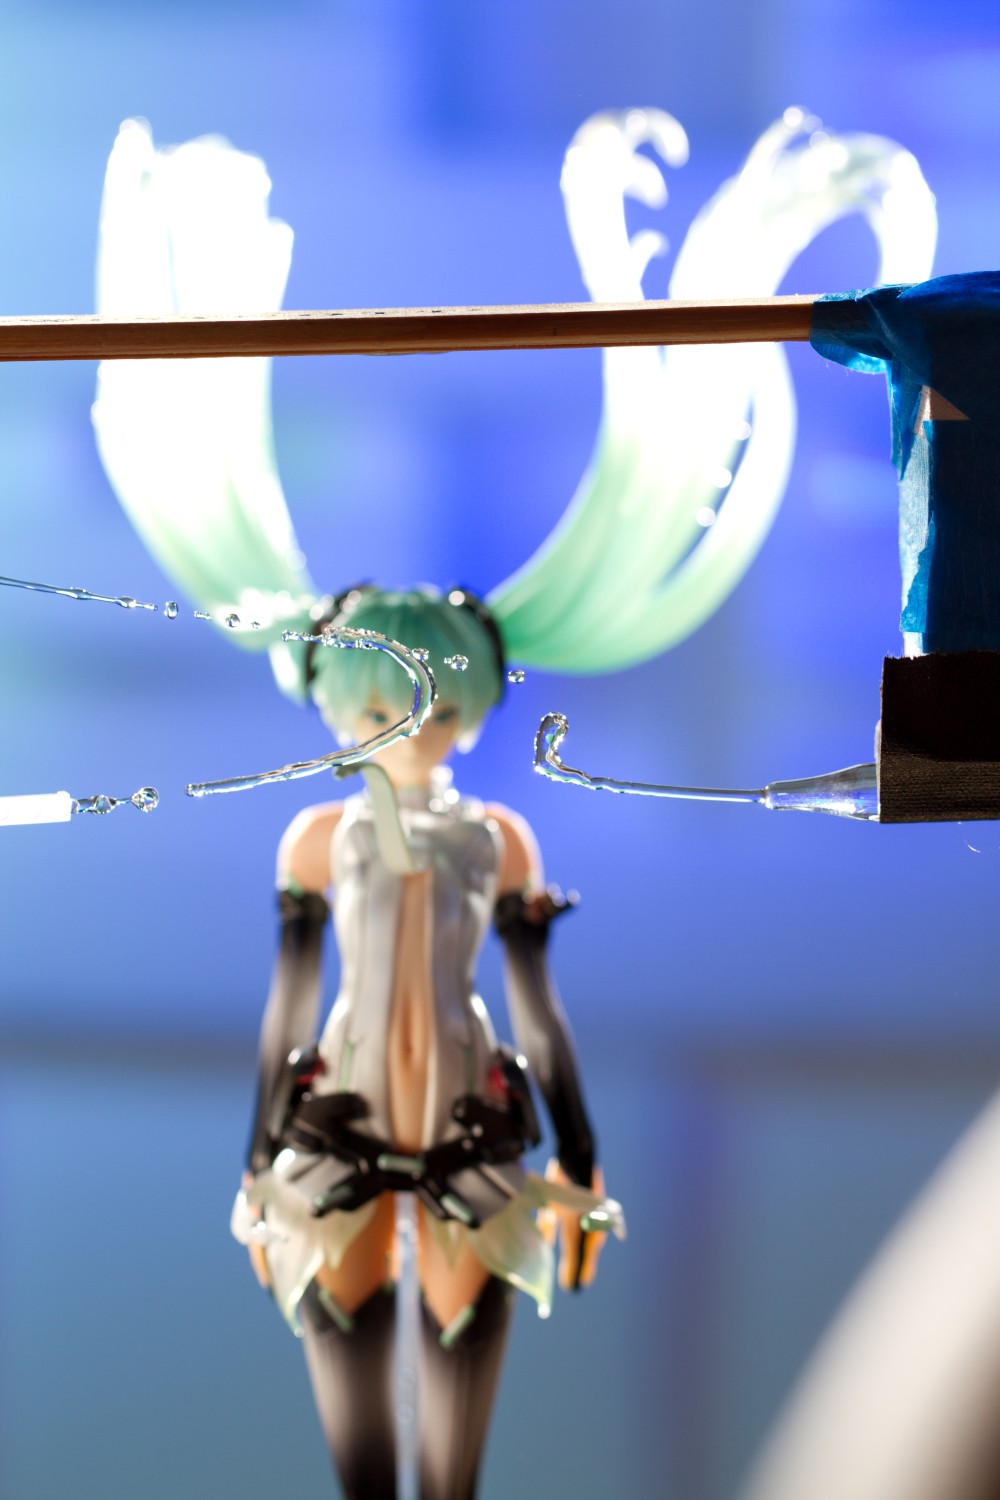
I still wanted something to be happening in front of her face. A year or so ago, I took a picture of Kureha that I don’t think I ever published here, but I uploaded it to Tsuki-board on a whim. I liked the effect of the water drops seemingly flying horizontally and then splashing spectacularly. I wanted to incorporate that idea on this shot of Miku. On the earlier shot, I used Kureha’s body to generate the splash effect; on Miku’s shot, I wadded up a little piece of adhesive putty and stuck it to her necktie to disrupt the path of the flying water.
There’s that U-turning water stream again. Weird how that happens.
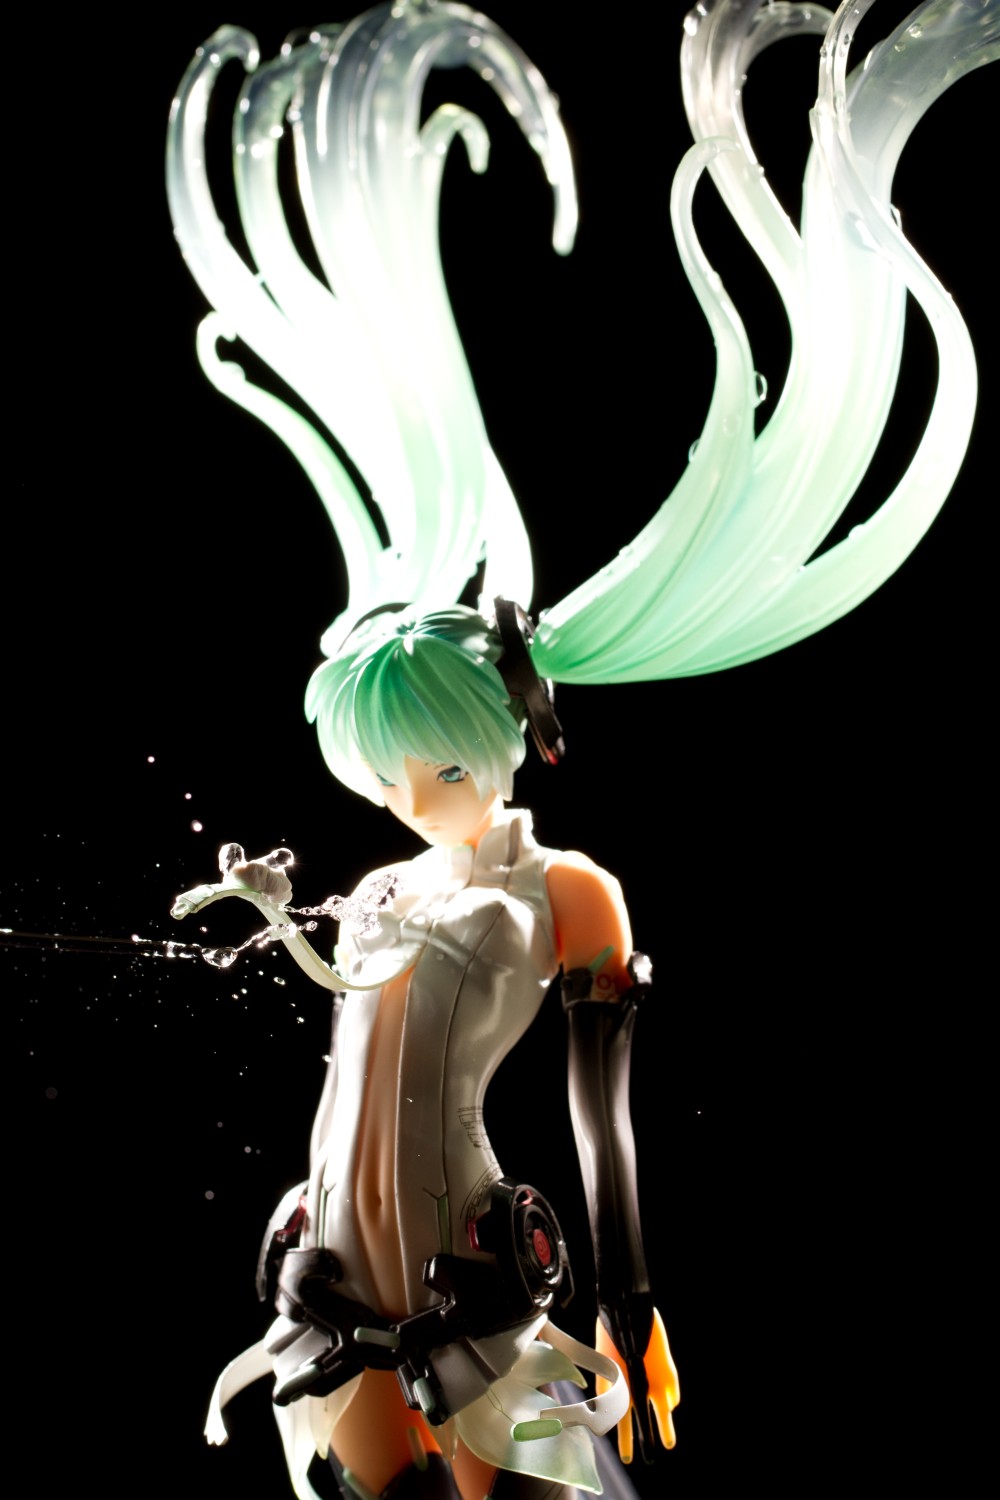
Here’s two of the photos used to generate the water flying in front of her.
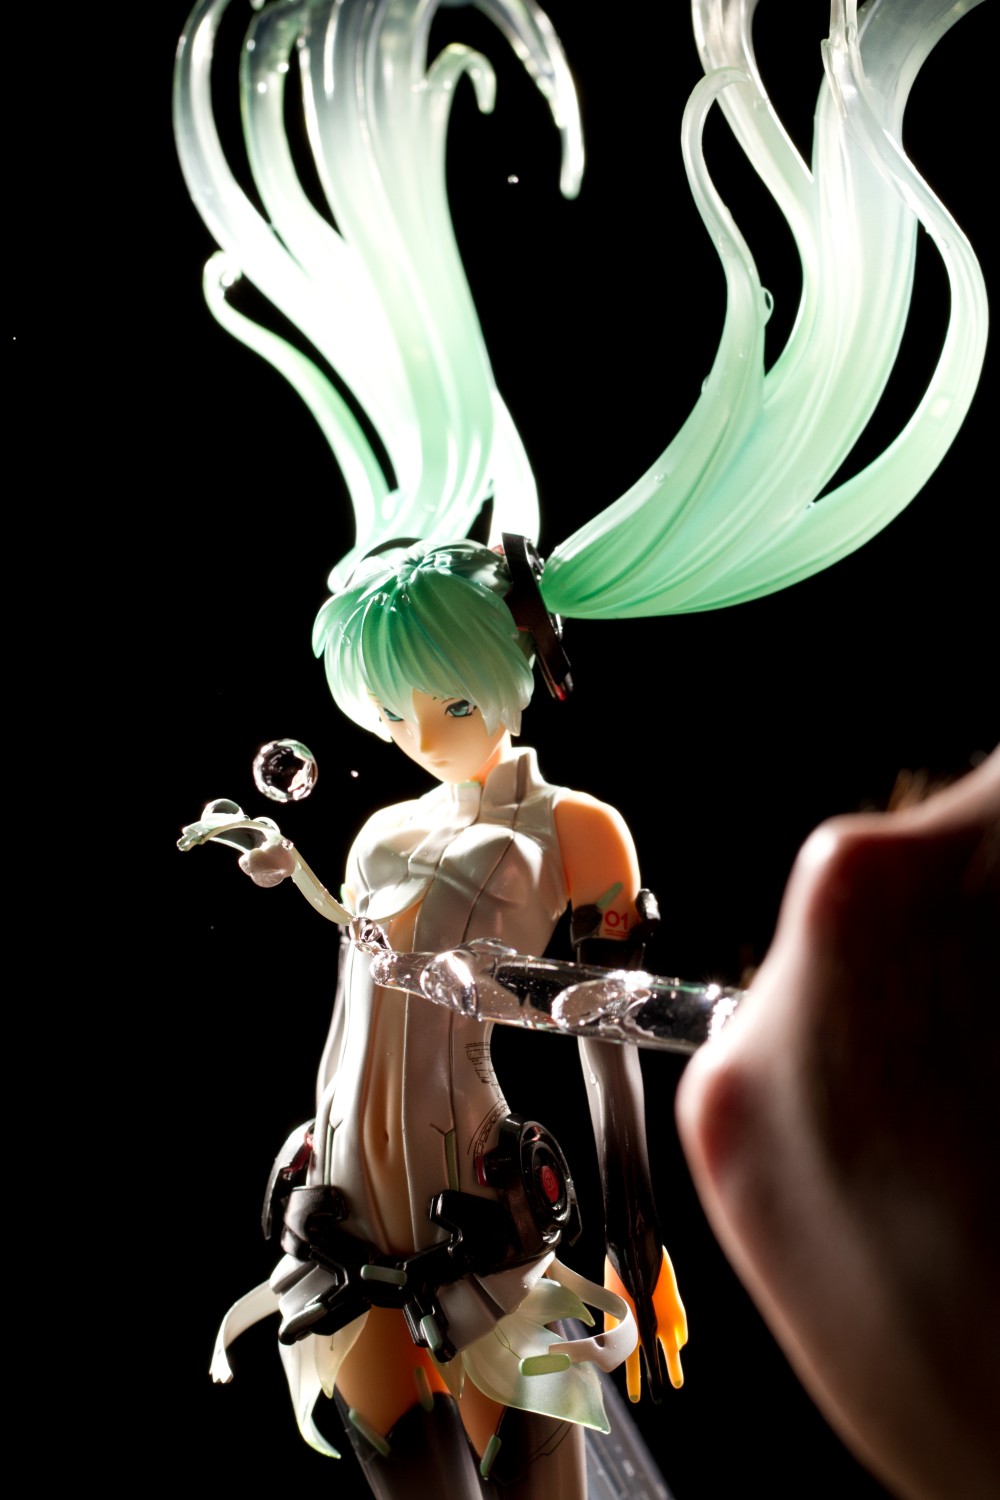
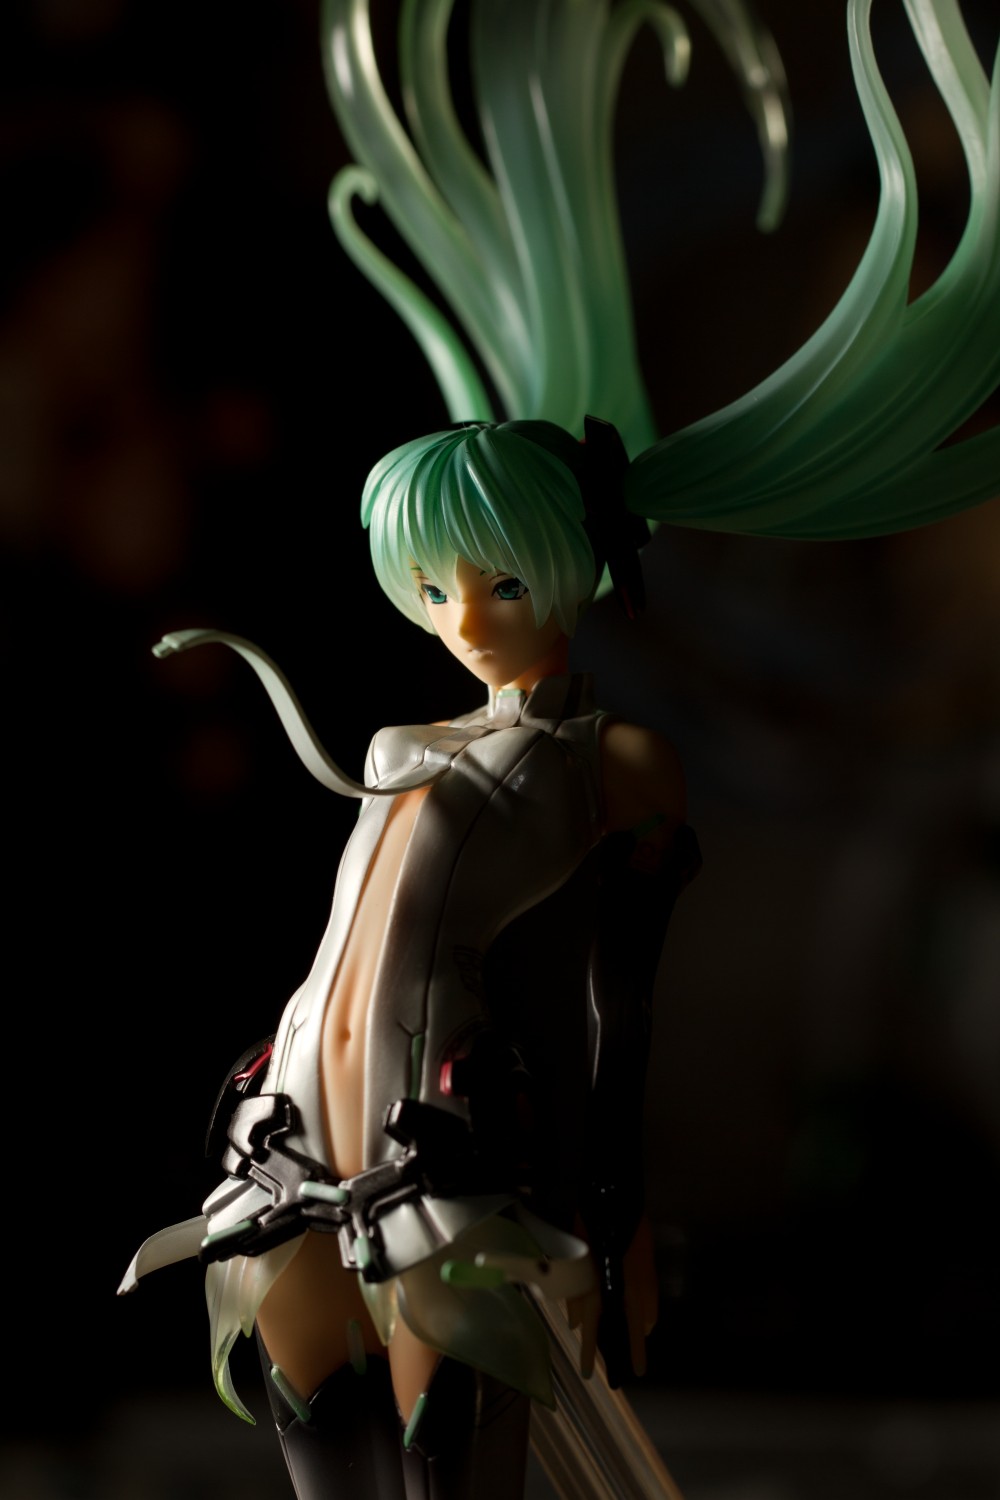
While looking through the images, I came across this one, which I liked a lot. An eyeline connecting the subject to an object generates immediate interest in whatever is being looked at, in this case a fairly large globe of water. The only thing I didn’t like was that the drop is slightly out of focus. I found another image with a sharp drop of water and pasted it over the blurry one. A few people might consider that cheating. I don’t particularly care. I shot over two thousand images in this sequence, I wasn’t going to shoot off another five hundred just because of a dubious ethical issue.
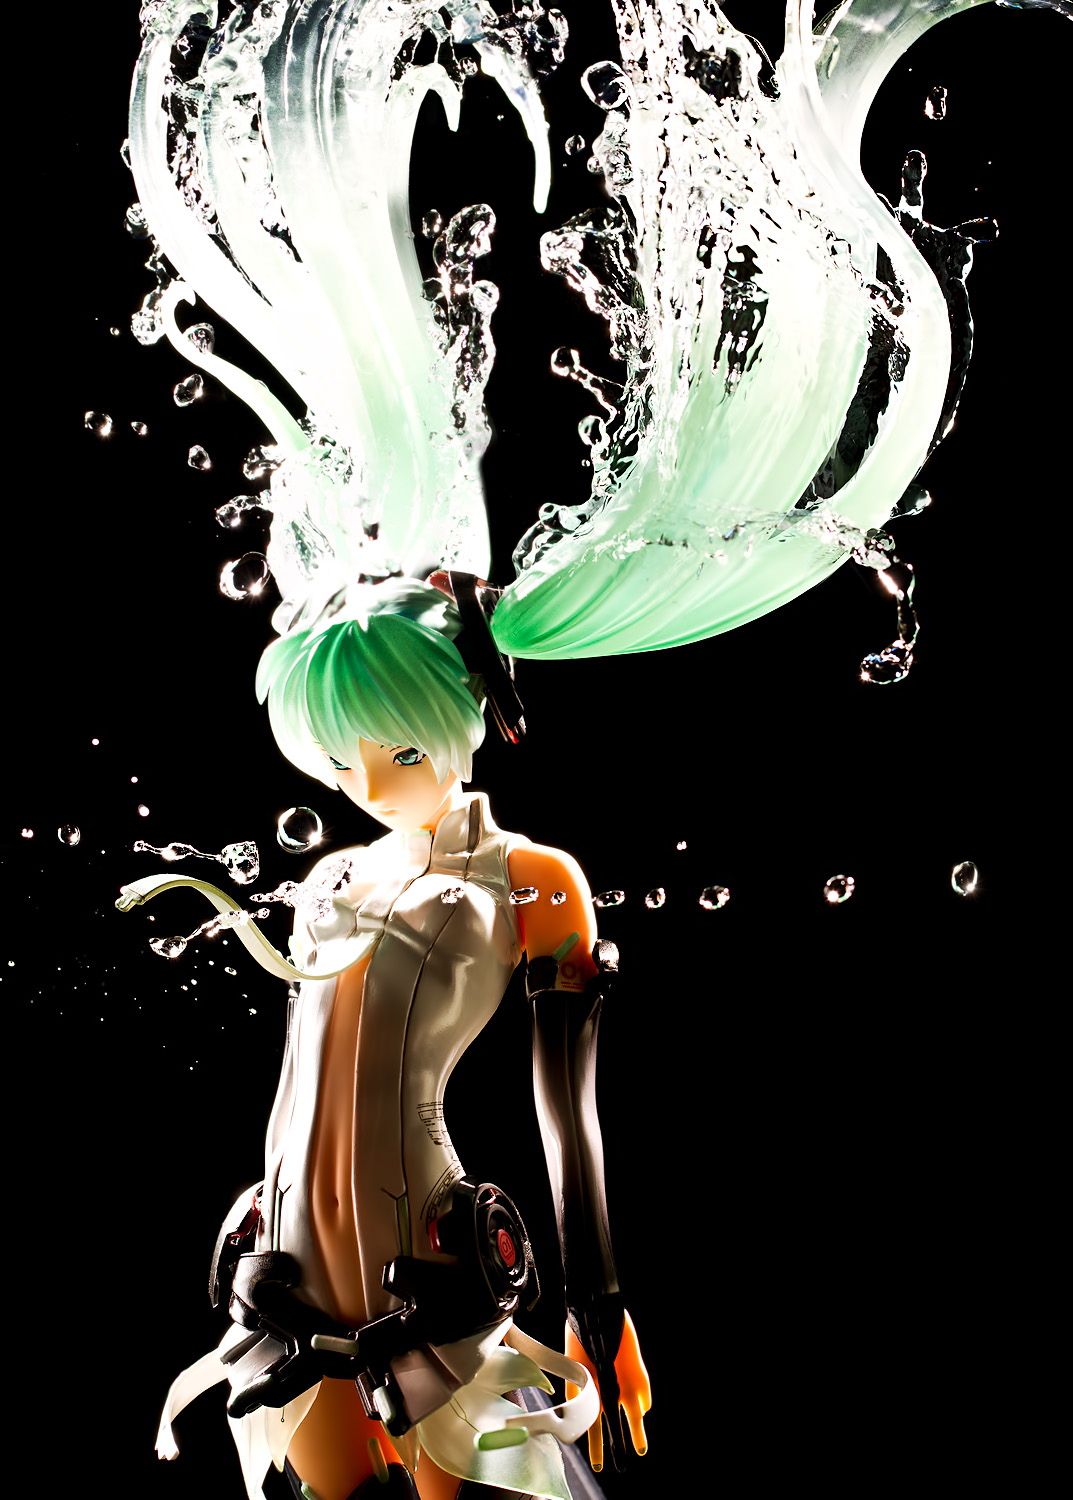
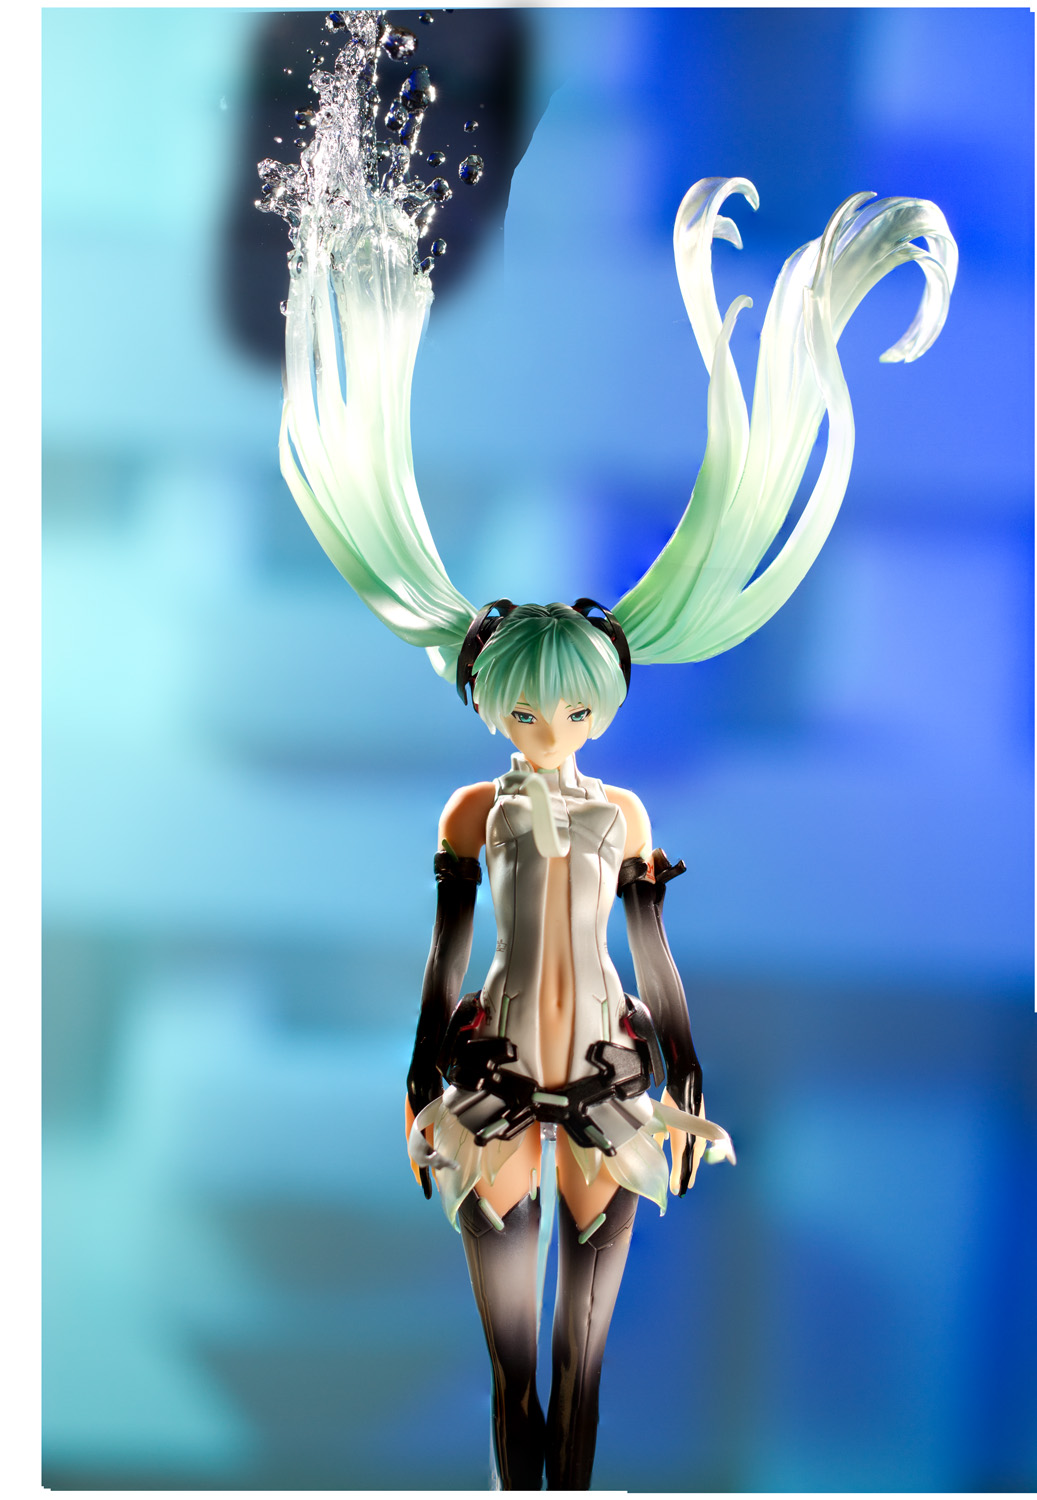
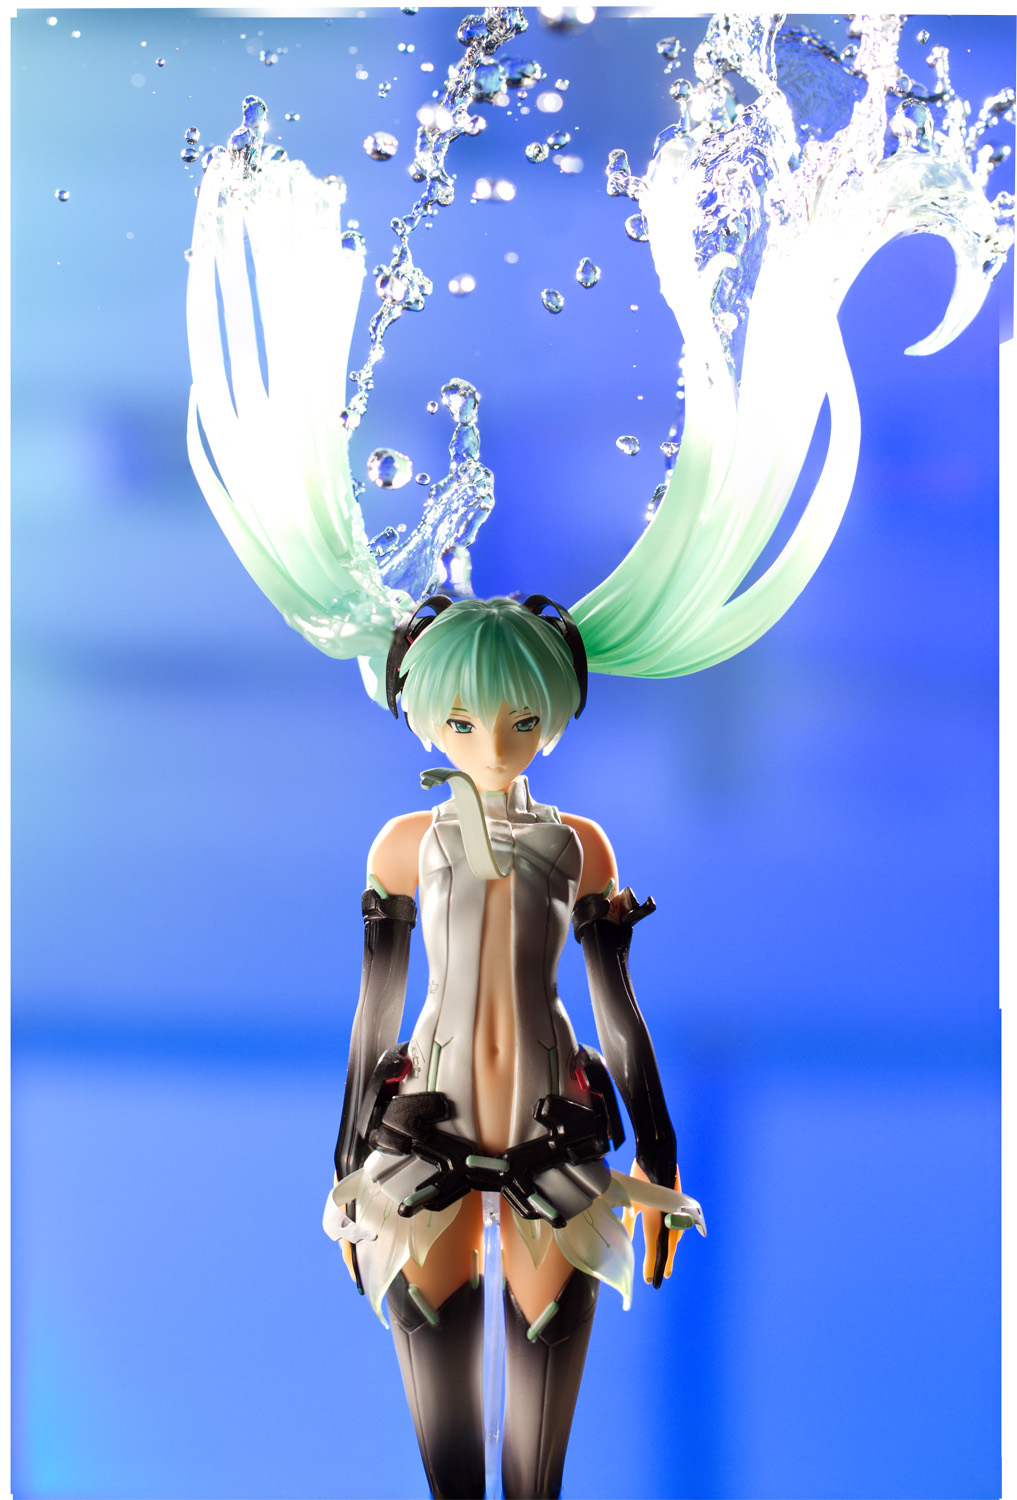
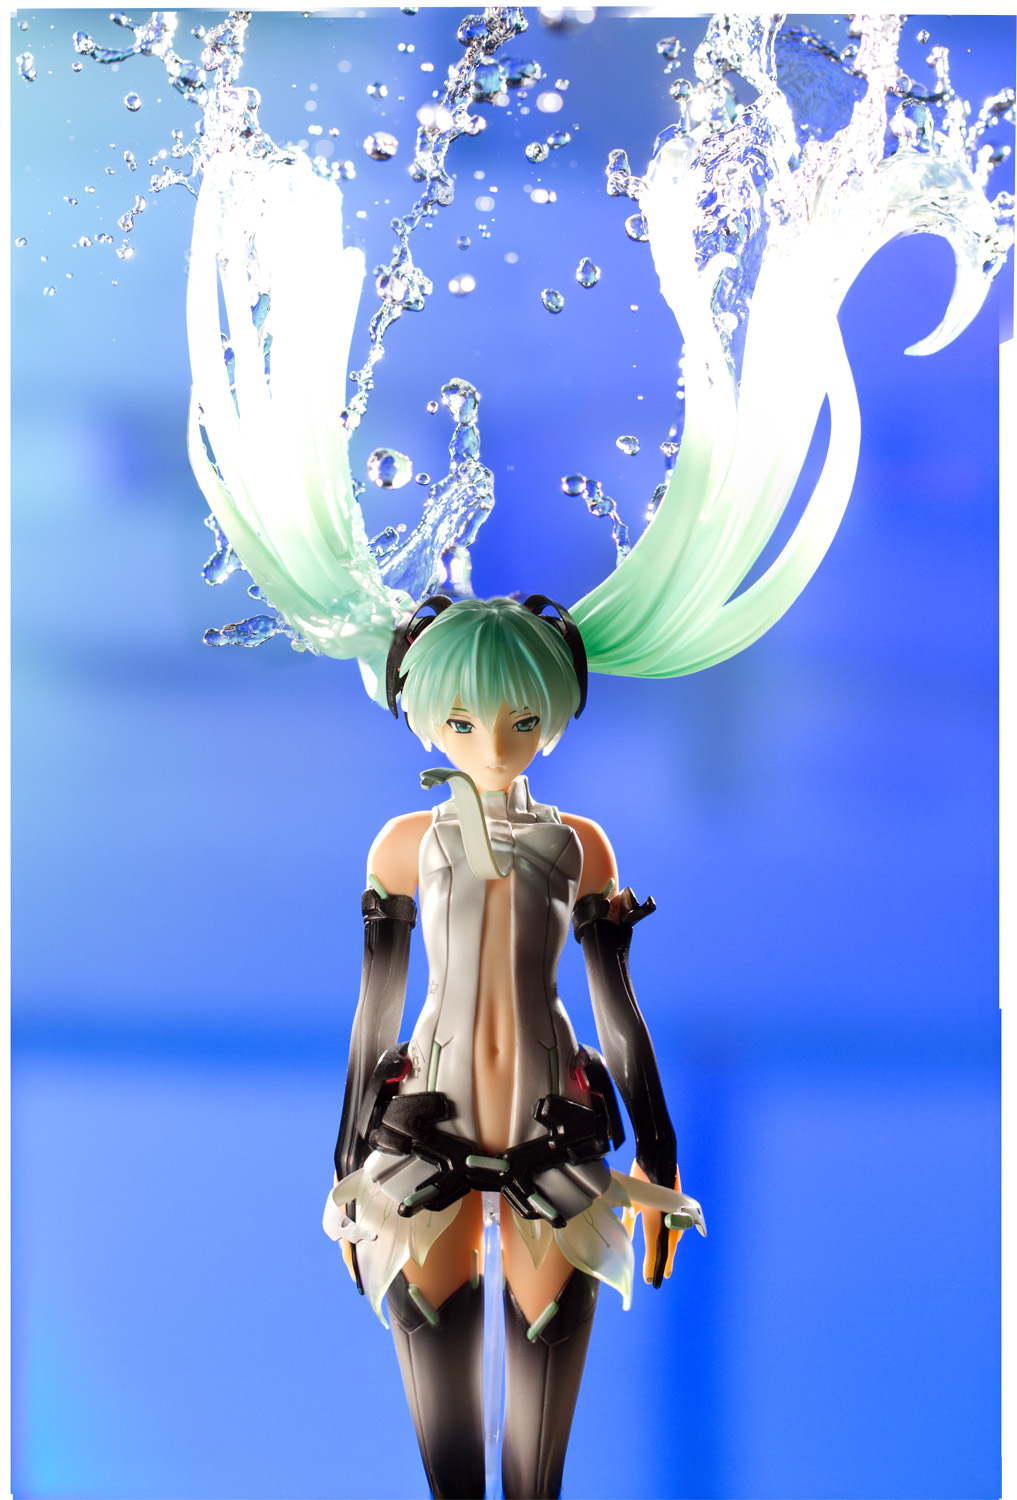
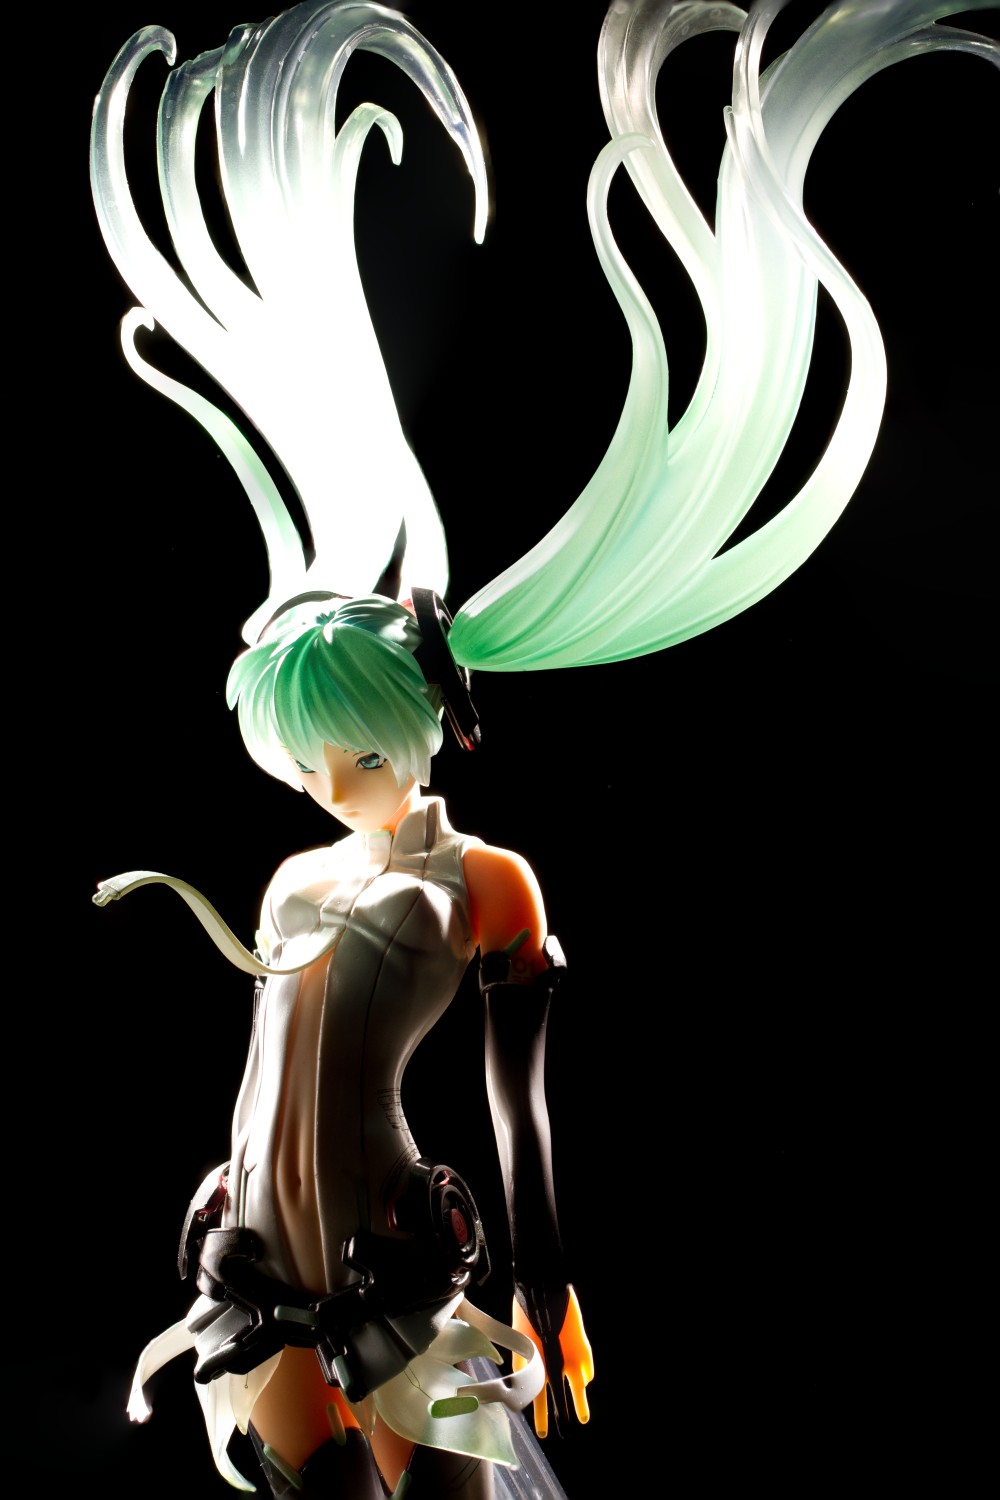
With everything merged and masked off, I finally arrived at this image, which I am fairly happy with. It’s not perfect, but it’s very close to what I intended to create.

One thing I was aiming for in the composition was distinct and easily-identifiable lines. Miku’s pose is very vertical, with a diagonal line running through her hair, and I also wanted a horizontal line going across the lower part of the frame. Horizontal lines often convey a sense of stability, and as I knew that the top half of the frame was going to be much more energetic, I thought that the contrast would present an interesting dynamic, even though nobody’s going to consciously think about that.
Final Thoughts
This image required quite a bit of effort to create, but the process actually went fairly smoothly, apart from my inability to coordinate two eyedroppers. The tricky parts were thinking about how to frame the picture and getting everything organized. The Photoshop side of it was, by comparison, very easy – though a bit tedious – to do.
While I worked on the final image, I debated whether to include that hook-shaped stream of water emerging out of her left twintail. On one hand, it looks out of place, as it’s not moving in the same direction as the rest of the water. But as I looked at the image, I thought to myself, “That looks kinda like a tentacle” and I decided that I had to include it. Maybe it detracts from the image in an objective sense, but I wanted to put a little bit of myself into the picture. I like tentacles. It had to stay in.
A random thought: my enthusiasm for photography has grown considerably since I stopped reading camera gear forums.
Now, back to Lacia.


Wow the finished pictures look absolutely stunning!!
Thanks!
Haha creative overkill, thats cool !
First compliments for the blue background, on close view it looks cheap but the dof you created with it looks awesome.
You went through this tremendous workflow to get one picture? Respect!
So you haven’t altered gravity for the water effects, you just flipped her over :p.
With my kind of luck, the figure would have hit the basin several times *splash*.
The waterdrops of the eyedroppers look beautiful, on their own and in combination
with the figure. Your description made it sound like a helping hand would be very helpful when you have to trigger so many things at once.
Picture stacking sounds interesting, I should use a tripod from time to time ^^
Sometimes the dof effect of a dslr is just annoying with an open aperture the dof is nice but the sharp are is too thin, with a closed aperture it’s the other way around 🙁
thx for sharing this making of, it was super interesting, even though only a few might be able to ever recreate something like this, because they think its a loooooot of work XD
I definitely could have used a third hand or somebody to help out. That’s one of the reasons I don’t do these sorts of shots more often, though the main reason is that they can be somewhat complex to set up – particularly since I have to make sure I don’t spill or splash water on anything that might be damaged by it.
One of the best things about using flash units is not having to use a tripod at all. Back when I started this site, I always used a tripod and I paid absolutely no attention to composition since my tripod was a crappy Best Buy model that was difficult to adjust (the panning knob was stuck so I couldn’t rotate the head). In fact, instead of adjusting perspective, I always just cropped the figure out of the middle of the frame. If you look at my older pictures, they’re always in weird aspect ratios; nowadays, I tend to keep most of my shots at 3:2 if I shoot in portrait orientation.
I think I ought to perform focus stacking more often, particularly if I’ve got two figures in a picture. My pictures usually come out really ugly if I’m shooting at a very low f-stop to get both figures in reasonable focus, and focus stacking would be a good way of keeping the background blurred while getting the figures equally in focus.
Thanks XD I’ll be honest, it sounds like a lot of work – and it was – but that’s mainly because my first two attempts didn’t work out. The third attempt only took a few hours – about as long as a typical shoot for me – and the postprocessing took maybe a couple of hours more. Admittedly, that’s only for one shot, whereas I’m typically keeping twenty to thirty shots per session, but even one shot is worth this much time if I think it can turn out special.
I appreciate your breakdowns as trying to get a glimpse of how your head works can hopefully help me become a better photographer. Though I will never do flash photography as I don’t have the patience for it, nor really the room to set them all up and such. Also they’re damned expensive. Much more so than figures. I’d have to hold of figures for a few months to get three or four good flashes. Not interested, I’d rather lamps with fixed lighting. 😀 I do greatly approve of your work with them, though.
As I said in her actual review, I’m not a fan of this figure. The tie leaving a big gash on her chest really irks me, for whatever reason. Otherwise, I think it’s a beautiful sculpt, and I really like what you’ve done with her here. Much less the dedication to take two thousand shots to get your end result; I haven’t even hit 2k actuations on my camera yet. Just goes to show I should use it more, I guess.
I don’t have any figures suited for a water shoot, though I’ve been interested in trying one. But no bikini or swimsuit figures, only naked one I have is CM’s Horo, and her base isn’t really good for water… though if I could remove her from it, maybe… hmm, ideas. Just no idea how she’d stand without it. I think she’s built on to it anyway. I don’t recall having to put her on it… but ramblings aside.
I really like what you’ve done with this shoot, and the breakdown and war stories of your woes with it certainly help for if I ever try a wet shoot. Main thing is, would a wet shoot be remotely possible with lamps, or do you think flashes are absolutely necessary to capture the droplets? I do have a larger (GN25, I think) flash, not my popup, but it throws an icky yellow hue on everything so I’m not all that keen on it. My photography teacher gave it to me, so I can’t complain, but I just don’t do/aren’t interested in flash photography enough to invest a thousand bucks in some. He did offer me two massive (like GN150) flash guns he used to use as a wedding photographer, but my baby SLR doesn’t have ports for them, so I’d have to buy some sort of hot shoe adapter or something anyway. Plus, huge, powerful stuff in a tiny room instead of massive church or outdoors… not cool.
Ahh, your shoots inspire me. Then I remember I’m lazy. And not -that- well off.
I think it ‘d be nearly impossible to freeze the motion of water with continuous lights. The main problem is that it’s now your camera’s shutter speed rather than the flash duration that freezes movement, and I don’t think continuous lights can put out enough power to allow such a short shutter speed. Unless you get one of those new 1D-X or D4 cameras that can shoot at like ISO one billion, anyway. However, you might still be able to do something with your lights that incorporates motion blur, which can be a very attractive effect in itself.
I don’t think I’d want to use studio strobes, either, particularly since they’re overly large and the biggest advantage of flashguns for my purposes is their small size. Nor do I think there’s any intrinsic advantage to using flashes. I use them because I’m comfortable with them and I have a reasonably good understanding of how they work. Light is light, though, whether it’s coming out of a light bulb or a flashgun or a studio strobe or the sun. The important thing isn’t the device the light comes out of; it’s knowing how to control and shape the light to make the picture you want.
That said, though, flashes don’t need to be very expensive. My second-favorite flash runs about $68 shipped anywhere in the world, which is about the cost of one of those Beach Queens figures.
Next time someone says collecting figures is childish and unproductive, I’m going to show them this post.
And I assure you: this is art. And I think that a good illustrator should have a bit of mathematical/technical mind. For example, as shown above in your post, composition shouldn’t be random, but analyzed.
So, like it or not, you are an artist. 🙂
Thanks XD Composition is something I’m studying right now, as I paid absolutely no attention to it before the middle part of last year. Prior to that, I was – like a lot of beginning photographers – all about gear: fast lenses and magnesium-alloy bodies and that sexy, sexy red ring. But now I’m a lot more interested in learning how to make better pictures. I wrote something up above about how photo composition doesn’t have an answer but that’s only partially correct, now that I think about it; there are many ways a photo can be organized but oftentimes there is at least one superior framing that, as you say, can be arrived at through analysis and comprehension of design principles.
As always, great shots. Definitely something I wouldn’t do but I’m from a different school of thought where I try hard to focus almost exclusively on the figure rather than any fancy composition. It’s not that I think it’s too hard or I don’t have the skill to try, I just prefer more basic shots and minimal post processing, which is what I stick to.
But it’s always good to see what someone on the other side of the fence gets up to! Looks like you had more of a handful for this one compared to your last few!
I initially did something like that, but it was mainly my lack of skill that was holding me back. I’d always wanted to do something more artistic since anybody looking for an evenly-lit picture of a figure on a mottled fabric background can go to Hobby Search for that. I figured there wasn’t much reason for me to try to compete with manufacturers’ promo photos, nor the foo-bar-baz guy, particularly since nobody was competing with him in that style. Speaking of whom, I wonder where he went? The dude seems to have fallen off the internet or something.
That’s true. I haven’t heard anything from the guy in ages, even though he was pretty much the go-to guy for great shots a while back.
You’re right that web shops can give decent, well lit pics for the figures, but then my figures aren’t the kind of ones you will find in those shops! Plus, doing stuff like water effects would likely damage my works…
And I will openly confess that I don’t “get” art!!
Man, that shot took you way more work than I expected. I wasn’t aware of all those neat Photoshop tricks you could do, very nifty. I found your whole process to arrive at the final shot and the story behind it very fascinating.
I’m not entirely sure I get your Illustrator analogy as they also have to make decisions of arrangement, focus, framing, colors, etc. I think the main difference is that photographers are constrained to the physical world. We can only take pictures of things we see, while the illustrator can draw whatever he desires.
While reading this whole post I have really gotten into picture taking mood, thanks!
Yeah, I’m not denigrating the difficulty of illustration – having given up on trying to learn how to draw several times in the last decade, I know it ain’t easy. My assertion is that an illustrator is, to a large degree, constrained by her skill – if she knows how to draw it, then, well, she can draw it. In photography, for lack of a more delicate phrasing, shit happens, and you can be the most skillful photographer with all the gear in the world and still not be able to translate your idea from concept to an image. Not only is the photographer constrained to the physical world, he is also constrained by numerous factors that may be beyond his control or understanding. An obvious example is light; I think it’s safe to assume the large majority of photographs are taken in natural light, which photographers have no direct control over, but they need to know how to work with it (me, I have no clue how to work with sunlight).
This whole train of thought came to mind as I recalled an article I read maybe a month ago. I forget where I read it, but it was some art person who contended that photography is not art because all a photographer does is record the scene in front of him. I found that to be a baffling assertion (the latter assertion, that photography is merely transcription. I don’t know what constitutes art; that’s why I studied engineering) because there is a helluva lot more thought that goes into making good pictures than pointing your camera at something and thoughtlessly clicking the shutter button. The article was all the more confounding since it was written by someone who is faculty at a good school – an Ivy League school, if I remember right – rather than a clown college.
I can see what you mean by a photographer not having full control of his environment with sunlight and weather, however I keep thinking that an illustrator is constrained by more than just skill. I can see a skilled illustrator having shit happen as well. Maybe it’s not tangible shit, maybe it’s something internal, so they fail to convey what they wanted with their drawing. I guess what I’m trying to say is that shit happens to anyone.
I completely agree with you with photography being more than just translating reality into the sensor. I’ve done a lot of work to get a scene exactly like I want and I refuse to accept that all that work and trouble is just copying a scene.
I think it’s outrageous that somebody who calls themselves “an art person” goes about claiming that something (whatever it may be) is not art. It just proves that they are blind or biased or narrow-minded or too full of themselves, which, in my eyes, constitutes mandatory disqualification as an artist.
I admit that I have no artistic ability myself and that I’m not too enthusiastic about art. If I see, say, a painting, I say to myself “I like it” or “I don’t like it”, maybe even “I don’t care about it”. For instance, I have no idea why people are so crazy about van Gogh paintings. I wouldn’t spend millions of bucks on such a painting, because they don’t appeal to me. But I’d never say “That’s not art” because I don’t like them.
From an artist, of all people, I’d expect to appreciate the creativity of others and not dismissing (for example) photograpy because they don’t have an idea about that subject themselves.
Yeah, I gotta admit that the article I read (from that Ivy League person) bugged me, even though I don’t have much interest in the fine arts myself. I even tend to dislike the fine arts just because so many people involved with it seem so damn pompous, which is something I despise.
I don’t disagree that illustrators and painters aren’t subject to bad days and internal frustration, but every creative type is. Writers even have a special name for it. My contention isn’t about artists not being able to formulate ideas, it’s being able to translate that idea into a work when one already has a clear idea of what one wants to create.
Maybe a story from Joe McNally’s most recent book might help me to explain. He wrote of a work experience he had while shooting for National Geographic. He got assigned to shoot pictures of museums in New York, and he came up with an idea for a picture of the Guggenheim with the museum on one side of the picture and the New York skyline stretching to the other side. He wanted to shoot it during the early evening, when the sky would be vivid and the city lights would be coming on – knowing that cities are far more impressive at night. So he rents a truck with a 120 foot crane to elevate himself to the proper vantage point, and he shoots off some shots while sitting in a bucket high above 5th Avenue. Nighttime rolls around … and the museum’s lights aren’t coming on. He radios his assistant who runs into the museum and, after conferring with the staff, tells McNally that there’s a special exhibit going on and they aren’t going to be turning on the lights. So his idea goes down the drain – if he shoots it anyway, there’s going to be a big dark hole on the left side of the frame where a brightly-lit museum is supposed to be, and he doesn’t have the budget to rent the truck again. This is an extreme example, to be sure – most photographers don’t have the moxie to shut down 5th Avenue for an afternoon – but I think most photographers can relate to having an idea dashed by unexpected circumstances.
So much …. patience! For a person who say not to have much sense of beauty you are doing well. I do the same job as you and i have absolutely no idea of what is beautiful or not ^^
This is great that you can achieve to create something artistic, i am kinda jealous.
Nevertheless even if am completely clueless about everything concerning photography / drawing but i am convinced that Photo is a very difficult art and that it takes years to learn.
And even if you know everything about technics, without notions used in drawing/painting you probably won’t get good results.
I also guess that working with fluids is one of the hardest as it doesn’t stand still while you setup your view 🙂
Good work with miku, i really like how she looks 🙂
Oh wow, it’s been a while. I’d wondered where you and Lyllibelule and a few other people went. I agree, I’ve been taking pictures for nearly three years now – 30,000 or so pictures so far – and I feel like I’m just getting started. I spent the first year lusting for gear, the second year learning about lighting, and now I’m interested in composition and visual impact. A while back I read an article by Thom Hogan that suggested taking a class in drawing would teach fundamental photographic principles, and I wish I’d taken one when I was in college. I’m still learning fundamental things like angles and lines right now.
Yes i am back, at least i try to start again but the time has passed and i guess almost everyone removed my rss feed xD
I just posted my first real new post few days ago.
Knowing the basics of drawing to help in other artistics domains make sense to me in a way i cannot explain.
When i think that i am bored whan i have to retake only once … definitely not for me which is a shame. My dolls could be pictured quite nicely if i had any talents 🙂
It’s rare to see people come back after taking a break from blogging XD My bookmarks list is full of dead blogs and I don’t expect many of them will be coming back to life.
I can proudly say that I did not remove your RSS feed, though. Uhh, though that’s because that even after running my own site for three years and using the web for well over a decade, I still don’t know what an RSS feed is.
Use de-ionized water to keep it from bending away from the other stream.
Both of the water sources are picking up charged ions from something (you or the dropper). Electrons in motion create magnetic fields around the water streams…two magnetic fields passing through each other will either deflect or combine causing the water to change direction slightly (making the water appear clingy or evasive).
A variation of what is happening to you can be found here;
http://chemistry.about.com/od/chemistryexperiments/ht/bendwater.htm
As for the shot breakdown….Wow! I was impressed by the original post. Now I’m kinda awed.
Ah, thanks for that. It’s pretty neat to be able to see it happen; I had a magnet kit when I was younger, like a lot of kids, but it’s cooler to actually see the water streams bend.
I’m strongly interested in how this amazing photograph was made, since I saw it on Tsuki-Board. Very glad to see the shot breakdown!
And you let me know the function Focus Stacking and the usage of Masking. Very useful skills! Thanks for your sharing!!
Thanks! I’m glad the post was helpful. I’m still learning more about Photoshop myself; in fact, I didn’t know how the masking function worked until about a year ago, and I didn’t even learn what the Curves tool did until about two years ago, despite having used Photoshop for well over a decade.
Wow, I’d heard people in photography blogs mention that they used masking/merging of several photos for their water shots in passing but never learned how it was used in practice until now. And 2000+ shots, wow. It’s an awesome shot and your perseverance in trying to capture your vision is something I wish I had even half of.
Composition is something I often have trouble with as well. Most shots, I just follow the tried and true rule-of-thirds but its an area where I would really like to experiment with more, especially with using white space or background elements to lead the eye, like you did with the water streams.
I think photography is much like painting, just with different brushes. You need to choose your set, the angle of the subject. You’re pretty much painting the figure with light, instead of pushing down harder on the brush or angling it, you control the light with snoots, gobos, diffusers, etc. There’s still a ton of creativity that goes into even coming up with the concept of a photo and its respective elements like set, water streams, etc. It’s just that photography gets to appeal to the tech geek a little more xD
It’s something I need to pay a lot more attention to as well. A large part of the problem is that since I ostensibly provide photos for review purposes, I shoot a lot of pictures without thinking too hard about them. I would really like to scale back the number of pictures I post in a review, but I’ve heard from people who like being able to see a lot of pictures, so I think maybe the best compromise might be for me to spend a lot of time on two or three really good pictures and then not worry too much about the rest.
I would agree with that. I’ve also heard photography compared to cooking XD Flash photography, anyway. Sometimes you’re going for something bold and spicy; sometimes you want a subtle flavor. Joe McNally explained it really well, anyway.
The tech stuff is one of the fun parts of photography. Though I think, like musicianship, sometimes there’s too much focus on the gear. Okay, there’s no “sometimes” about it, there’s way too much damn focus on gear … I wish people would stop going, “My pictures are going to suck unless I have an expensive camera” or “Oh, you have such a nice camera, your pictures are great!” when in fact, their pictures are crap! It kills me when I go through a camera gear forum and some guy says, “Check out my 5D Mark II with my expensive-ass L lens!” and all you see are pictures of the guy’s cat and some junk in his front yard.
Awesome read about how you set up those shots.
Thanks XD
I enjoy reading these shot breakdown posts Tier, good job man. Also wanted to drop a quick suggestion: I’m not savvy enough to know some of the terms you use in these posts like the trigger light and what not so it may be good to write a little post about some of the common terms you use in these shot breakdowns. Yeah I know I could just use Google but maybe there are others like me.
Thanks! Yeah, I’ve been meaning to write some more intro-oriented posts about figure photography, since I have the feeling there are a lot of people who are interested in photography but haven’t gotten too far into it. I’ve particularly meant to write a couple posts about using flashes since as far as I know, I might be the most enthusiastic user of hotshoe flashes as far as anime figure photography goes. I’ll see if I can’t get those written in the near future. Thanks for the suggestion.