There’s a couple of ways you can take figure photos. One uses traditional studio lighting techniques; you place the figure in front of a nice solid or patterned background, place your key light offset by maybe 30 degrees or so and your fill light on the other side, and trip the shutter. If you do it right, you can make a picture that clearly illuminates the figure, showing it off as it is.
Another way to shoot a figure is to manipulate the lighting and setting to achieve a desired effect, and this is how I prefer to photograph figures. Many times, I’m trying to convey a mood or establish an atmosphere rather than show how the figure looks. I readily concede that my pictures aren’t that useful for assessing what a figure looks like or whether it would be a worthwhile purchase, but that’s not what I’m trying to do; my goal is to make my figures and my pictures look as good as I can.
I should mention that a third way to take a figure picture is to take it outside. Definitely a valid approach, but I don’t think there’s anything intrinsically impressive or beautiful about a figure photo taken outside, and as I’m not very good at it, it’s not something I’ll be talking about here.
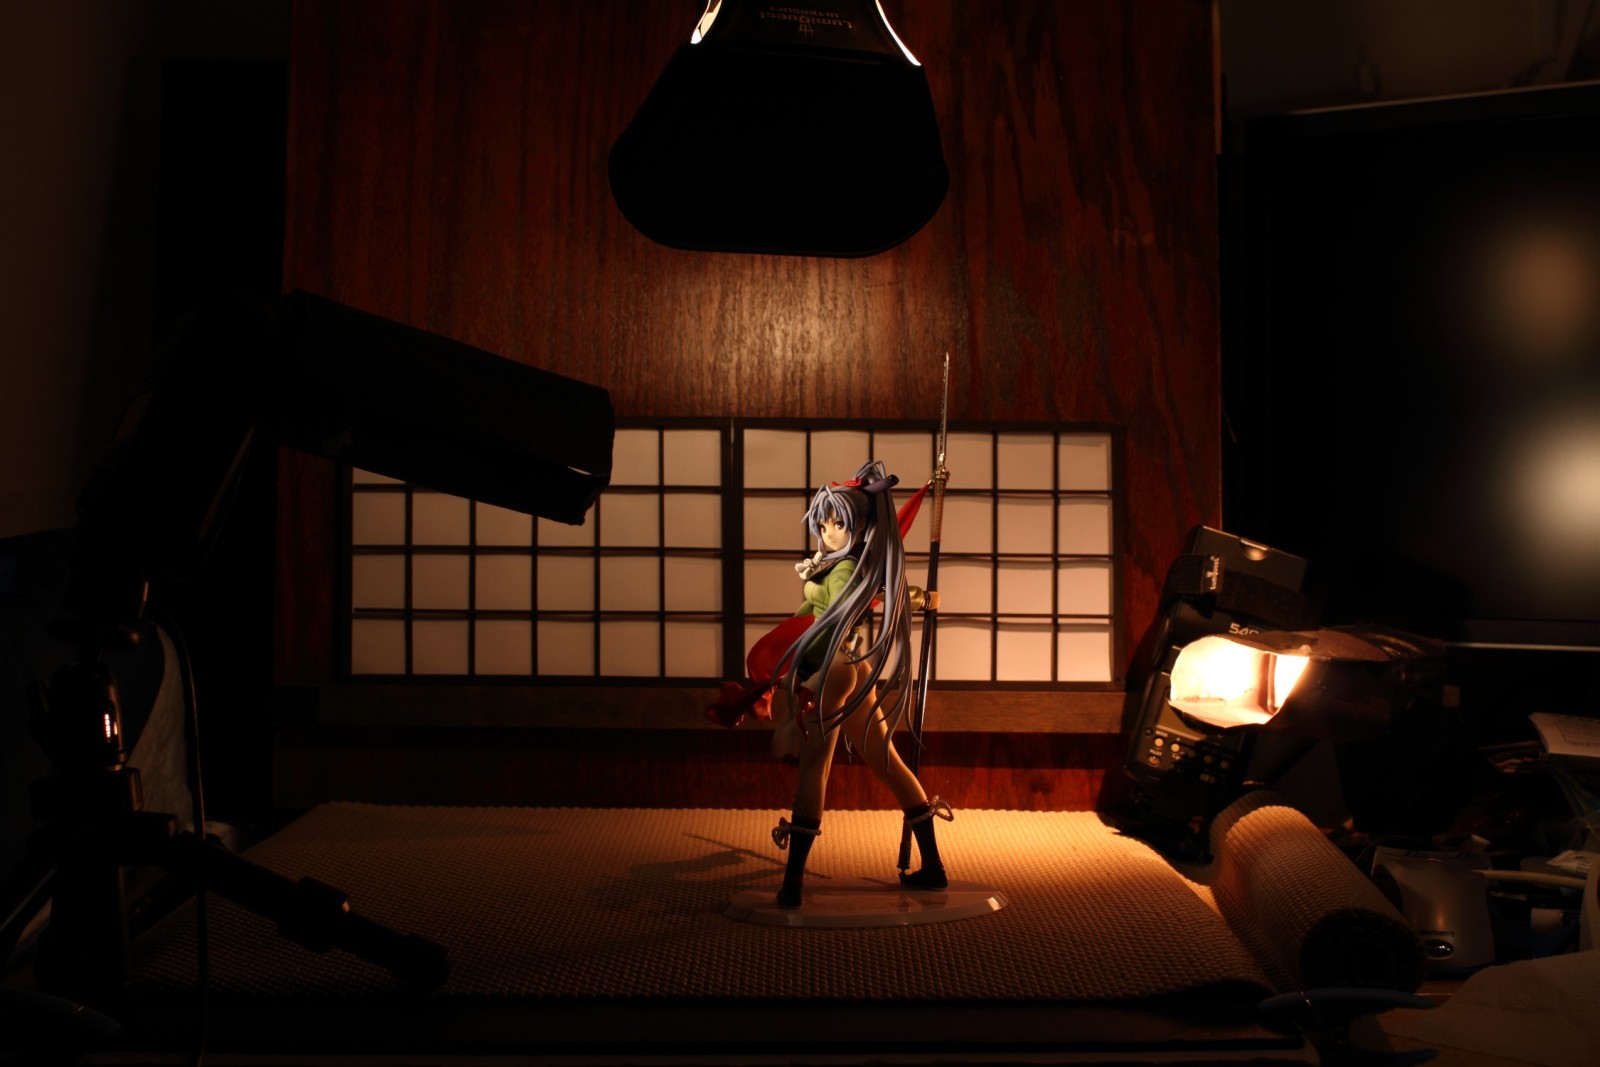
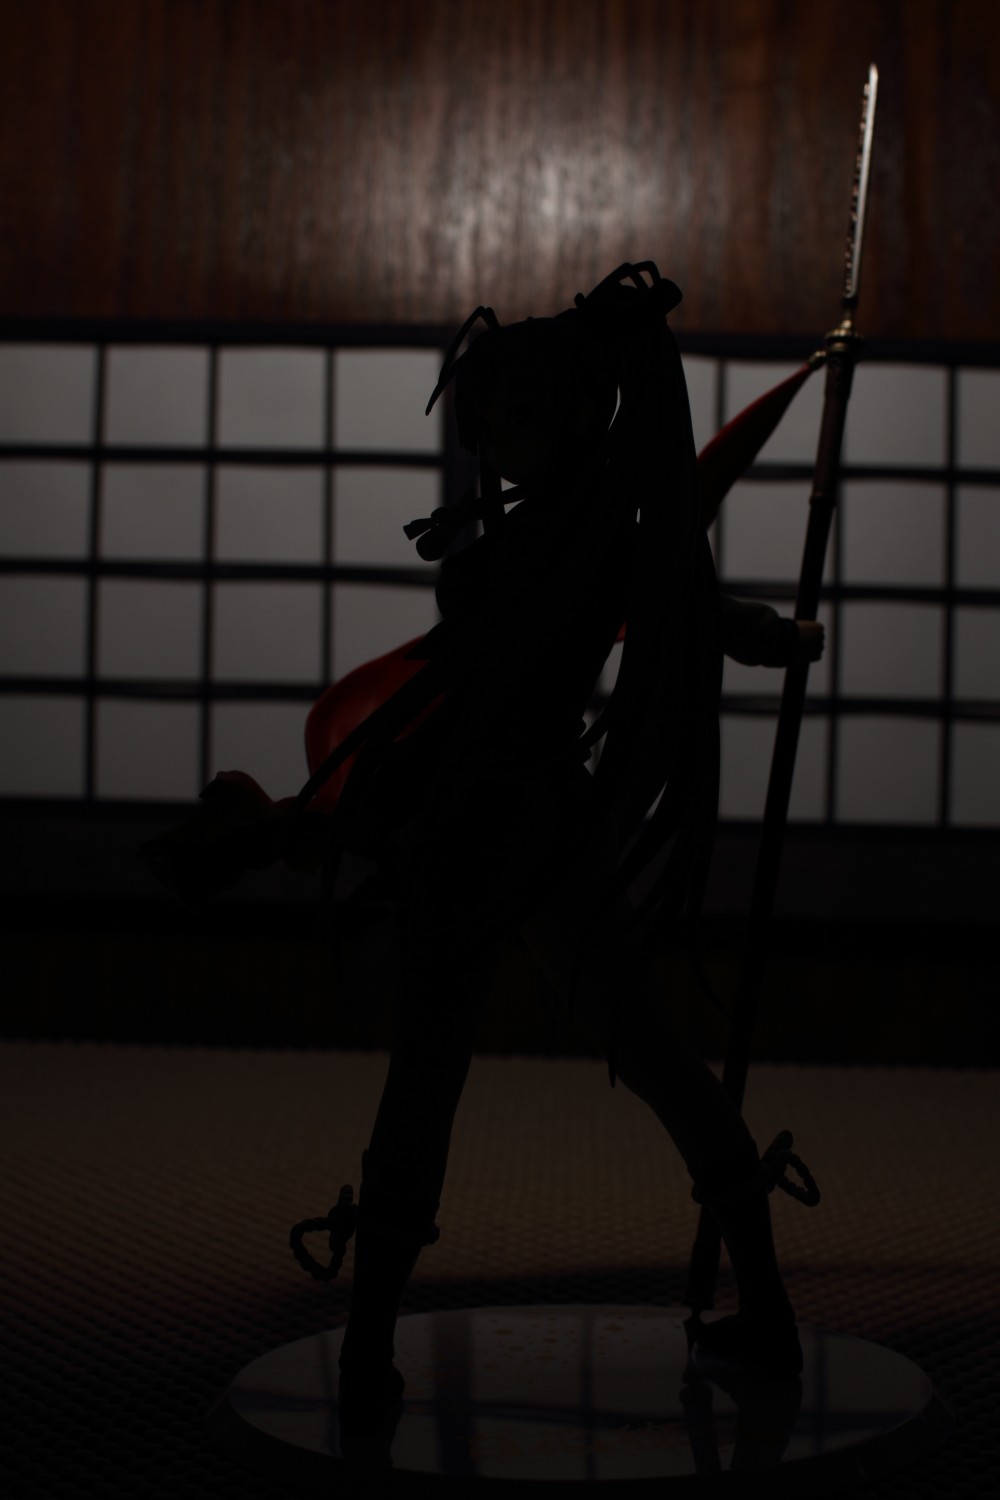
The first thing I do when I shoot a figure on a set is to set up the backdrop and get my lights positioned. Here I’ve got the backdrop set up how I want it, Matabei is positioned correctly, the lights are set to the appropriate power, and everything looks okay. Click.
I could use this photo in a post if I had to, but I’d rather not, as it doesn’t convey any sort of mood or drama. In addition, while the lighting is okay for the most part, there’s actually a conspicuous problem: the key light is set to camera left, but her spear casts a strange shadow on the floor, where the light source is obviously coming from the right. What’s that about? That light source is there because I was testing things out; there was an image in my mind that I wanted to create.
When I ordered this figure, I thought about how I wanted to photograph it. My first idea was to build a set in a style similar to the motifs presented in the anime – something with ink splotches and bold black outlining. As Matabei’s release date approached I decided the idea wasn’t a good one; I didn’t think I could pull it off and even if I could, I wouldn’t be able to re-use the set except for more Hyakka Ryouran (and Street Fighter IV, hypothetically) figures.
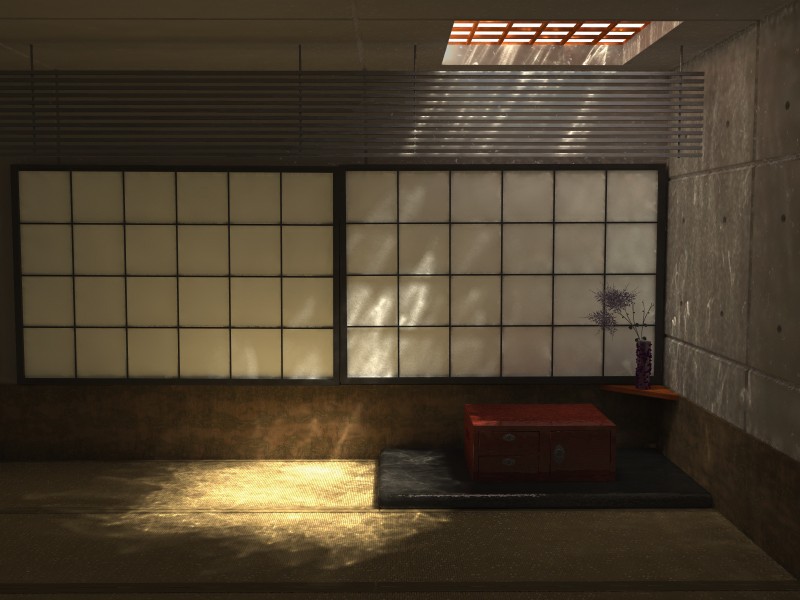
With that plan scrapped, I wasn’t sure how I wanted to photograph Matabei until I came across this image in one of my old archive directories. I’ve held on to this picture for around ten years because the mood it conveys always makes a big impression on me – the serenity of the scene, the somberness of the golden sunlight filtering through the ceiling, the way the shaft of light is directed away from the component objects in the room. I thought that something like this would make for a pretty good set.
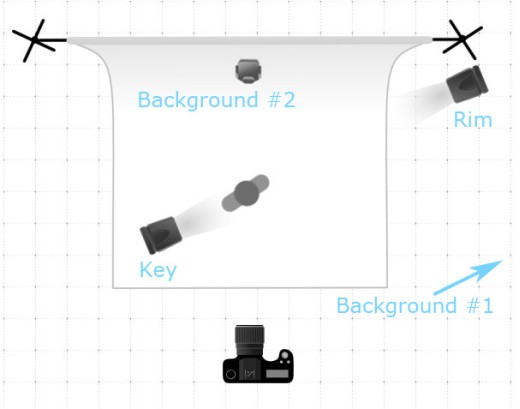
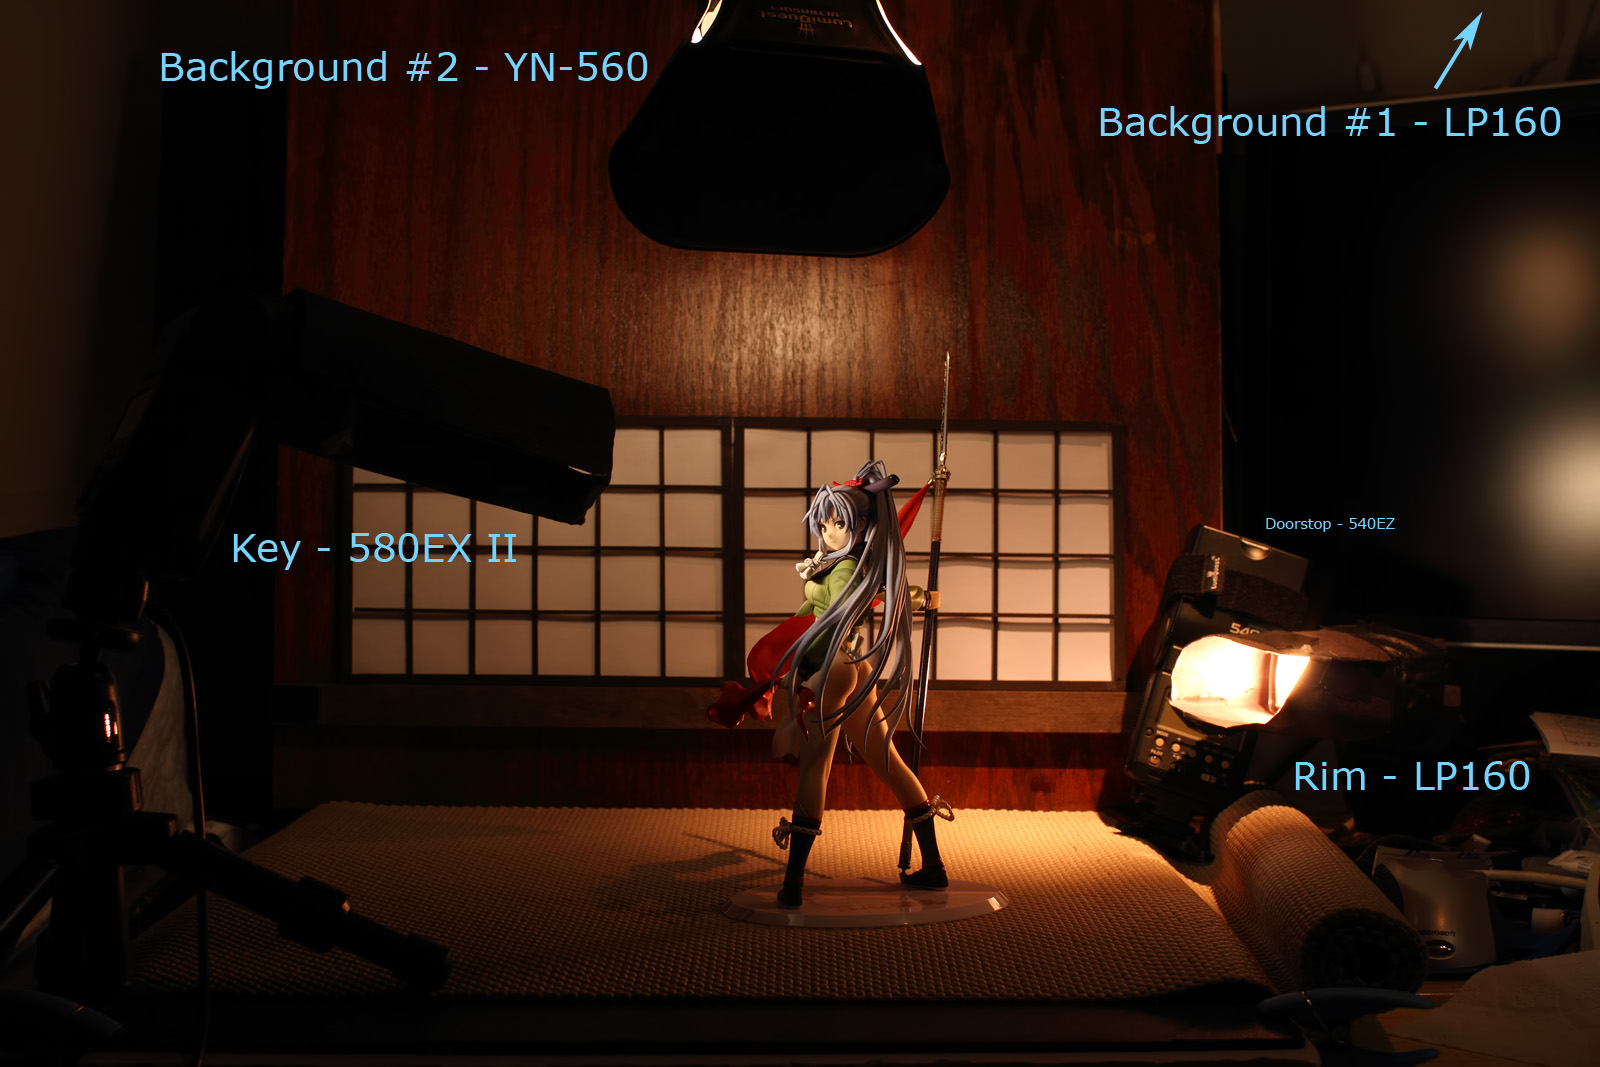
The overhead lighting diagram isn’t exactly to scale and doesn’t show distances perfectly, but it gives an idea of where the lights were placed. The key light is a 580EX II with a snoot placed over it. What’s a snoot? It’s a very complicated contraption that looks like this:
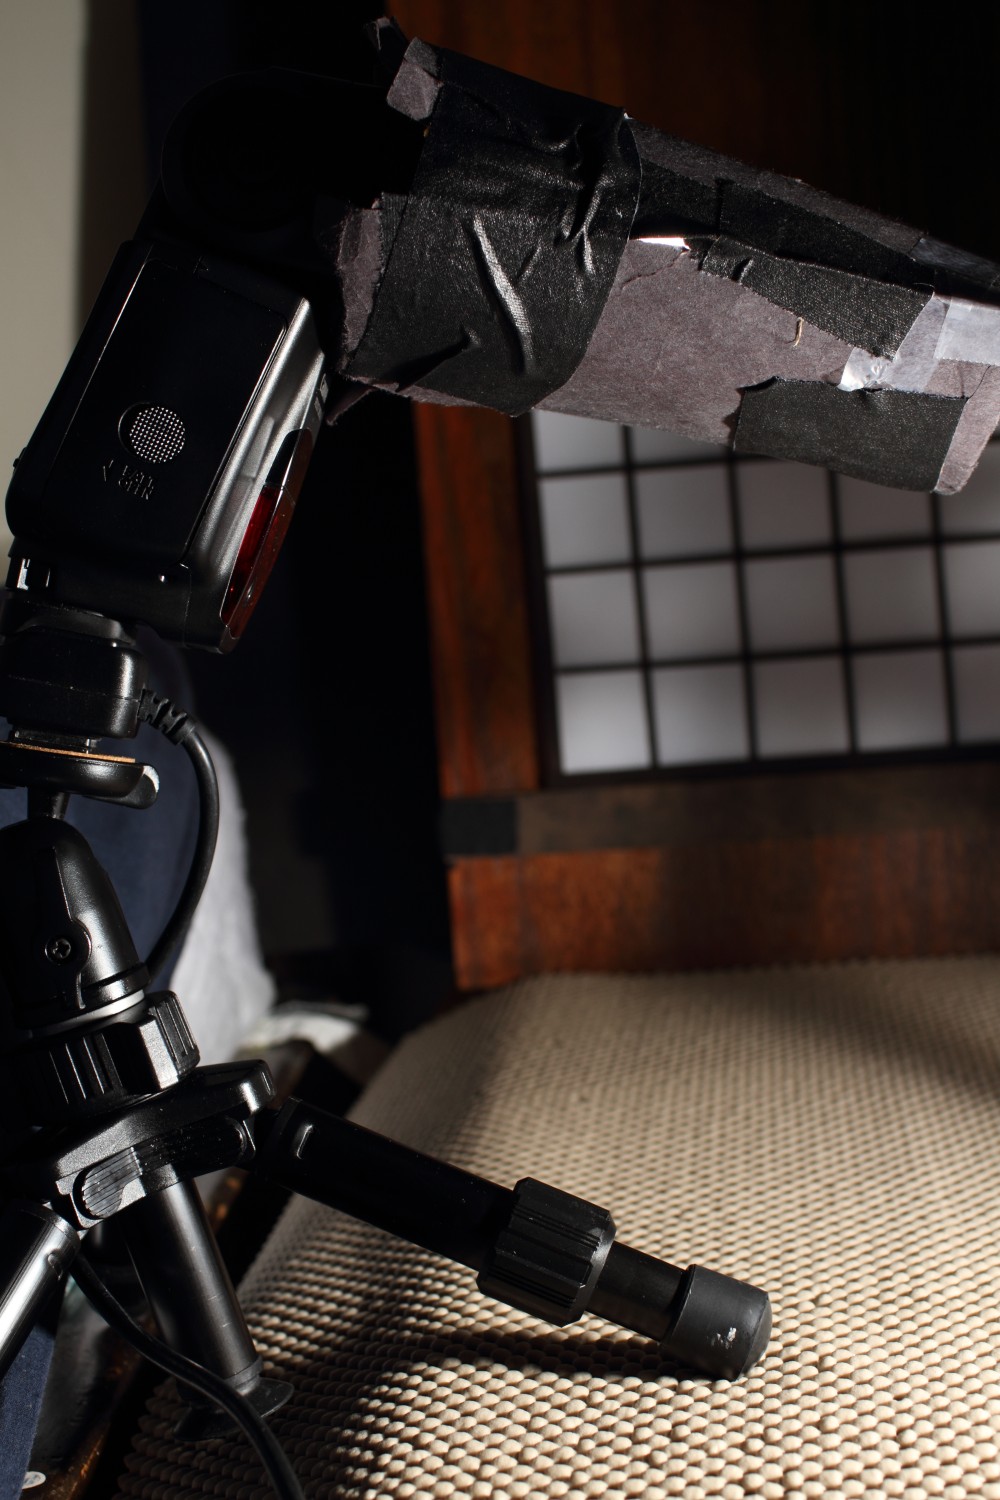
A snoot is basically a sleeve that fits over your light to restrict its spread; the longer the snoot, the tighter the beam. I’m constrained by a lack of space so the snoot I am using is not very long – only about five inches. However, there is not much room for the light to spread because the flash is placed so close to the subject.
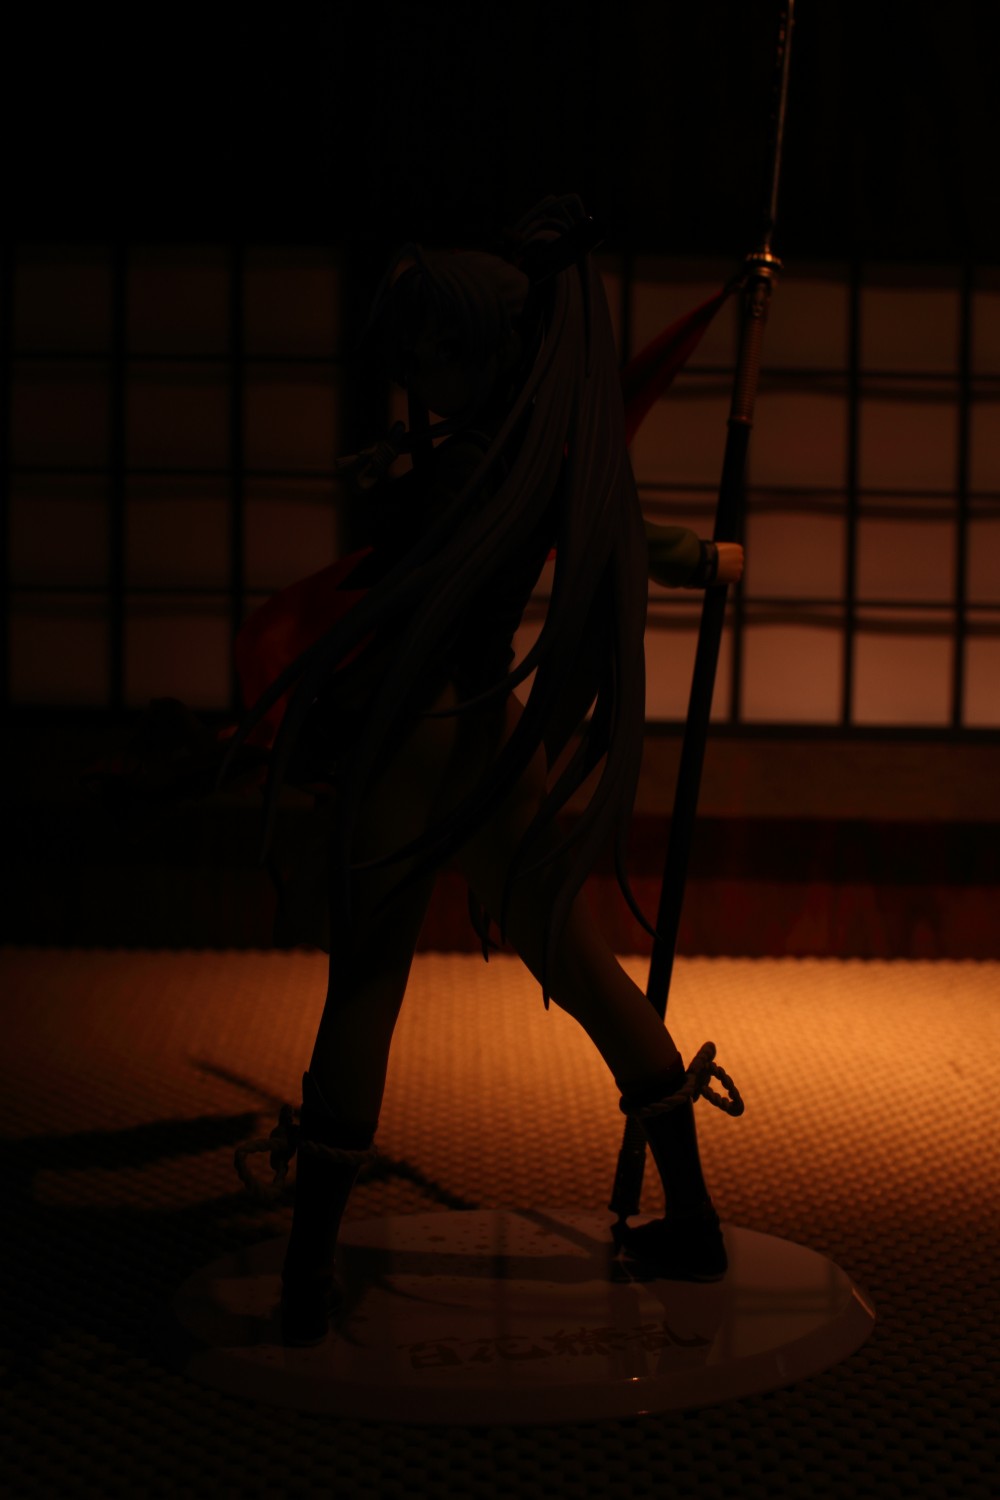
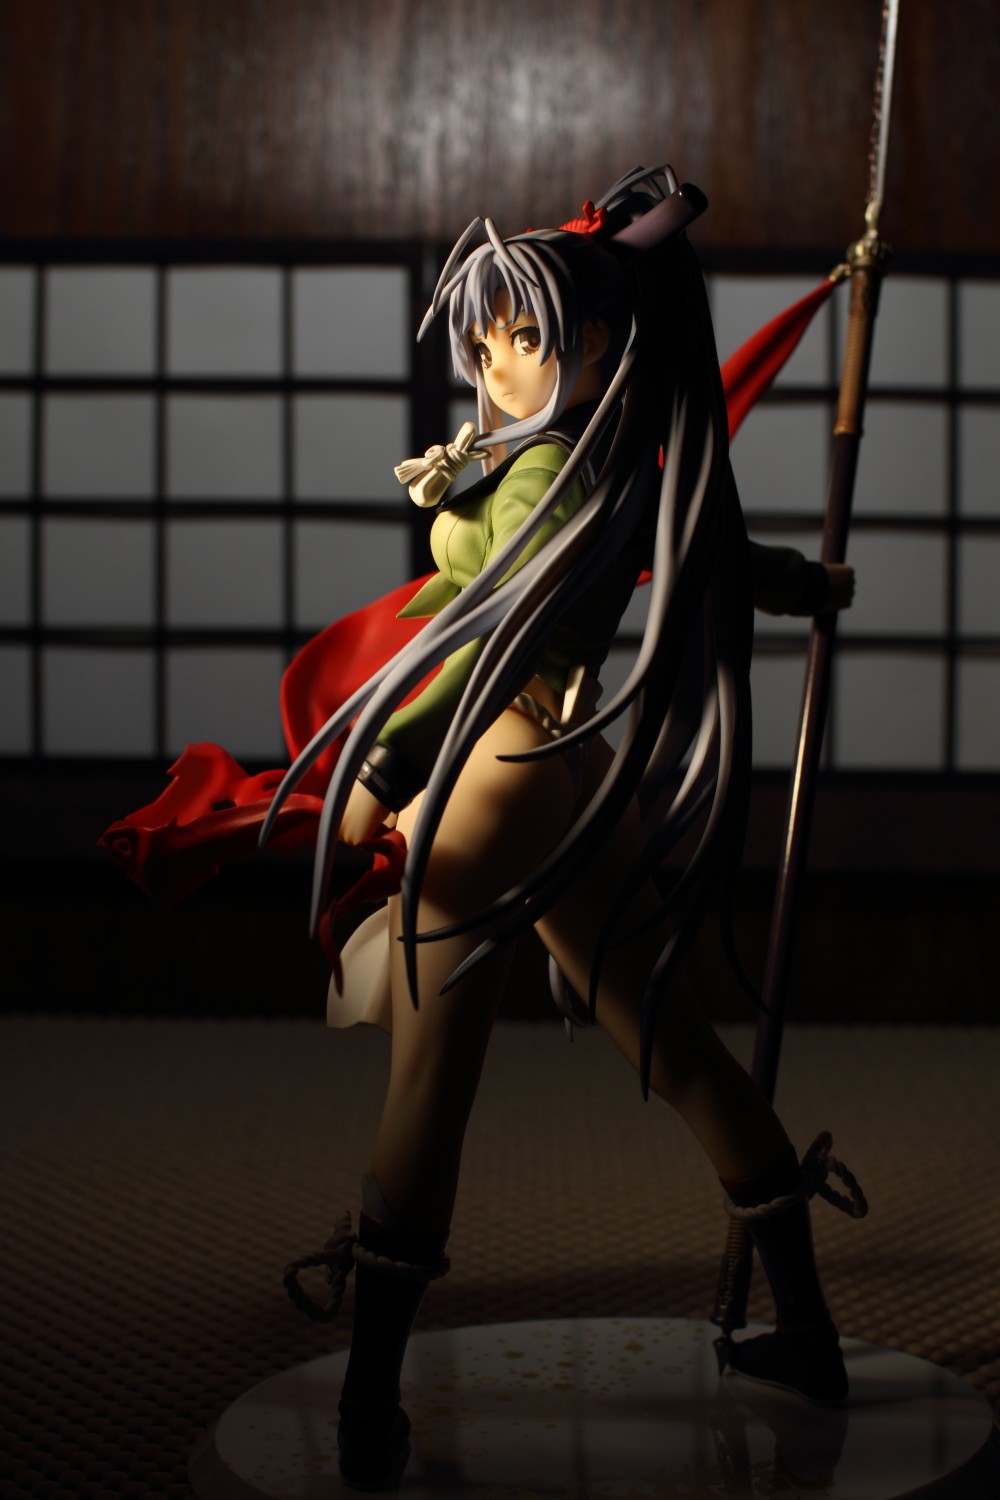
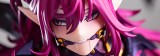
Let’s build this shot up one light at a time. First, the key light, straight out of the camera (besides RAW conversion and resizing):
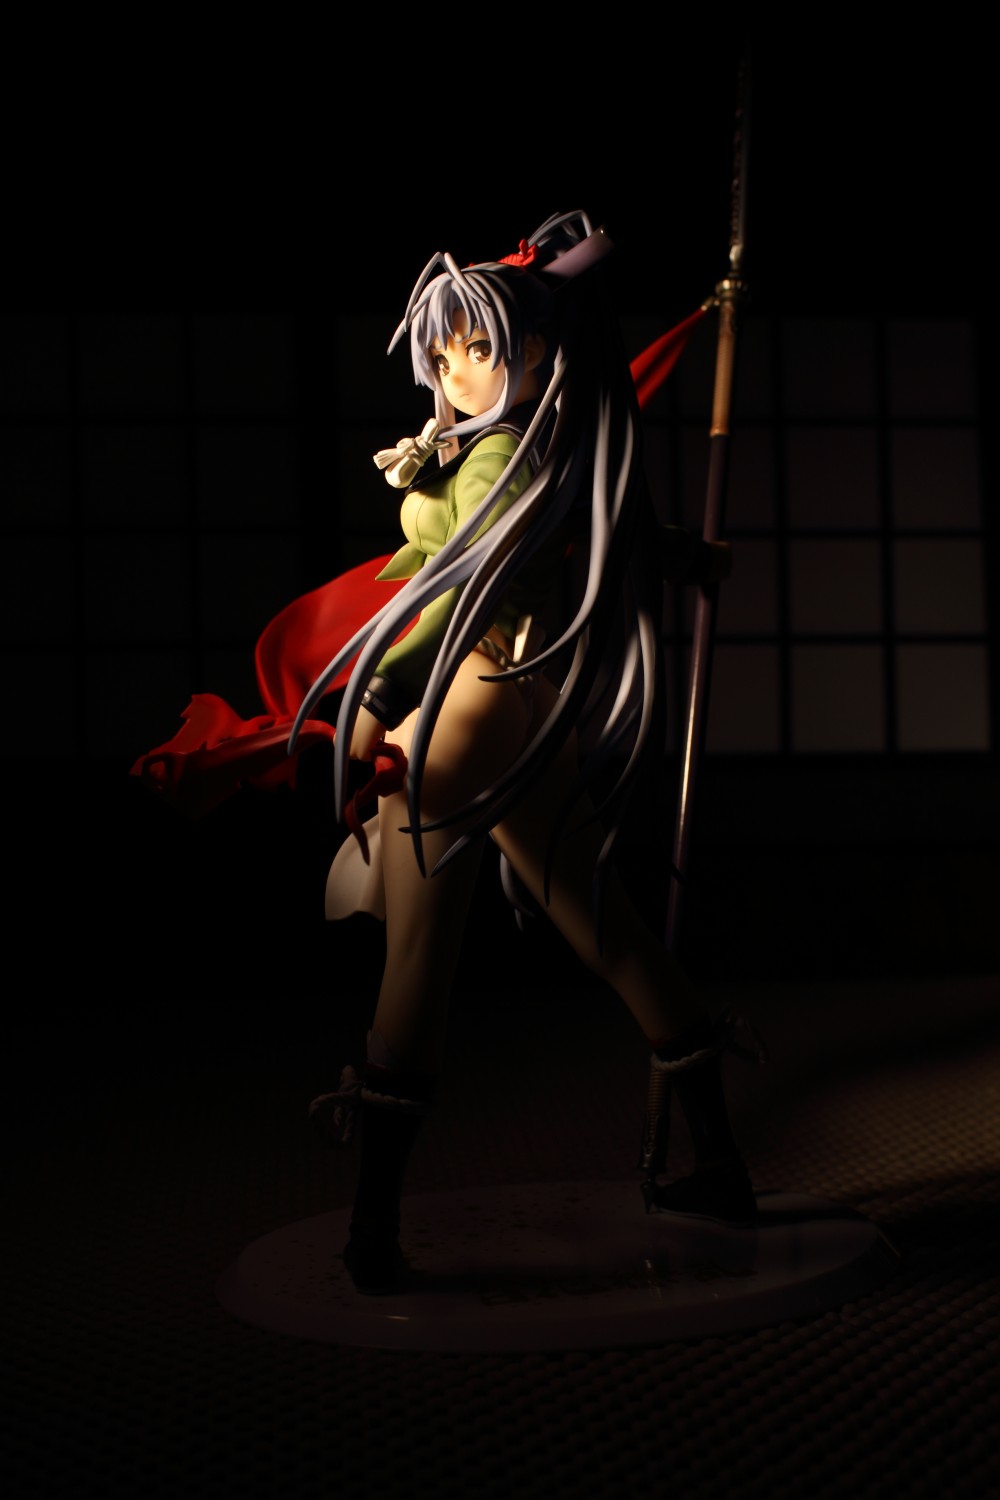
The key light is placed to camera left so that Matabei is turning her face into the light. Note the dramatic falloff of the light; it’s basically lighting her upper body, with just a little bit landing on her hips and almost none falling on her legs. Her hair is also deeply shadowed, increasing drama. There’s a bit of spill onto the floor and the backdrop but that’s not a problem.
If you remember the inverse square law from your physics classes … okay, nobody remembers that. Basically the main thing here is that if you want dramatic light falloff with deep, mysterious shadows, position your light appropriately and push it in closer. That might sound a bit counterintuitive – normally if you want to make a light dimmer, you position it further away, not closer – but cameras work differently than human vision.
The second thing about this light is that it is gelled with a 1/4 CTO gel. What’s a CTO gel? CTO stands for Color Temperature Orange and a gel is just a transparent piece of colored plastic. The idea here is that if you are in a room lit by tungsten sources – that is, incandescent or halogen light bulbs – the ambient light will be very orange in color. Camera flashes are generally colorless, so you’ll have colorless light mixed with amber-tinted light and your camera’s white balance function may not be able to compensate for that. However, by placing a CTO gel over your flash, you turn your flash orange, matching the ambient light, and now your camera’s white balance can cool down the scene and render a nice, color-corrected frame.
That’s not what I’m after here, though. CTO gels are meant to compensate for orange light but I want orange light here. The slightly warmer skin tone provided by the 1/4 CTO gel is essential to the mood I’m trying to create.
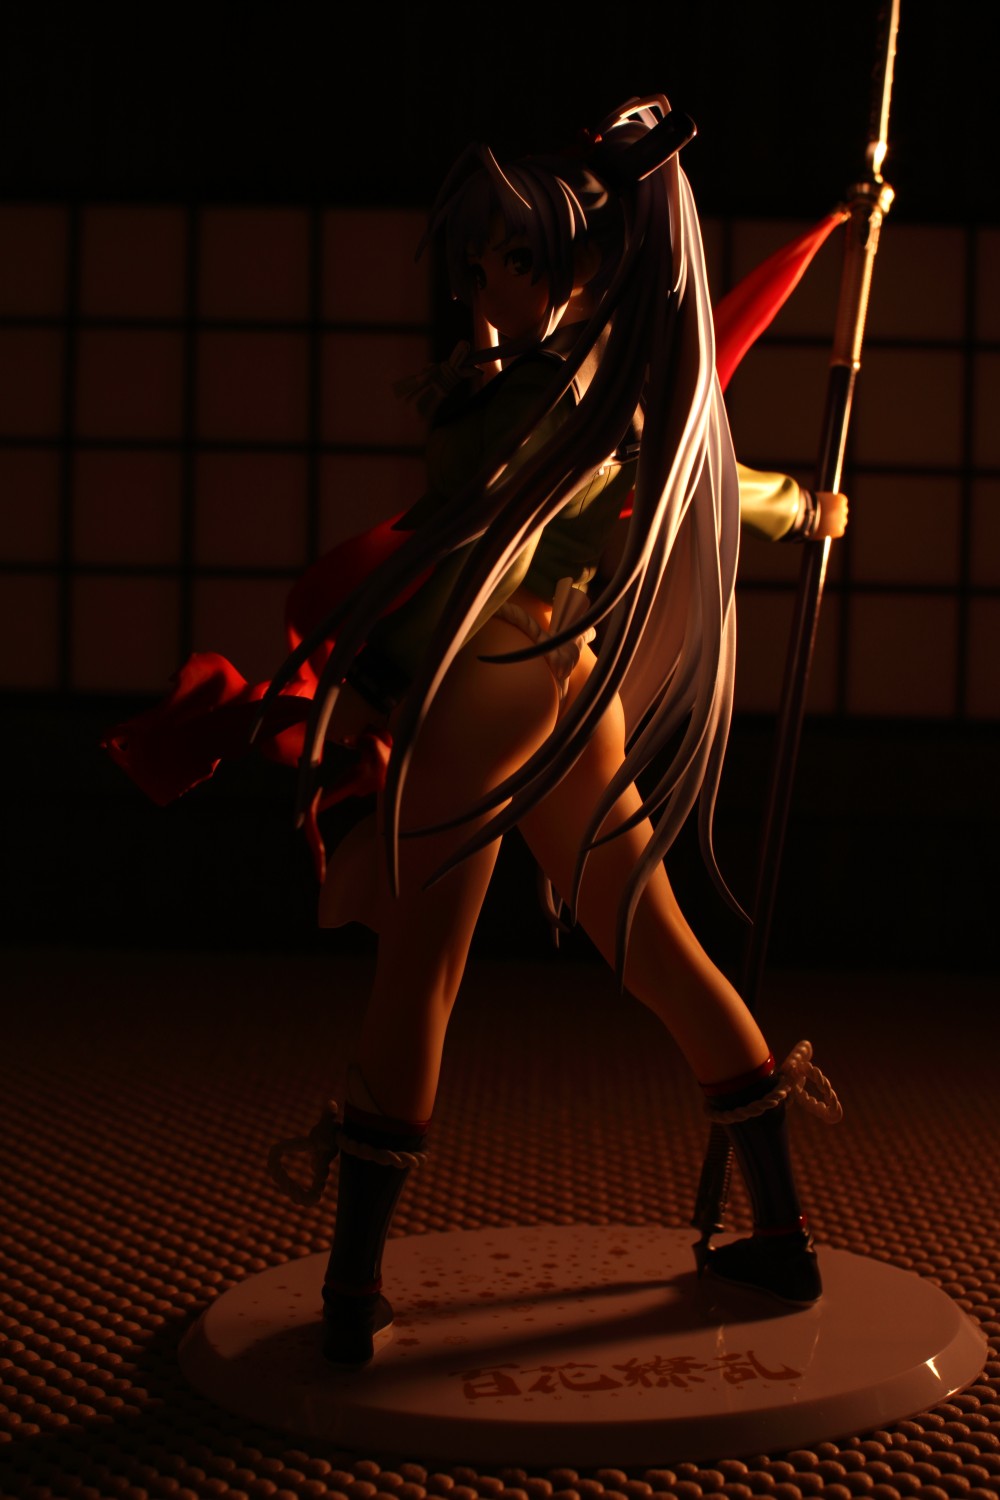
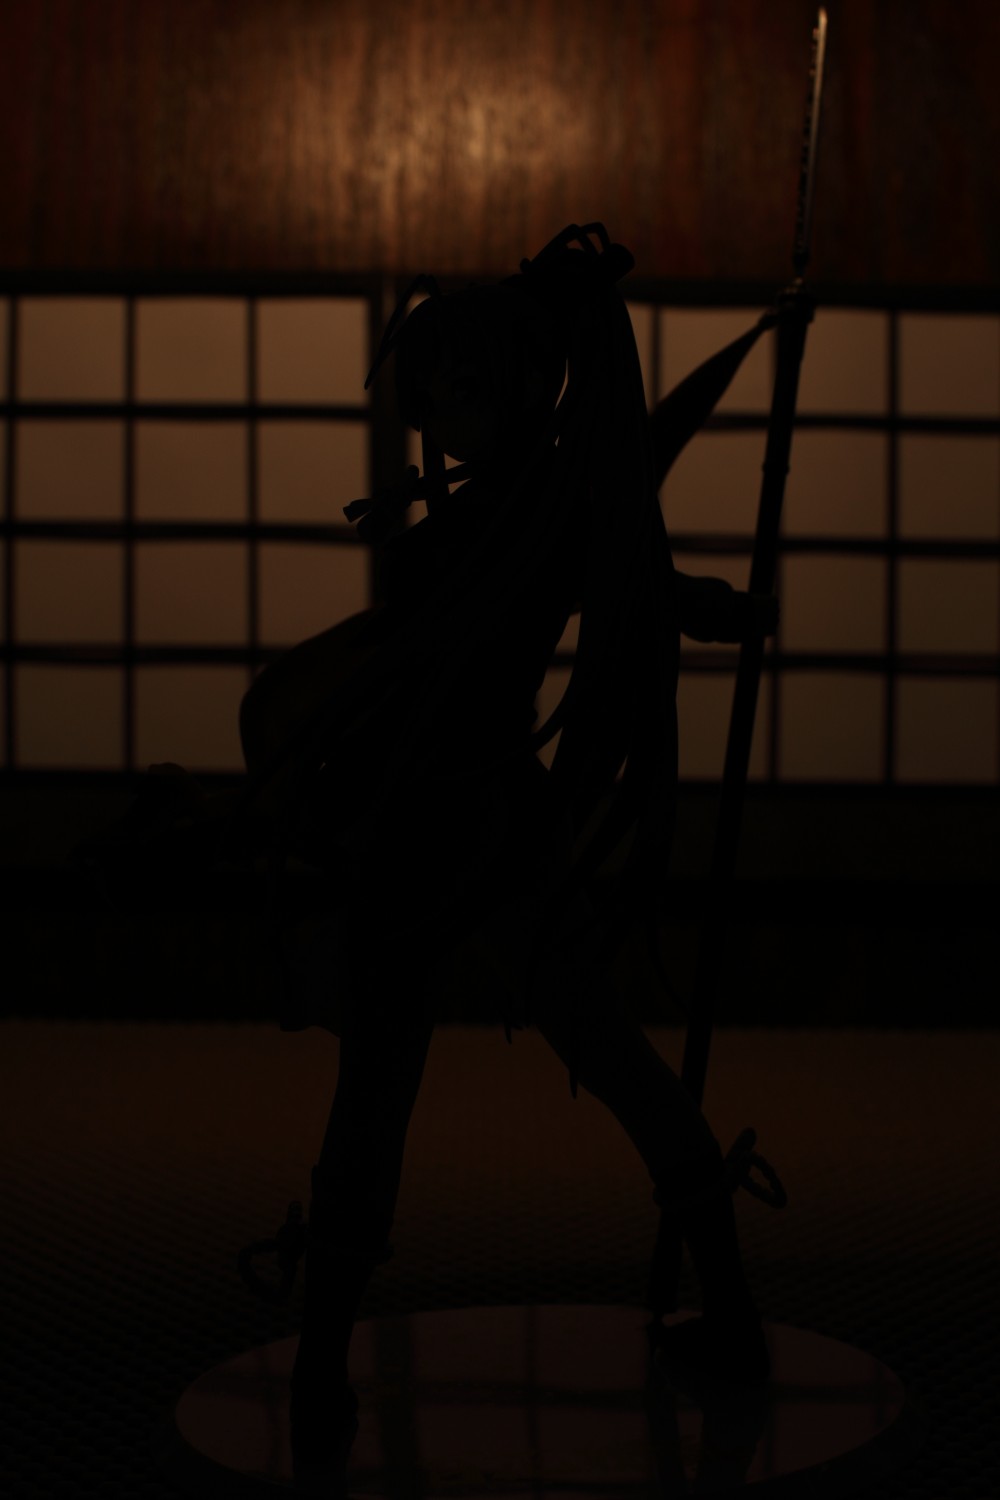
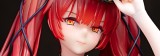
The second light is a rim light, positioned to camera right and behind the subject. It creates a dramatic outline that separates Matabei from the background. It also reveals the texture of the floor. This light is snooted and is zoomed in to 105mm to give it a harder edge. A full CTO gel gives it a warm tone that contrasts with the key light.
The key light put together with the rim light. I felt that the key light was too bright so I dropped it a third of a stop after this shot.
Now I want to light the background. I liked the spotlight effect from the old room picture and I wanted to implement something like that here, so what I’ve done is mount a flash way up high on a Magic Arm. It’s about five feet above the desk and has a full CTO gel and a grid spot. A grid spot does a similar thing as a snoot, but it constrains the beam even more tightly. To further restrict its spread, I put a couple of pieces of gaffer’s tape on the front, cutting the size of the light source to about a square inch. I ought to write a whole post on gaffer’s tape and just how awesome it is. It is really amazing, amazing stuff and I could not get by without it.
Anyway, you can see how tight the light is; it’s landing just a few inches behind Matabei but very little of it is lighting up her body.
And if you’re curious as to what a grid spot looks like, here’s mine:
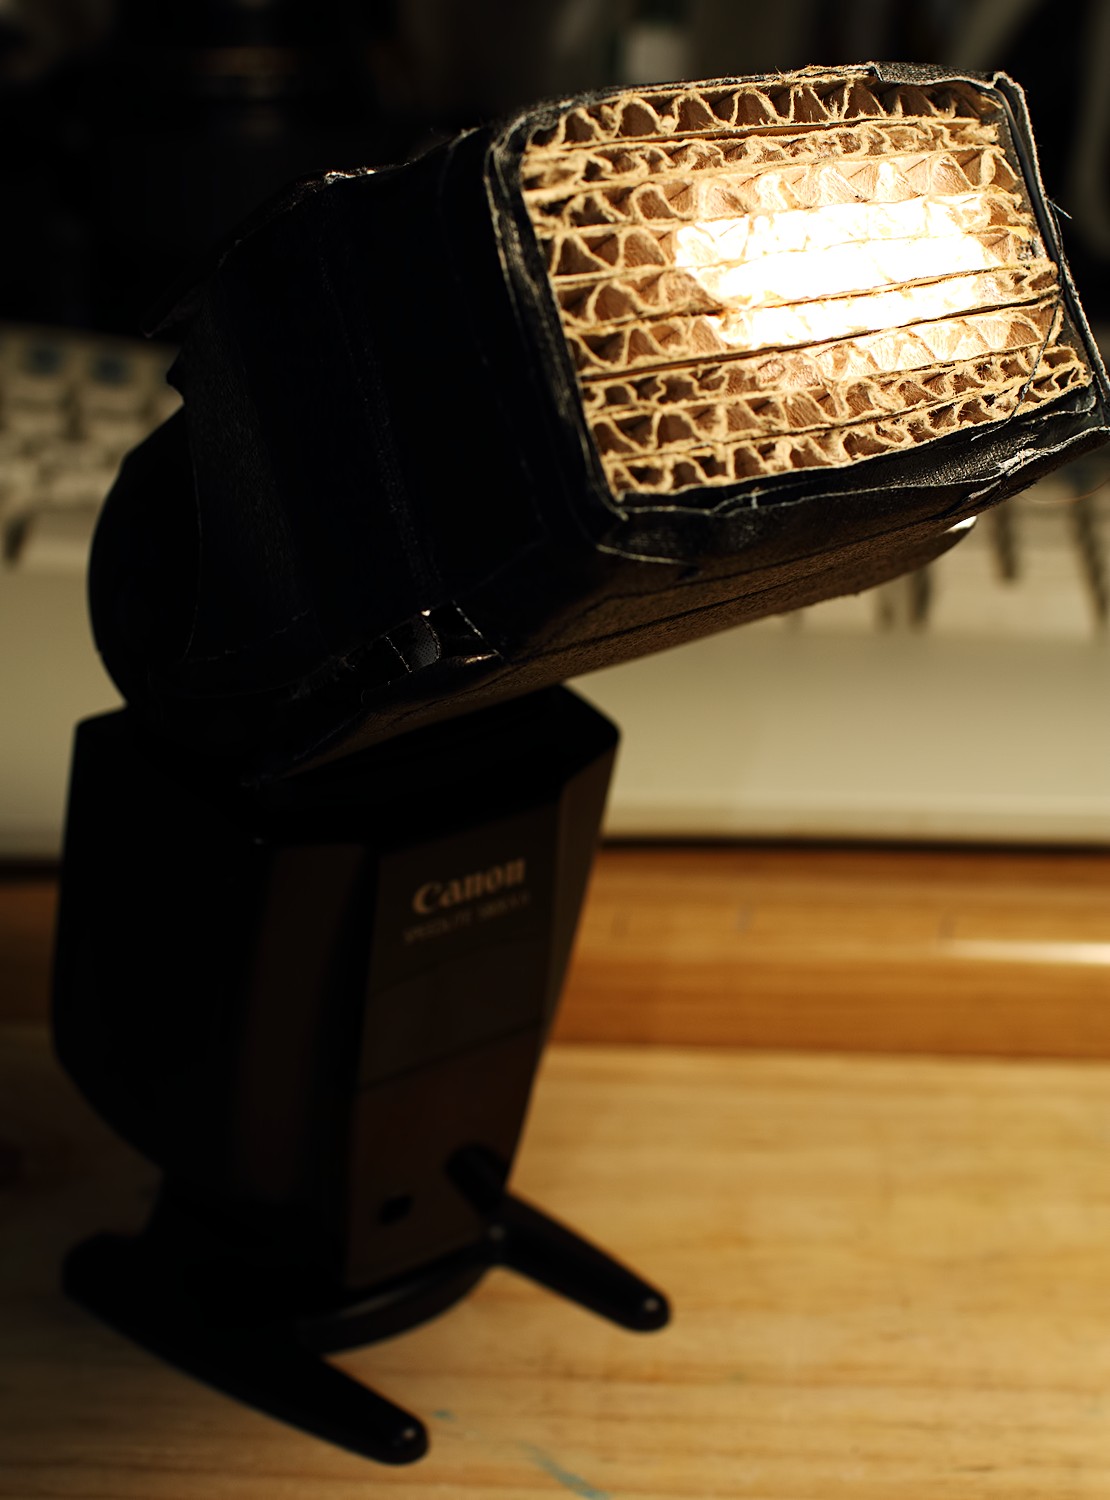
Pause for a moment and admire the obvious craftsmanship. Observe the exquisite artistry, the elegant practicality. Pay no mind to your delusions if you think it looks like it was cut out of the side of a cardboard box.

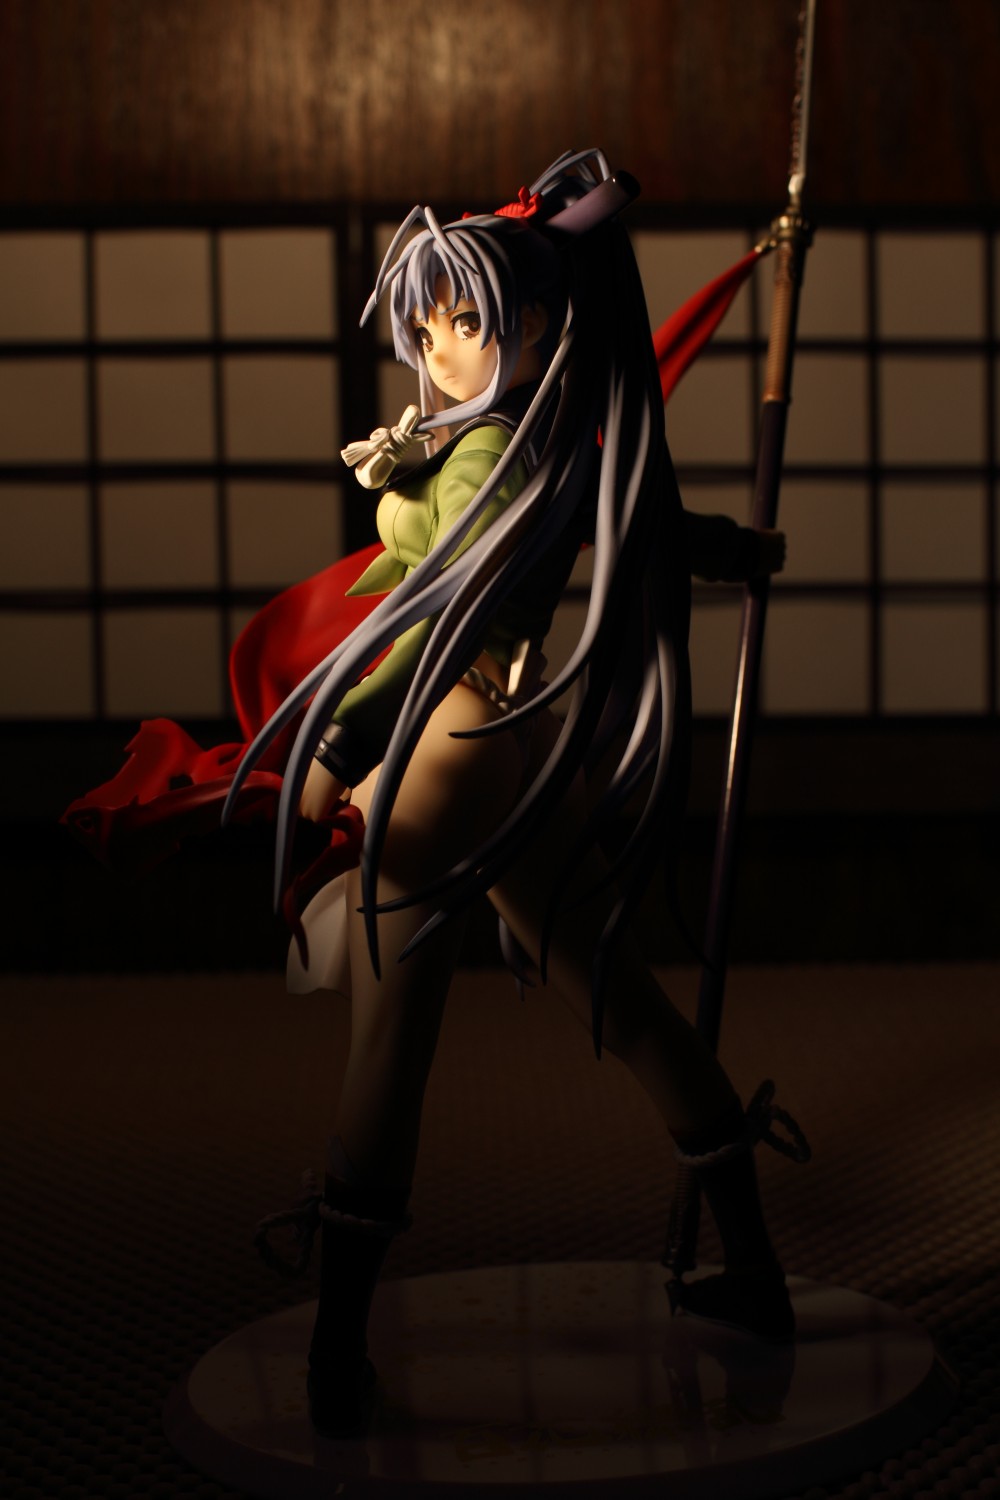
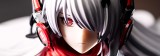
Here is the scene with all three lights. Now I could stop here, but the background is still pretty dark. I went through a lot of trouble to stain the wood panel that’s serving as the wall but you can hardly see the texture; instead, you see a big black bar at the top of the frame and another one below the screens to the left. I want to bring out that detail, so I’ll add another light into the scene.
The second background light is hanging downwards vertically with a LumiQuest Ultrasoft attached to it. I want this light to light up the background but not Matabei, and it does the job well, as you can see.
However, the light is pretty ugly. The white reflection off the top part of the wall brings out the texture but looks like the glare you get when using your pop-up flash.
You can see how the white light of the background and the warm, golden light coming from the key light do not mix well at all. To get the lights looking right, I turn to my gel collection once more.
With two pale gold gels slipped in front of the flash head, the light takes on a muted amber hue.
Now the lights are matched up well. Why two pale gold gels instead of a 1/4 CTO? No real reason, I just wanted to try them out. I had bought the Strobist Gel Kit a while back but I hardly ever use it because the individual gels are so small, and I thought this would be a good time to try out one of the different colors in the pack. I like the effect; it gives a subtly different tone than the CTO gels I typically use, I think.
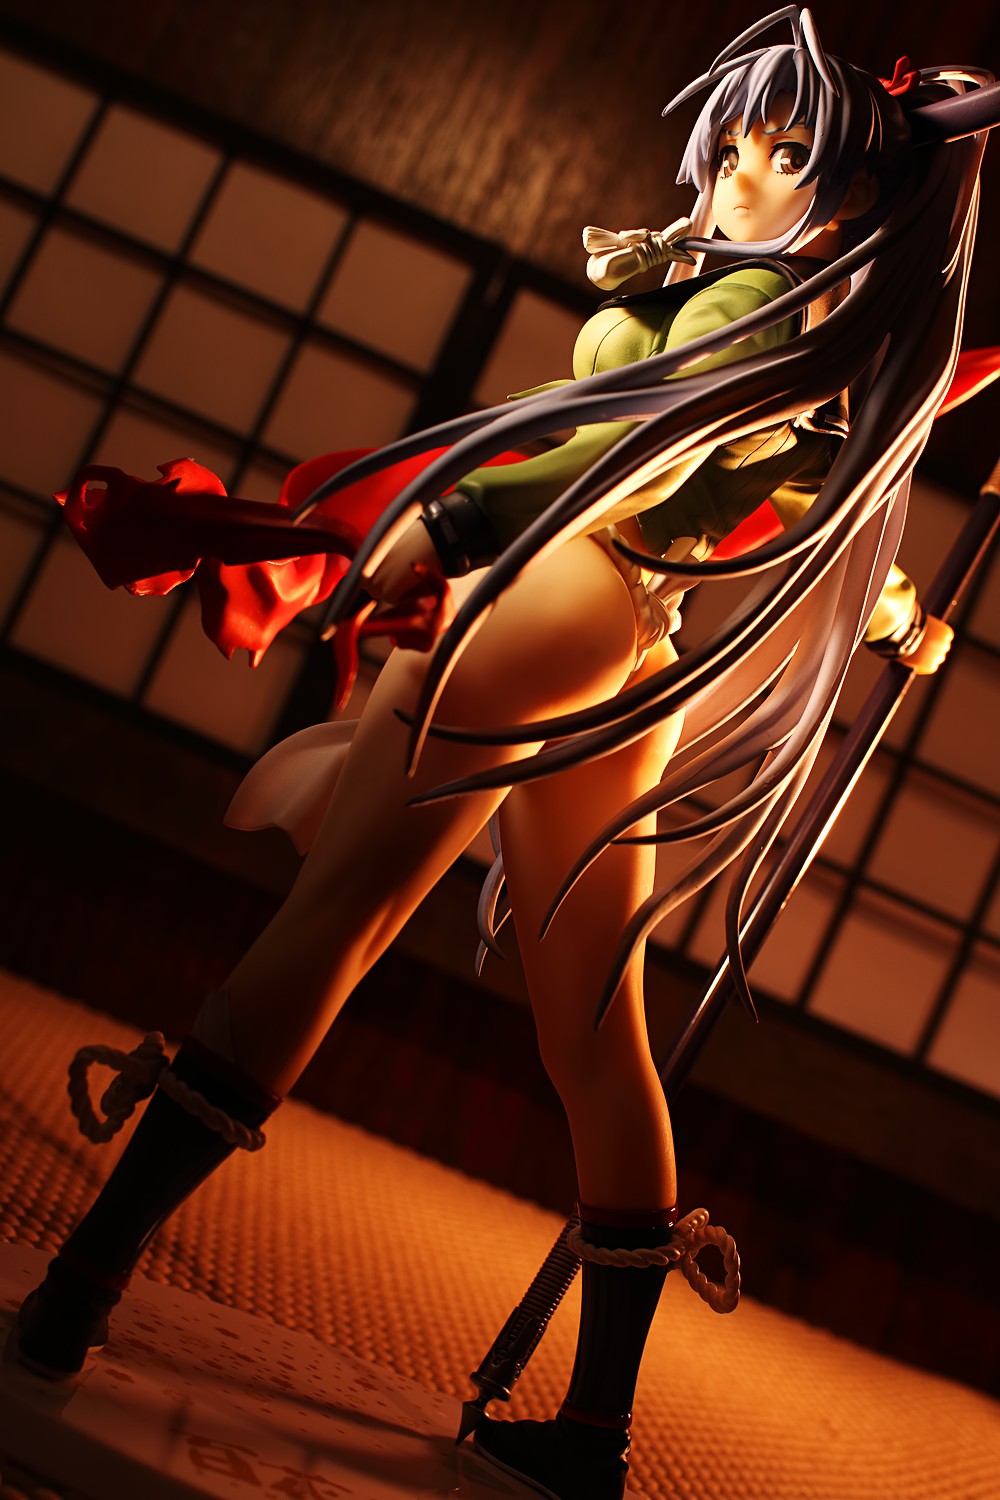
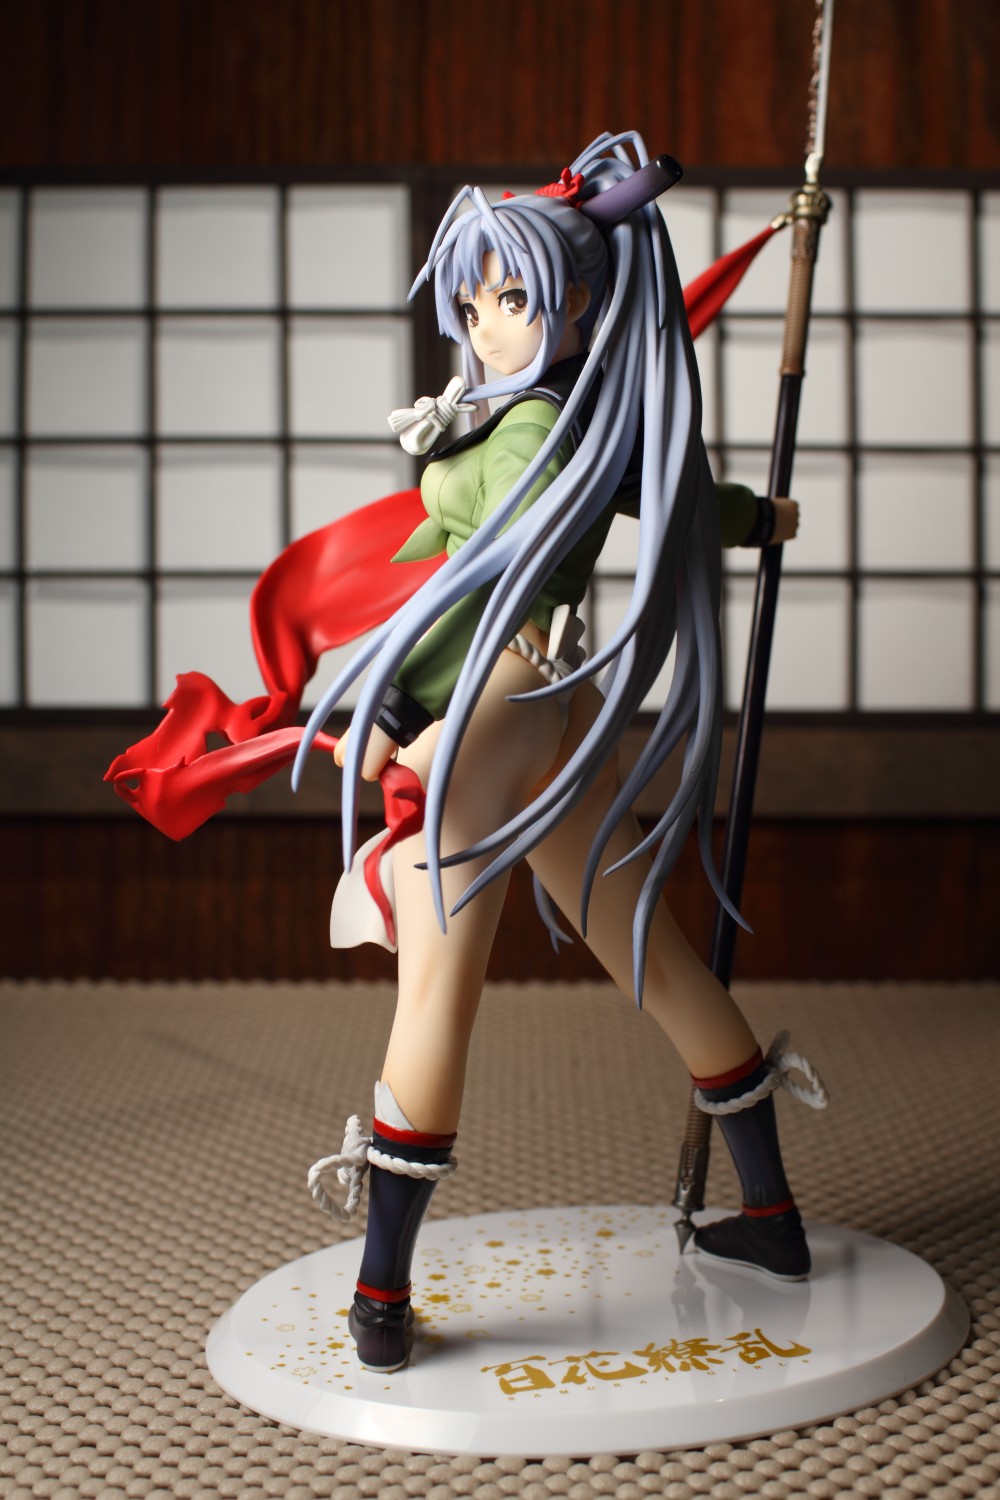
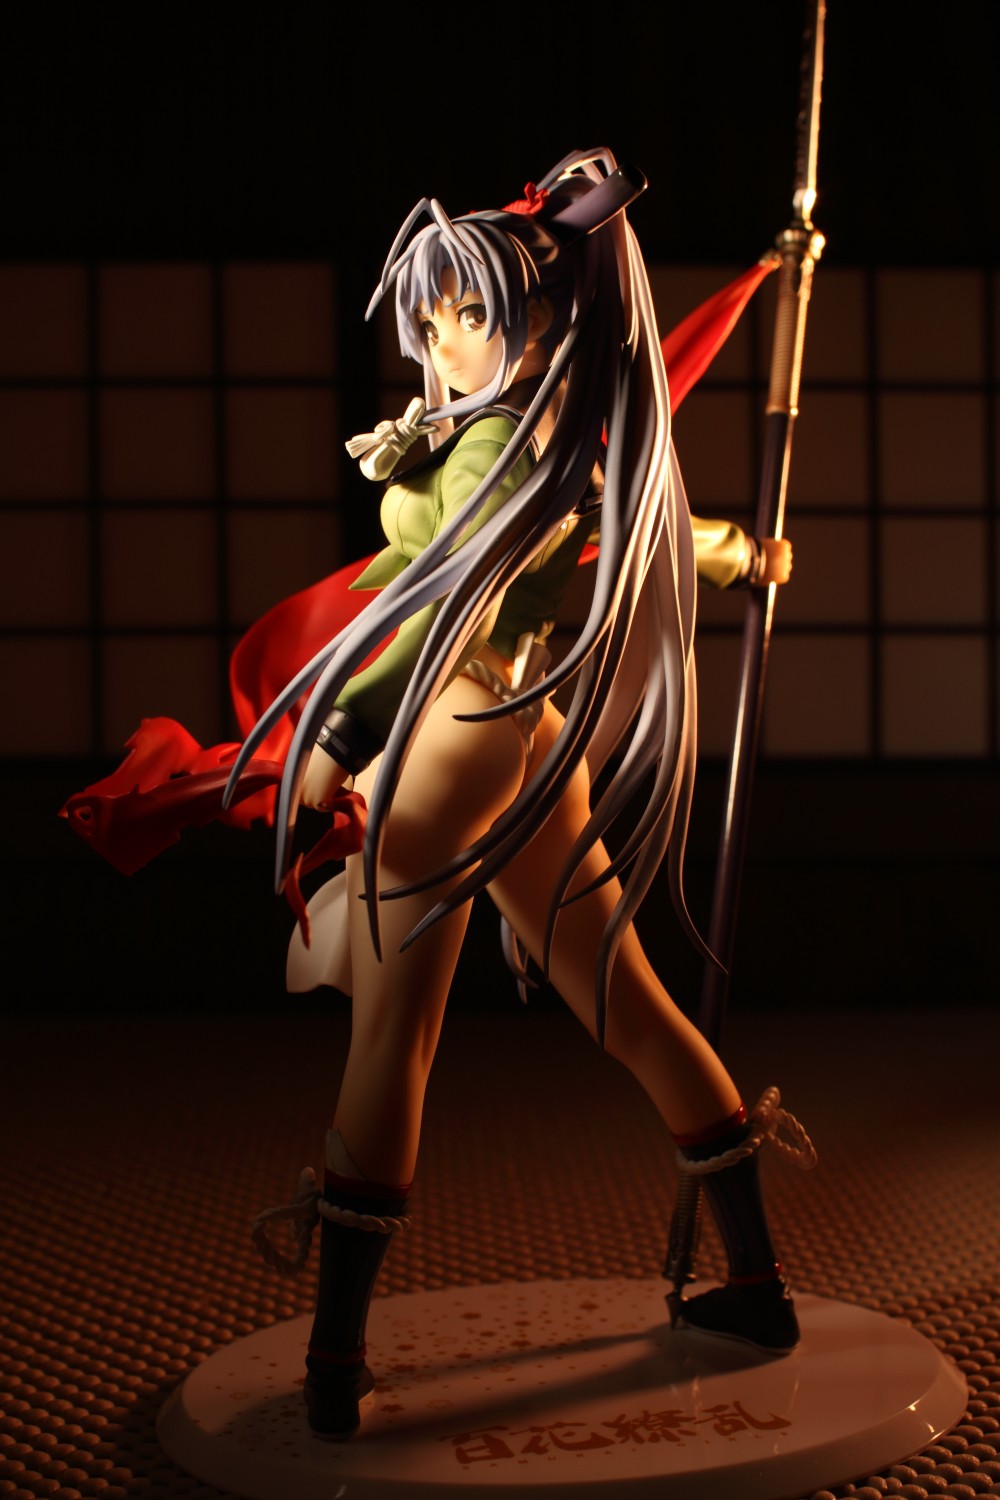
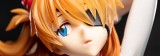
Fire all the lights, get the camera low and turned to a jaunty angle, play a little jazz on the image in Photoshop and you get something like this. Shooting low emphasizes the stature of your subject; if you look for photos of athletes or pictures of comic book superheroes, you’ll see quite a few pictures shot or drawn from a low angle to give them a larger-than-life look. Shooting low also makes the legs look longer, which is important here since Matabei’s legs look a bit short in real life. I’m using a 35mm lens pushed in close, which provides additional separation between the subject and the backdrop than the 100mm macro that I use for most of my figure photos, making Matabei appear larger and more imposing.
In the end, I didn’t get quite what I started out to achieve, which was that timeless, tranquil mood from that picture of the empty room. I got something quite a bit more dramatic and vivid, which is sort of my style, I suppose; I tend to go for heavy shadows and high contrast in many of my photos. I tried to dial down the drama in some of my close-up shots, but there’s only so much dialing-down you can do when you’re shooting an angry girl holding a big spear while wearing no pants.
One thing I really hated was how the shadows of the criss-crossed beams on the screens are projected onto the white paper. That bothered me so much that I was on the verge of spiking the whole set of shots, fixing up the screens, and doing it over, but I decided that would be too much work. The hard spotlight coming from above isn’t really helping things there, and maybe I could have turned it off to see how that affected things. I also experimented a bit with some blue-colored lighting in some of the pictures, with no gels on the key light so that you can see Matabei’s natural skin color. I don’t like how those shots turned out either; I don’t think the blue light goes very well with the figure, particularly since her hair starts to blend in with the backdrop. But I like how the warmer-toned pictures turned out, and I really focused on trying to get those looking interesting. I probably spent too much time on them; always a danger when you’re trying to get fifteen to thirty good pictures and not just two or three.


This is an amazing documentary! I’ve always admired your photographs, but now after learning about all the intricacies involved, I am even more impressed!
You truly have a rare talent and pizzaz for artistic photography.
Thanks! I enjoy photography a lot – it still surprises me how much I enjoy it. I’m glad that this post was interesting.
Thank you for another in-depth look at your shooting. The way you explain it is simple and easy to understand… but also makes me realise I lack a lot of kit to pull off these sorts of shots (backdrops aside). I have too large a figure bill pending to invest in flashes/flashguns etc at the moment so I will just have to absorb your knowledge and practice with what I have for now.
I do agree with you how the warm light works with this figure the best. And how the imposing, dramatic look you ended up with is quite likely better than any sort of natural light showing off her real skintones and such. Overall, a brilliant insight to your shooting mind, and kit. I appreciate it muchly.
Thanks! I’ve got a ton of gear – probably more than I need, really – but I should mention that a lot of what I’ve got can be replicated or improvised pretty cheaply. I buy commercially-available stuff since I’m pretty lazy and I’d rather spend money than build a lot of my own stuff; I do have a couple of home-made LumiQuest-clone softboxes and a ton of snoots, but I like to use the commercial stuff since it’s more durable and the results I get are a bit more consistent. Also, I took some of my favorite shots without a great deal of equipment; for example, this shot of Sora is still one of my favorites, and if I remember right, I used just two desk lamps with fluorescent bulbs and a dinner mat to set it up.
That was quite interesting pose since Im always interested in your lightsettings 😉
The key light pic of Matabei is something I would like to achieve in my pictures more often.
Im always a bit unsatisfied with my light setting, but maybe I’ve learned something from your post. I will try this snoot and cto gel and maybe I will buy a second flash.
I think I should have experimented with killing the rim light and using just the key light on the figure … maybe that could’ve gotten the more peaceful and mysterious look I was attempting to get. That’s always a problem with me, I sit down and look at my shots and I wish I had added or removed a light or placed it differently.
Thanks for sharing your experience and knowledge! By reading this… I leveled up! Gotta grind some more exp…. and money to upgrade my equipment!
^^
Thanks! Gear is good but I don’t want to suggest that you need a ton of gear to get great results … you can definitely make awesome pictures with desk lamps or sunlight. The thing is, though, you do need lights; it doesn’t matter if they’re flashguns or light bulbs, you need light. I see a lot of people buy expensive cameras but then skimp on buying $15 desk lamps and $5 light bulbs and that’s never made any sense to me.
Oh! thats a relief, I think I got some useable desk lamps, although since the shapes of theese might make it difficult to make a snoot of them..
My english is not that superb, but if I’d make a summary for myself, is it correct that:
Rim light is for the location for the background light, for example, sunlight from a window.
Key light is to make the figure (or object) visible
“Background light 1” is to make the background separate from the figure
“Background light 2” is to light up the background, which works well with colour gels.
? =)
The rim light shines on the subject, but it’s always placed somewhere behind it, so that it creates an outline of light that rims the subject. For example, if you look at this picture there is a faint outline on the figure’s left side which comes from a rim light.
Yep, the key light is the main light. There’s no strict definition for what the key light is; it’s just whatever is lighting up the subject.
The two background lights just light up the backdrop, and strictly speaking, they aren’t necessary. You can light up the background with light from the key light, which sometimes looks more natural. In this case, I lit the subject and background separately, but there are times where I would light them together with the same light.
Thanks!!! Really appriciate it! I’m make my first real photosession really soon then! Maybe start my own figure blog if it turns out well ^^
Haha, love your DiY accessories. I have a bigger version of your snoot for my desk lamps and after seeing how effective your grid is in controlling light falloff, I’m eager to put together my own with all the toilet paper tubes I’ve been saving up. Someday I’ll upgrade to flashes but I figure its 2+ or none, especially after seeing how many all the setups on Strobist and yourself use. But dang, 4 flashes in 1 scene, it almost seems like brush strokes when you add another strobe; put them together and you get a whole picture.
One question I have is how important is the zoom functionality in your flashes? I was thinking of going for the YN460 IIs eventually but they only lack zoom, is this a big deal for figure photography where distances are so small? Also, a question about your setup, I notice a TTL cord on your key light but nothing on your other flashes, are you using the optical slave mode on them? Thanks for the great insight and awesome tips!
I’ve got all kinds of homemade and ersatz stuff here … for a long time, I pretty much built snoots as I needed them, because I kept losing them. I should write a post about my can of sliced pears, too; it’s been with me as long as I’ve run this site and it’s been crucial to my photo shoots.
I started out with one flash and I think starting out with just one makes a lot of sense. One of the toughest things I had to adjust to while learning off-camera flash was positioning the light and setting the power correctly. Since I was only using one flashgun, I could experiment with it while still being able to look up and see what my desk lamps were doing, and then take the shot and observe what the flash was contributing to the picture. With multiple flashes, I sometimes still have trouble figuring out what light is doing what.
I don’t actually use the zoom function a whole ton. From what I’ve seen, it is extremely useful for people photography but at the ranges I typically place my flashes at, I don’t think it’s a big deal. I mainly use it for unusual circumstances (like the spotlight effect here) or if I need more power (and that’s not too often; actually, I usually need less power. But having more potential power is better than having less potential power.).
Yeah, I trigger the key light via an E-TTL sync cord and all the other lights are triggered by optical slaves. The LP-160 and the Yongnuo flashes have really sensitive optical sensors and they’ll fire even if you’re dangling them off a Justin Clamp while the key light is firing through a snoot a meter below them. That’s why I don’t use the 540EZ too often; I’ve got it mounted on a hot shoe adapter with a Sonia optical slave screwed into the PC sync port, but it’s not nearly as sensitive (and the flash is prone to falling off of the adapter, which is annoying and potentially quite destructive to both the flash and anything it might crash into). The sync cord is great; it lets me control my flash via my camera’s flash menu so that I don’t have to fiddle with the controls on the back of the unit. I don’t actually use E-TTL though; I don’t trust it very much. All my flashes operate in manual mode.
Oooh, this can sounds awesome. I think that’s one of the biggest things I’m looking forward to with flashes, easier to make/buy accessories and modifiers, portability, and there are so many great guides out there on using them.
Ohwow, you can mix the lights? I had thought that the flash would overpower the desk lamps, if it’s not too bad then I might start looking at getting started with a flash sooner than later. Good to know about not needing zoom as much. And even able to optically trigger while using a snoot? That’s fantastic news for me, I was going to ask specifically about that as a followup question, lol. I was planning on using manual mode anyways since all the flashes I’ve been interested in don’t support TTL. Thanks for answering all my questions!
Yeah, you can mix lights. Understanding that you’re making two exposures is one of the key concepts regarding flash, actually. You control the flash exposure by setting the flash’s power level and you control the ambient exposure by changing your camera’s shutter speed. For example, at a shutter speed of 1/250, most indoor ambient light is killed and the exposure is entirely generated by the flash; at a shutter speed of, say, 2 seconds and with a low flash power level, ambient light will contribute the most light towards the total exposure.
Wow thank you for sharing this. I always wonder how you do that awesome shots. I’m a fan of your works. I need more practice and save up for the equipment. 🙂
Thanks XD Equipment is good but practice is much better. I’m not sure how many figure pictures I’ve taken, but I think the total is something like 25,000.
Thanks for taking the time to do this detailed write-up. The shots where you add each light one at the time really helps me see how each light in your setup adds something to the final shot, which looks fantastic.
Lighting is something I struggle with constantly. My gear basically consists of a light tent and a couple of compact studio lights. Together, they do a good job of illuminating the hell out of my figures and generally producing rather bland, documentary photos of the type you describe at the beginning of the article. The lights have such a wide spread that I find it very difficult to control the light. Recently, I’ve taken to using large sections of foam board to try to direct the light into a fairly narrow beam, which does help to a certain extent, but I still haven’t been able to get the light band as tight as I would like.
I’ve been very curious about the strobe side of life ever since I found the Strobist blog a year or so ago, but I’ve been reluctant to give it a shot as what I read leads me to believe it would be a substantial investment. As an earlier poster noted, I get the impression you really need multiple strobes to get good effects and on top of the strobes themselves, you need some means of support, various apparatuses to guide the light, and something to sync the flash to the shutter. I’m not against spending the money as such, but I’d hate to buy a bunch of new gear only to find out that it doesn’t give me the results that I’m after. Still, after reading this and seeing what you’re achieving with strobes, I think I should give them another look.
I had a tough time learning how to light as well, and there is still a great deal I need to learn. This might be most evident where I tried to use fake flowers in the background; I’ve never liked how those shots turned out and even now I’m not sure what I could have done differently to make them more attractive.
Controlling light spill was a very big problem for me when I used desk lamps, particularly given my limited shooting space. I found that using a big snoot (typically made from scrap posterboard or construction paper) worked okay, but it wasn’t until I moved to flashguns that I felt that I had a lot more control over light placement and intensity. I don’t want to give the impression that anybody needs flashes or expensive gear to get great results – you definitely don’t – but I think flashes provide for more creative possibilities than desk lamps.
Flash units are cheaper than I thought they’d be – you can get a YN-560 for about $65 off Amazon or eBay – and accessories like grip gear, sync cords, and dome diffusers are more expensive than I thought they’d be. Going to flashes was definitely a big investment for me, but I enjoy photography so much that it was a very worthwhile expense; otherwise, I probably would’ve just blown that money on a Playstation 3 and some video games instead.
Thanks! I really need to buy some lights soon.
A good plan; back when I used desk lamps, I had five. I typically used three or four, but sometimes I needed all five. Admittedly, more lights gives you the opportunity to ruin your shot by pouring too much light into the scene, but they also give you the creative flexibility to get the shots that you envision.
I would definitely like to see more shot breakdown posts like this; it’s always interesting to see how things are made and as Jon has mentioned, your already impressive photos are even more interesting when I know how much effort has been put into acquiring these results.
I’m planning to do more; probably not one for every figure review I do, but I’d like to do them for the photo sets that I think are more compelling. I’ve also got some ideas for some one-off photos that I think would make for interesting documentation.
How about taking requests for shots of figures in your collection that you may not have covered here, or covered a long time ago? 😀
I’d be down with that. Gimme suggestions and I will see what I can do.
Another educational post! I absolutely love these. This post has made me want to buy more flashes. I mean, you can never have too many lighting options, right?
More lights means more fun. There have been a few times where I wanted another light; I’m kinda thinking about buying another flash soon.
Wow I just wished I had more knowledge on the subject of lighting…even though I’m still starting I’d like to one day take pictures like you do….My collection of figures is miniscule compared to what I’ve seen here but I’m working on it and I right now have no space to work other than my desk which is cluster*%$ked but I just wanted to stop by and say that I’ve been following your site for a few months and I have yet to say….well that one’s not that good. Any tips to start taking better photos
Tips, let’s see … the main thing I’d advise is, take a helluva lot of pictures. That’s really all I did to improve, and looking through my archives, I can see the points where my style began to change. Ask a lot of questions if you find people whose work you admire; a lot of photographers are happy to share what they know. Also, be self-critical … be very, very self-critical. Part of the reason I’m doing this series is educational (since there aren’t a ton of figure photo tutorials out there), but another reason is for me to look at my work and give my honest assessment of it.
please tell me where I can buy a similar figure?
I think I saw one on Mandarake a few days ago, and I’m sure there are some listed on Yahoo Japan Auctions.
Thank you for your hard work and please do keep it up! It’s really inspiring to see your photo shoot break downs and really makes me want to try to shoot the ways you take your photos!
Thanks for the kind words XD I’ve got a couple of ideas for more breakdowns, though they’ll probably be of standalone shoots rather than adapted from some of the recent reviews I’ve done.